Friday, September 22, 2023

The Scrambling Ernie Quilt

Last Saturday was National Sew A Jelly Roll Day and my plan was to make an Ernie Quilt which uses 2.5” strips in memory of Mary Etherington/Country Threads late cat Ernie who passed away in late May. Even though I didn’t sew a Jelly Roll which I had a few in my stash, I think my bases were covered by using all Moda prints and Mary’s latest pattern Rambling Rows which is a variation of an Ernie Quilt. What’s especially nice is that Scrambling Ernie only took me six days to finish despite having a busy weekend involving Hubby having two band gigs and  an outing with the Peeps and our husbands.
First, a little background on the Rambling Rows pattern. Back in July, I sent Mary a pic of my FALLoween II quilt which was my July finish for Country Threads Dirty Dozen UFO Challenge. Several of her followers asked her for a pattern for this quilt which was my own design based on the Sandy Gervais fabrics I had in my stash.
I gave Mary the measurements of the blocks and then she tweaked, wrote and drew up the pattern and she made the above quilt. When she first sent me the photo, I thought it was a Jelly Roll Race quilt but it’s the pattern we named Rambling Rows. I love how scrappy Mary made hers with Denyse Schmitz scraps and how much more random her layout is versus FALLoween II. This pattern really is versatile since you can improvise by changing the size of the blocks/strip sets which Mary did since she ran out of Denyse Schmitz scrap and used other fabrics in her stash. I love how her strips sets are not like the usual Ernie strips which uses only two fabrics,  which contrast with each other by color or value and looks like stripes, but four different fabrics. 
I wanted to make a Rambling Rows quilt using my Moda’s Sweetwater stash of different collections: Authentic, Pure, Hometown, Sew Noteworthy, Make Life, Road 15, Wishes, Branded, etc. and needed some help with the gray and black fabrics which are from Jen Kingwell, Basic Grey, and Blackbird Designs. I love Sweetwater fabrics and they have a special place in my quilt memories since I used their Hometown Christmas fabrics for the Jelly Roll Charm Chase Quilt I did for Moda Bake Shop. I love that their collection always include some text prints and the special green I call Citronickle. I thought I had a lot of Sweetwater fabrics as my bin is full, but apparently I missed buying fabric from forty of their other collections.
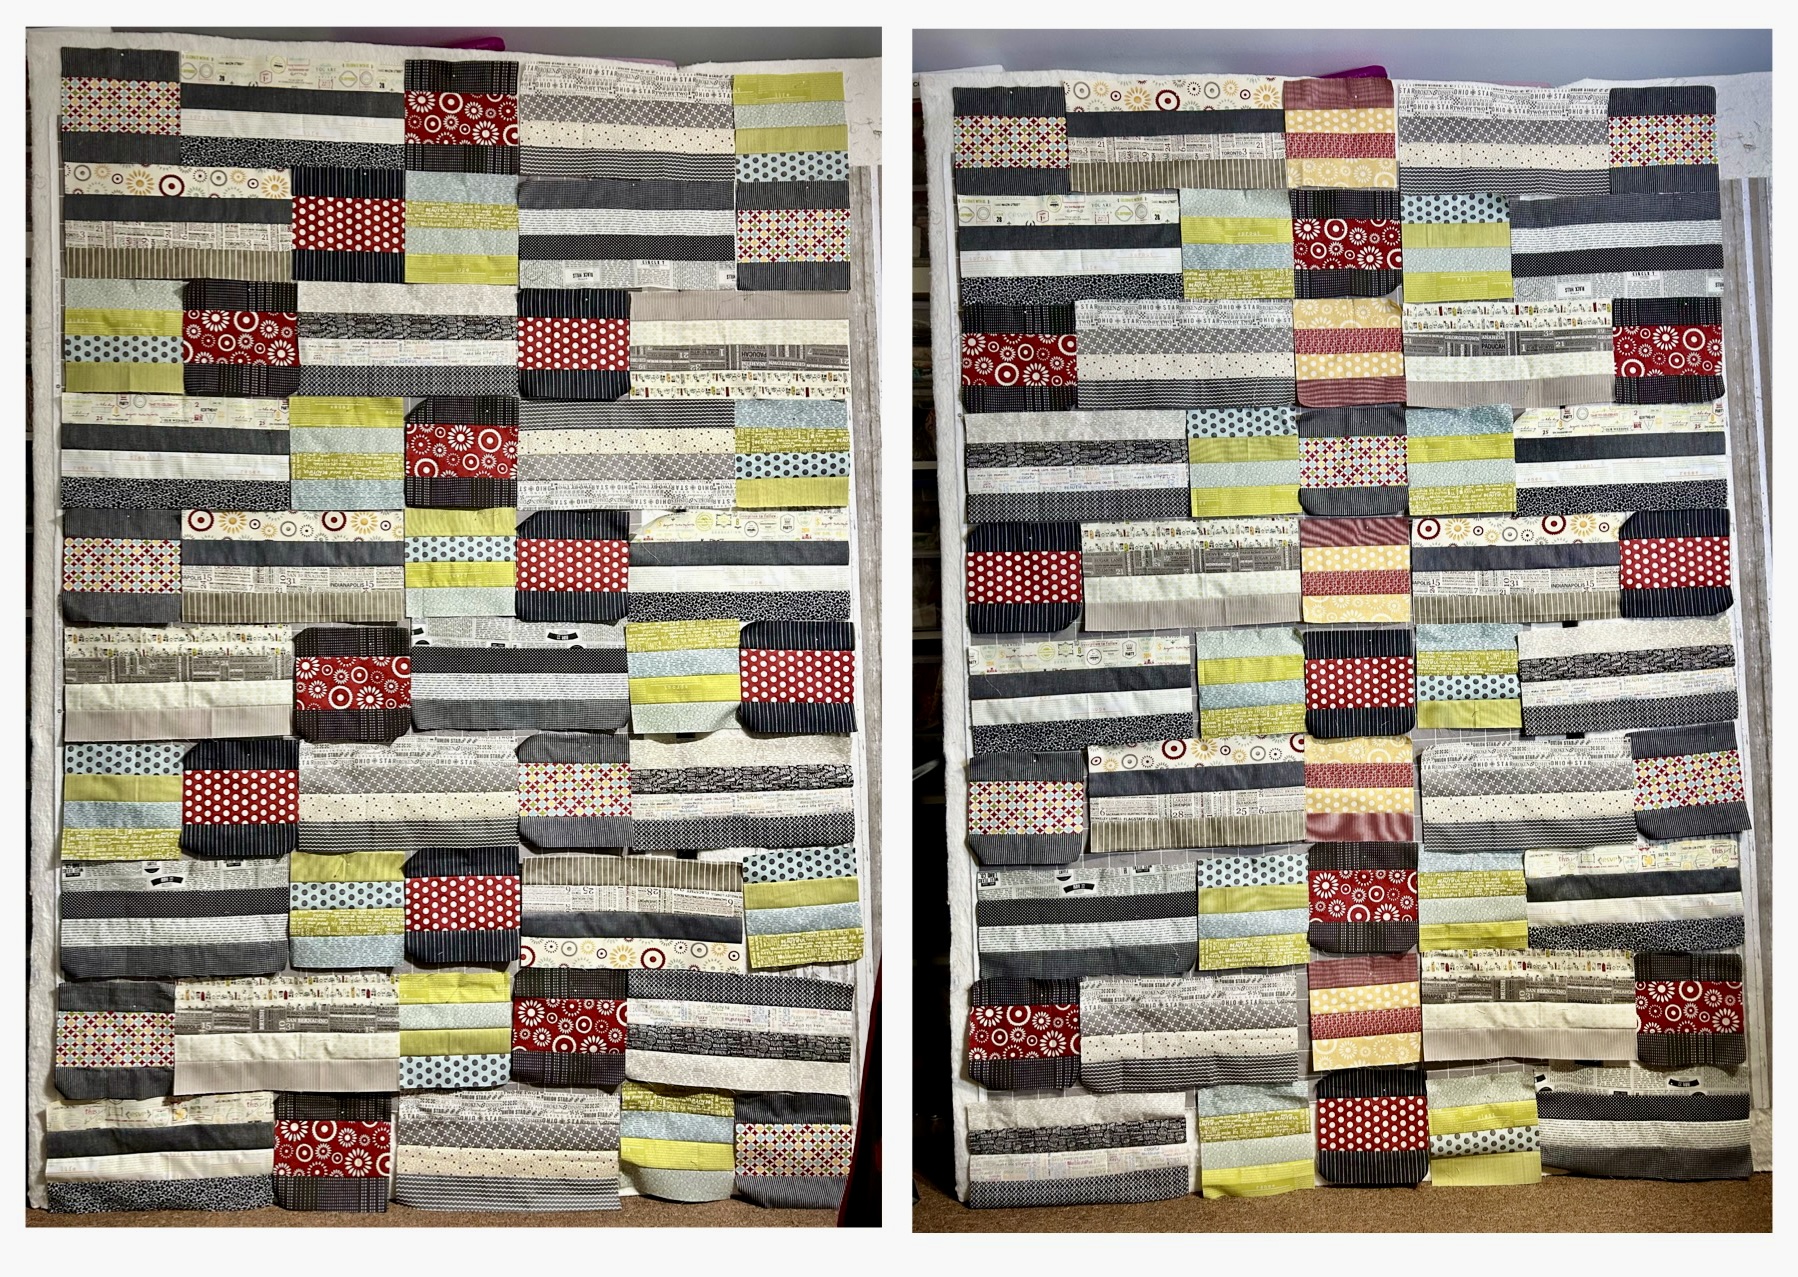
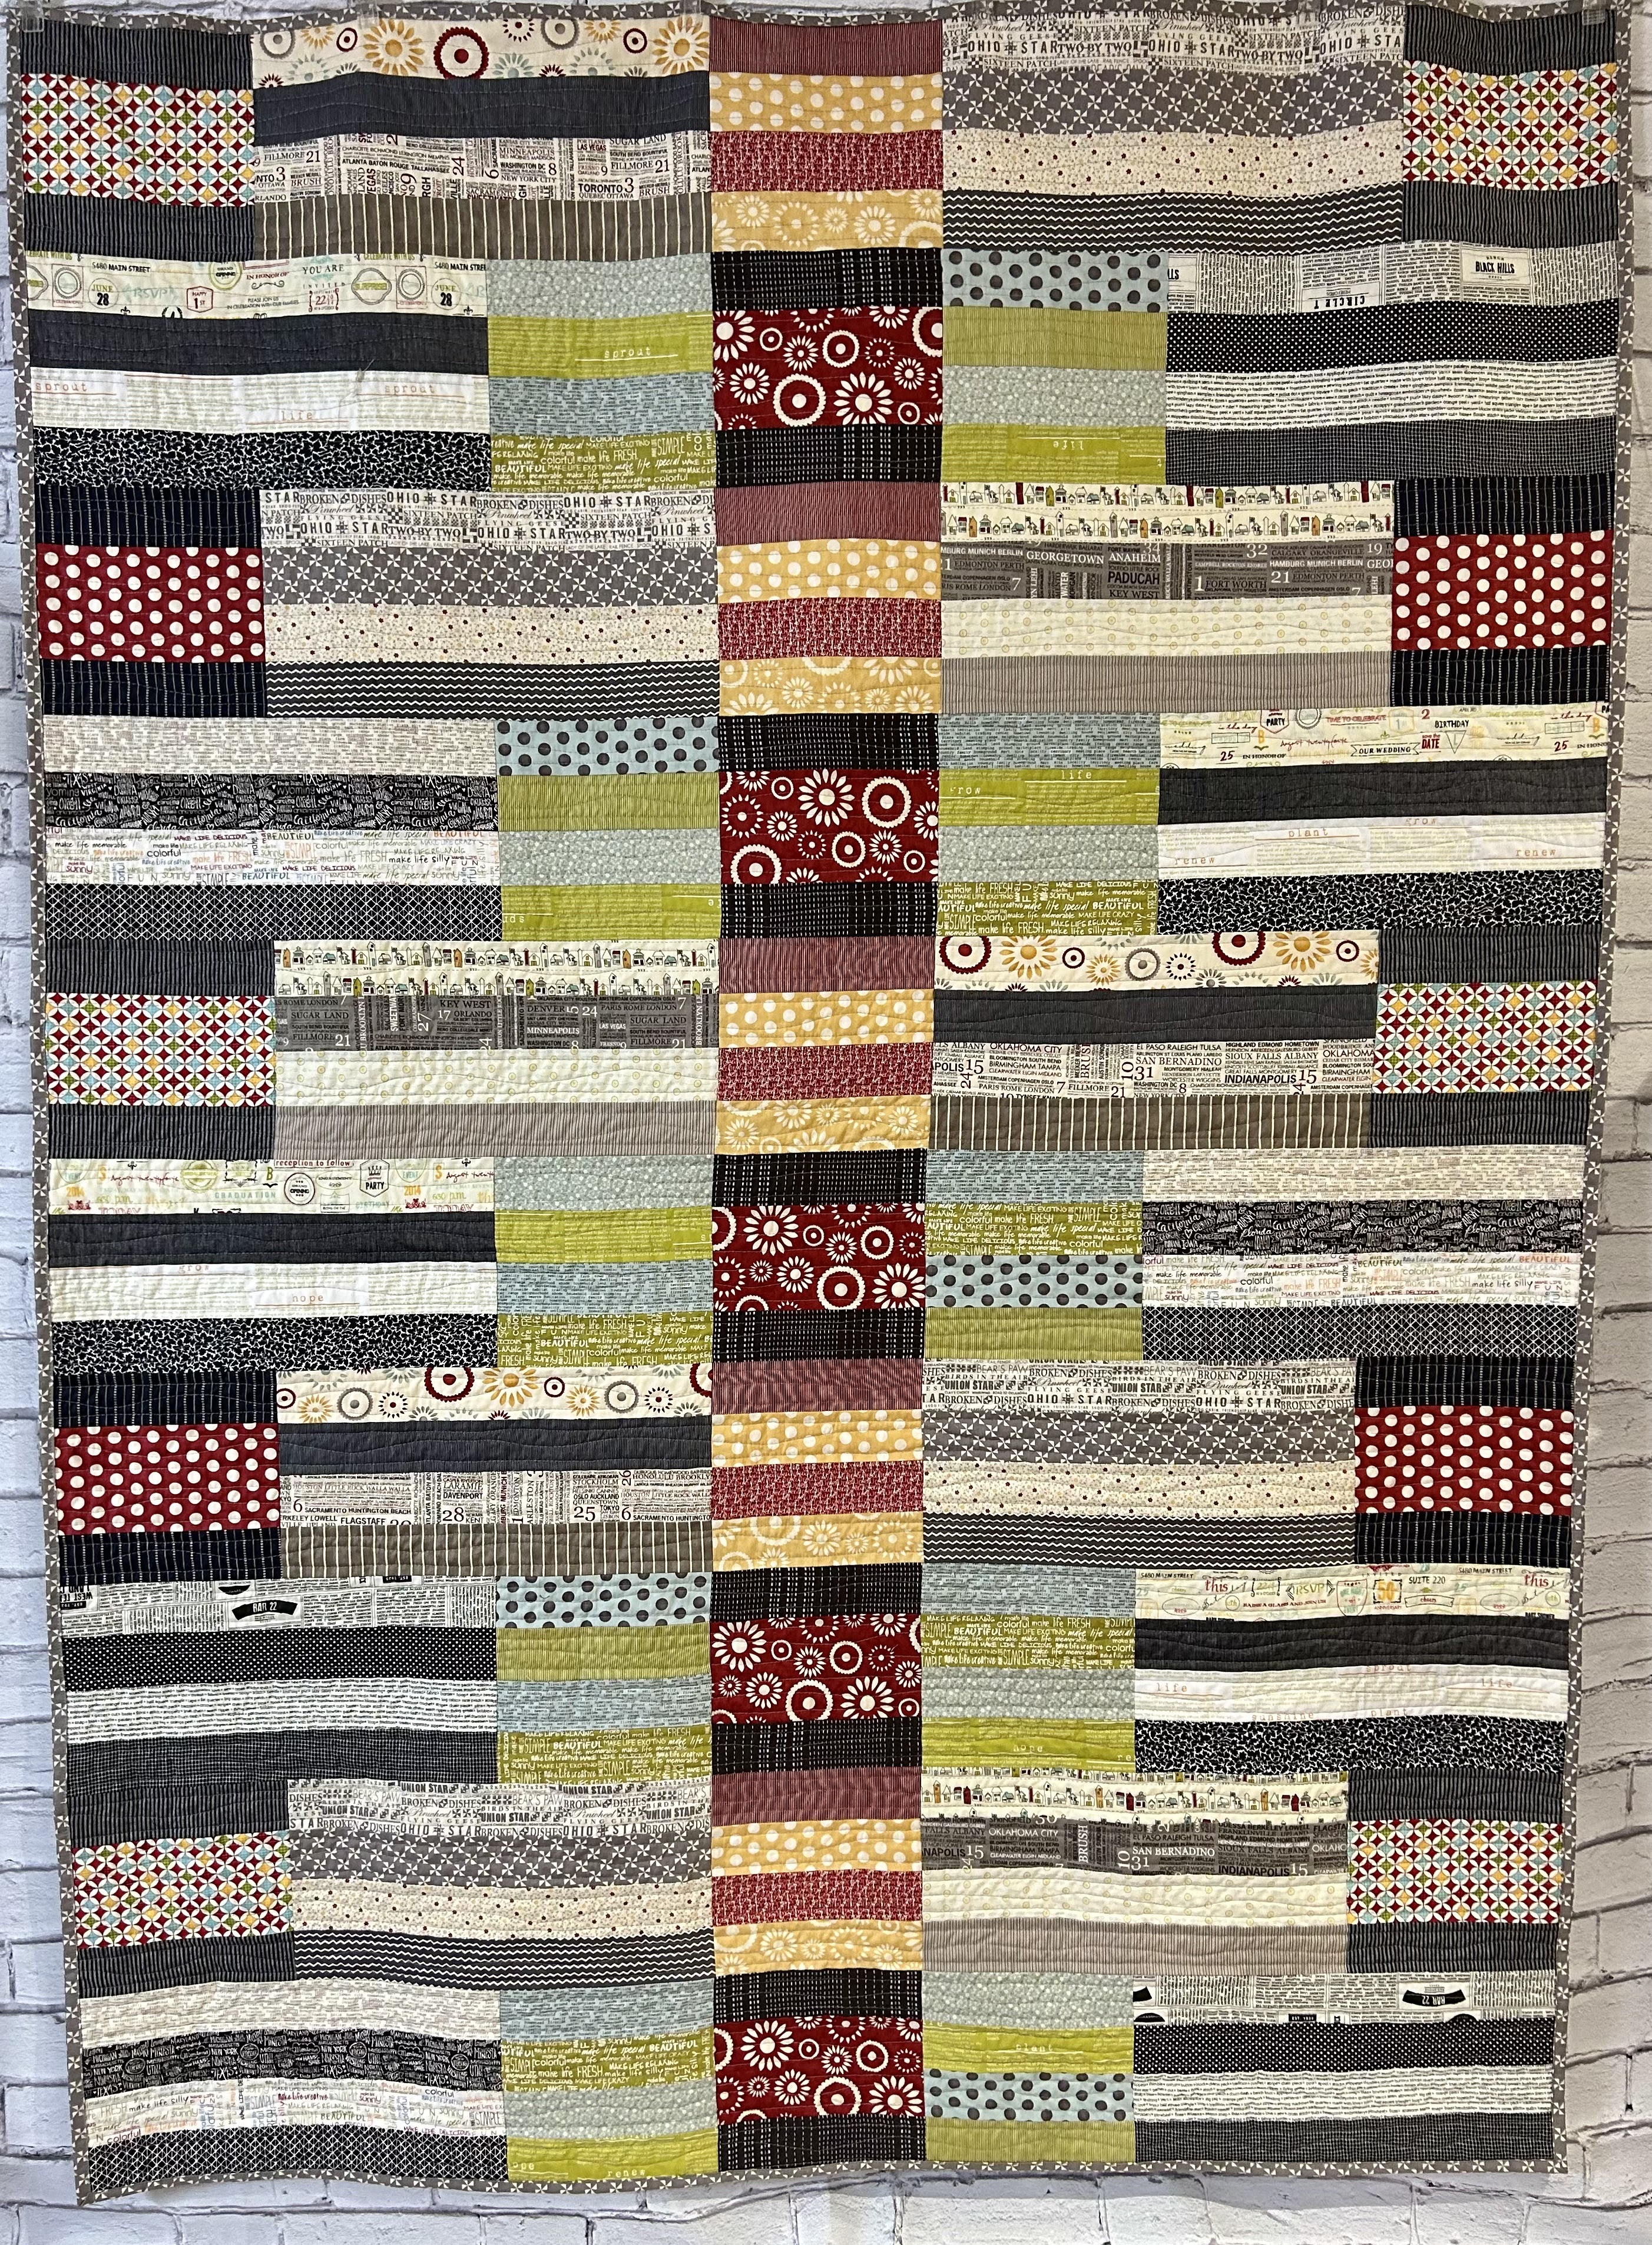
After my blocks and strip sets were made, I first laid them out randomly and did not like the way it looked. To me the problem were the red blocks which after looking at Mary’s quilt, I should have used two different fabrics for the top and bottom strips and not just one. So, I was scrambling to make what I had work which meant putting back the red and yellow strips I had taken out and adding more blue and green blocks. BTW, the yellow strips reminded me of scrambled eggs which is another reason for naming this quilt Scrambling Ernie. At first, I wasn’t happy with the layout I ended up with thinking that it was too planned but realized that this is the layout for Rambling Rows. It helps to make the strips sets with four different fabrics instead of two. I already have another one in the works and this time for it to look more random,  I will use four different fabrics in four different for the strips so it will not look like stripes and two different strips for the blocks.

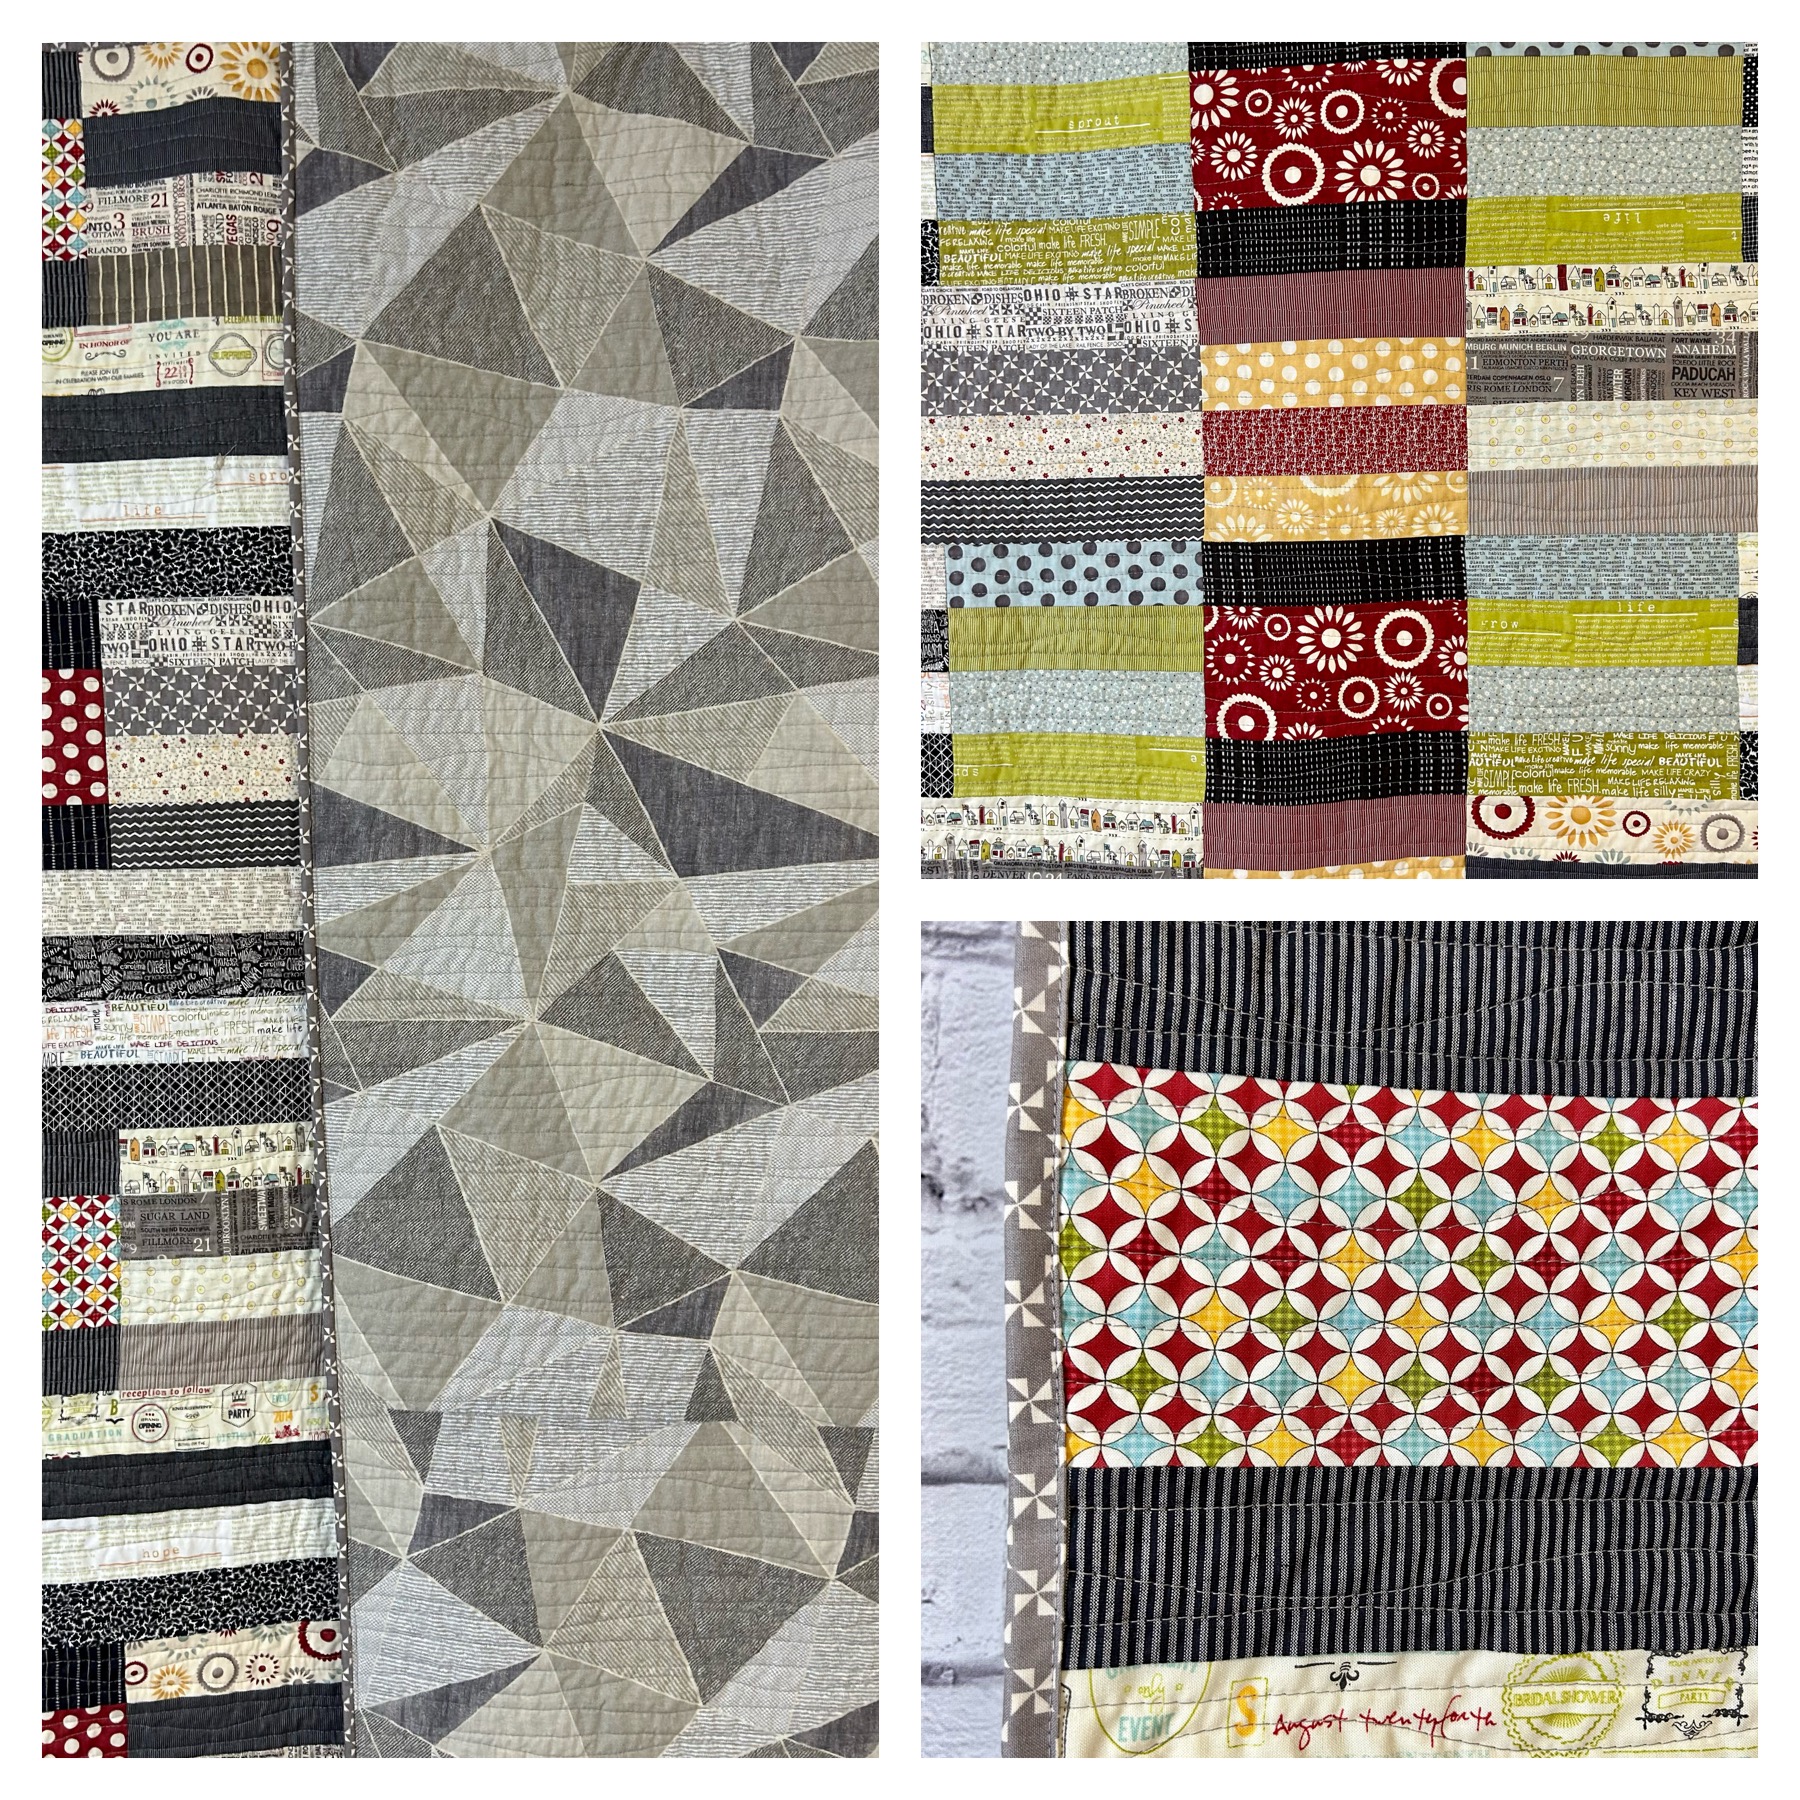
Here are some close-ups of the fabrics from different collections which played so well with each other. The multi-color orange peel print on the bottom right, just above, was what I used to based my fabric selection. Machine quilting using CT Essential Thread in Stone and there was no problem with my usual straight and wavey line quilting. I had wanted to use a black/white mini check by Urban Chix but I did not have enough and was resolved to used another Moda print for the binding which ended up to be the gray and white Pinwheel print by Sweetwater. The backing which is the only print not by Moda and is a print I purchased several years ago from Joann’s. I thought it went well and there’s less yardage now in the backing vault. Scrambling Ernie measures 56” x 80”. 
Here are the three Rambling Rows together where you can see how the layout and fabrics used makes a difference. I can see for myself now that making the strip sets with four different fabrics does really make the Scrambling Ernie fun. I remember when I finished FALLoween II, I wasn’t too thrilled with it and probably because planning and balancing the layout was so tiring. I really love the improv look and randomness of Mary’s Rambling Row. The Rambling Rows patterns can be purchased by sending a $5.00 check with a SSAE to: Mary Etherington, 2345 Palm Avenue, Garner, IA 50438. This really is a fast and fun pattern which can be used with scraps or stash. There are other patterns in her shop and purchasing a pattern helps supports her blog, which I found out fees can be expensive, as well as leasing a copier, etc. You can read about Mary’s blog about “Nothing” Here. This is not an affiliate link, just introducing someone who is fun to know.
I was hoping to take some outdoor photos of  Scrambling Ernie at home or at the GP House but it’s been rainy at both places so I only have indoor photos. Now that we’re at the GP House, I realized that Scrambling Ernie will be staying here in our bedroom where it will hang on the quilt rack directly across from the Sweetwater Road 15 wall hanging. Sweet, right?

Update: Of course the day after I posted, the Sun came out so I could finally take a photo outside.

Linking up with: My Quilt Infatuation/NTT

Saturday, September 16, 2023

A Razzle Dazzle Finish

Let me start this Post by saying how much I love my Razzle Dazzle quilt which I finished just less than two months after the flimsy was made in late July. I love the Ruby Star fabrics and the Razzle Dazzle pattern of 18” blocks with a fun twist on a Churn Dash block. I think this quilt lives up to the definition of Razzle Dazzle which means “noisy, showing exciting activity displayed and designed to attract and impress.”
The fabric and pattern are from the Fat Quarter Shop’s Ruby Star Society Quarterly Club I received earlier this year. I belong to several Fat Quarter Shop Clubs and do have to admit that I love receiving monthly or quarterly shipments of fabric. However, there has only been very few times that I actually have made a project using both the pattern and fabrics. When I received this pattern with the 12 fat quarter bundle of fabric from the Linear Floradora and Petunia collections, I knew I wanted to make this quilt because the fabric was fun plus I love big blocks especially when I can die-cut all of the patches. I did make one slight change to the pattern by not using a solid light as shown but instead I paired the fabrics with other fabrics, mostly lights, I had in my Cotton+Steel/Ruby Star Society stash. This made for a very low contrast or “mush” as I call it and like how busy Razzle Dazzle looks.
The only challenge I had was making sure all of the blocks were made and laid out correctly which was sometimes difficult to determine because of the many prints used.
All of my fabric combinations for each block were fun but the above two are my favorite. You wouldn’t think that a color combination of gold, red orange, lilacs and pinks would work but it does.
Machine quilting with both straight and wavey lines using a medium gray Aurifil thread went well until I was thinking this quilt was Razzle Dazzle with No Frazzle. Then, of course afterwards, came a few rows have tiny puckers here and there. You can’t see them but I know where they are. The backing is a Robert Kaufman wide back print. Surprisingly, one of my favorite parts of my quilt is the gold stripe binding which is a Ruby Star Society Warp and Weft print and was not my first choice. I was going to use a fuchsia print from  another Ruby Star Society collection but decided it wouldn’t look bold enough against the warm prints and glad I found the gold stripe binding in my stash. Razzle Dazzle measures 54” x 72”.
Now that Razzle Dazzle is my second finish for September, I am ready for my next project. I didn’t realize until a few days ago that September 16th is National Sew a Jelly Roll Day. I thought it wasn’t until next weekend which meant I would be at the GP House. I was already planning on making a Ernie Quilt in memory of  Mary Etherington’s beloved American Farm Tiger cat, Ernie.
Mary Etherington designed the first Ernie Quilt which was made with a Denyse Schmidt Jelly Roll back in 2016. Here is the link to Her Post.
I will be making a variation of an Ernie Quilt called Rambling Rows and you can purchase this pattern by sending a check for $5 with a self addressed stamped envelope to Mary Etherington, 2343 Palm Avenue, Garner IA 50438. (Not an affiliate link). Once I make my version, I already know that there will be an explanation behind my quilt. Hopefully, I will be able to explain next week.

Friday, September 8, 2023

Jack In The Box 23 Quilt

Jack In the Box 23 is my September finish for Country Threads Dirty Dozen UFO Challenge which I finished on September 2nd but couldn’t Post until today. I have once again have befallen to what seems like an annual “knee/sciatica/piriformis” pain during this time of year and sadly the culprit seems to be Quilting.  I really did not expect that pressing a flimsy and backing, basting and machine quilting a small quilt and then pressing another backing and flimsy would cause a flare-up. But anyhoot, after the usual five days of resting, taking OTC, no studio time, a few Pajamazon Days and finally a visit to the Chiropractor after Labor Day, I am back on the quilting saddle although I have imposed some time limitations for awhile.
There is a lot of story about the Jack in the Box 23 which is the second quilt I’ve made of the Jack in the Box pattern from Sue Pfau’s One Bundle of Fun. This book was published in 2016 and there are so many great patterns which uses fat quarter bundles, jelly rolls and layer cakes that I’ve already have another quilt or two planned. 
The first Jack in the Box flimsy was made in 2017 and I used a Jenn Ski Tiki Tok layer cake which was perfect for this pattern  as it works well with large scale or novelty prints. It was finally finished in January, 2020.
Sometime after the Tiki Tok flimsy was made and since I loved the Jack in the Box pattern so much, I planned to make another one with another fun modern graphic fabric line, Julie Comstock 23 fabrics which I had a charm pack and yardage. Soon after I cut the strips and squares I forgot all about it. In my defense,  2017 was a busy year for me which I finished 24 quilts, 5 wallhangings, 12 baby quilts for the Blanket Ministry at my church and probably the biggest distraction of all, this was the year my darling Granddaughter was born which numerous projects were also done for her.
It wasn’t until December 2020, when I made my Mori Girls flimsy on the right that I finally made the Jack in the Box 23 flimsy. It was only made because while I was making Mori Girls I kept thinking that the colors of the fabrics reminded me of another fabric collection so I did some searching around my studio and found the Jack in the Box 23 project. Of course after finding this and feeling guilty about forgetting it, I had to make the flimsy. I added Jack in the Box 23 on my Dirty Dozen UFO list for this year since the Mori Girls Quilt was a finally finished a year earlier in August, 2022. Is it me, but 2020 seems to be just last year but really it’s two to three years depending on how you look at it.
After our return from the GP House last week and finding out that #4 was drawn for the DD Challenge, I knew Jack in the Box 23 was my pick out of the five projects to finish. It helped that the backing was already sewn which I must have done last year when I was finishing Mori Girls. The backing fabric which is the Dots on yellow fabric on the left is the one that kept coming to mind when I was sewing Mori Girls. The machine quilting was vertical straight and wavy lines, the same way I did for Tiki Tok, and I used CT Essential Thread in Parchment. The binding, safely stored in the binding drawer, is a pink/red orange mini check which I thought would work well with the fabrics. Jack in the Box 23 measures 42”x64”, approx.
I thought my last pic for this Post would be of the two Jack in the Box quilts which is a great pattern for fun fabrics. It’s a nice size for keeping the lap and knees warm and would make great gifts for the “golden babies” who are retiring, celebrating a milestone birthdays or new grandparents who will have a quilt for cuddling. I’m glad the Jack in the Box 23 is a Finally Finished after six years and also glad I’ve finished my September UFO. But I still have at least another finish planned, maybe more, but I have to remember I have limitations at least for awhile. I really don’t like pain nor having to spend time away from my studio, but have I learned my lesson, maybe……

Thursday, August 31, 2023

August Three for Fall Finishes

I have three Finally Finishes to end August with and they are all for Fall; two were table runner flimsies made last month and one was an unexpected make and finish.
First up and the one that needs the most explaining because it was an unexpected make is the Sunflower Bouquet, a pattern by One Day in the Country/Sarah Sporer. My Quilt Peeps, Mary and Linda, whom I’ve known for over twenty-five years around the time I started quilting, met last week for a slow stitching day. We used to get together regularly, before grandchildren, and used to go gallivanting to shops, etc. Now we get together not so often and when we do, it’s with our hubbies and we end up playing cards. We decided it was time for just the peeps to get together for some slow stitching. I hadn’t decide what project I was going to work on until Mary mentioned the Sunflower Bouquet pattern which she was going to applique with wool. I had the same project stored away in the same cabinet where I already found two twenty-year old UFOs mentioned in this Post and the fabric pulled for Sunflower Bouquet would have been around the same time as the pattern is dated 1997. I did change some of the prints since I bought some newer ones which I liked better.
This is done in raw-edge applique which I love and have done some of Sarah Sporer other patterns. Before meeting with Mary and Linda, I did prep my project by fusing the pieces to the background. I usually do not use fusible when I do raw edge applique but since I had the flexiFuse sheets and Joan Shay’s Appli-bond needles I spent hours copying, cutting and fusing the patches down. Once with the peeps, all I had to do was sew a running stitch down the edges with one strand of #3371 Dark Brown DMC Floss. Surprisingly, during the 4-5 hours we spent, I was almost done with all of the stitching which usually when we stitch together I hardly get anything done because I’m either distracted by what the other peeps are working or too busy yakking. I must be staying focused in my old age. BTW, Mary decided to crochet instead of doing her Sunflower Bouquet project.
Quilting at home and at the GP House was done with two strands of the floss and I did use the appli-bond needles which really are very sharp needles and went through all the layers very easily. I decided not to quilt the numbers “1898” as in the pattern since I thought the quilting was enough.
Sunflower Bouquet measures 21”x29” and is going to look very lovely hanging on the hallway door. Although I thought prepping took too long, this project could be made and finished in a weekend.
These two FALLoween III tablerunners were flimsies made last month using my Sandy Gervais Fall stash. I wanted to machine quilt them  in August so they would be ready this Fall. It was an easy pattern of using what I had already cut, 2.5” strip sets with yardage of focus prints cut either 4.5” or 8.5” wide. The one on the left measures 32”x64” and the one on the left measures 20”x34”.
Machine quilting was with straight wavy line quilting using CT Essential Thread in light gold. The binding was the same stripe fabric used with in the runners.
I wasn’t going to show the backing fabric used for both of the runners but decided to after I saw how the Master Quilt Hokder laid the small runner on the table at the GP House where it will be used. In his defense he did not have to hold up the runners up for pics and may not have been aware how much prettier the front is. He claims the darling Granddaughter did this even though she wasn’t then at the GP House. The nice thing about making table runners is they can be made quickly and uses up the scrap batting and I was even planning on making then more regularly. But then sew and behold, several days ago, Demando who lives in his own apartment now and has a new dining table asked me to make him some table runners which is music to my air since he wants more than one.
I’m happy to end this long month of August with six Finally Finished; two lap quilts, two wall hangings and two table runners. Am I the only one who is ready to welcome Fall? Usually I don’t start Fall decorations until late September but come tomorrow, September 1st, the Fall quilts are coming out in hopes this will beckon the cool weather to arrive, even though it supposed to be another scorcher this weekend.

Tuesday, August 29, 2023

Koby, Jr., A Dreamy Dog Daze of Summer Quilt

I posted the Koby, Jr. flimsy earlier this month and, sew and behold, it is a Finally Finished for August. I am calling this a DrEAMi because it “Sew Happened”, really, right during a long stretch of very hot, humid weather. While rummaging through my stash to find fabrics for my Ole Glory Quilt and looking through my bins of Lights, I found a print which I knew was vintage Country Threads fabric because I had seen it when I visited Mary Etherington back in late May.
When we were in her studio, I had asked Mary if I could see the fabrics she designed for Benartex since I thought I never purchased any and expecting she would have a shelf exclusively for them. Surprisingly she only had a piece of this print which was laying on her sewing table. I’m sure if we looked harder we could have found more. So imagine being dumbfounded several months later when I saw yardage of the same print named Welcome  which probably have been sitting in my stash for years. I’m wondering if I bought it when I visited her shop the first time ten years ago.
After the Ole Glory Flimsy was made, I pulled out some “old friends”of mostly Jan Patek prints because I love making quilts with the color combination of red, beige, black and sage which you will see later. 
I knew the pattern I was going to use was Koby designed by GE Designs and it is a wonderful pattern (not an affiliate link) named after her dog. I love the layout of rectangles and strips or bricks and strips as I call it. The reason for naming this Koby, Jr is because I changed the dimensions of the patch sizes and although I do own three Stripology rulers I did not use them but instead my die cutter. I thought it would be appropriate to refer to Koby, Jr since there are several dog references especially the dog you see in the print which I recognized immediately when I found the Welcome fabric.
This pattern sews up fast and is a great stash buster. As I mentioned earlier, it’s a very versatile pattern and the bricks and strips can be laid horizontally for another great look.
Machine quilting with a CT Essential Thread in Barn Red with straight and wavy lines was fast and easy. The backing from the vault was a Free Spirit Print, My Sweet Sister Emma which was perfect. 
Koby, Jr was finished just in time to bring it the next day to Good Peep Mary’s beautiful house where I could take some photos there. I had to include a photo of Koby, Jr with her two Australian Doodles, Tater (L) and Pudge (R) since there is sort of a dog theme in this post and also I love seeing photos of dogs and cats with quilts, especially the ones posted by Joyfully Tracie with her dog Wally.  Just saying Wally and Pudge would make a cute couple and Tater reminds me of the dog in the Welcome fabric. Good Peeps Mary, Linda and I had a slow stitch day and I’ll be posting what I made and finished in the next post.
As I mentioned earlier in my Post, I love making quilts with the Red, Beige, Black and Sage color combination and since these quilts reside at the GP House because it goes well with the farmhouse decor, I thought I take a group shot of the five I’ve now made. Going from right to left, they are in chronological order of when they were made, the first two made over ten years ago and the third and fourth made around five years ago. The fourth quilt which was the last one I’ve made with this color combination and was finished in 2019, so it’s been four years, another good reason why I made Koby, Jr. By the way, the latest three quilts have a Mary Etherington influence either by fabric, fabric bomb (an unexpected fabric exchange where only one person is involved) or by pattern. Now before the month of August is over in a few days, I have another Post to write because I have three more Finally Finishes. Per usual, I never do what I say I’m going to do in my Posts, as in my July Post, I said I was going to take it easy by only finishing one project but instead I did six. August did seem like it lasted forever especially with the hot weather.
Linking up with:My Quilt Infatuation/NTT

Saturday, August 19, 2023

Another August UFO Finish: Ole Glory Flag Quilt

My Ole Glory Flag Quilt is my second finish in August for the Country Threads Dirty Dozen UFO Challenge.  This quilt is one of my oldest UFOs I’ve listed for this year’s Challenge and was started over twenty years ago after 9/11 when many quilters were making patriotic quilts. Also worth noting for this UFO is that this is the oldest one I worked on during the years of the Challenge and that it wasn’t just a Flimsy which needed to be machine quilted but one that needed the blocks sewn with over twenty-year old fabric. Fortunately, I still love these prints, since many of the red/blue/white and patriotic quilts in my house have these fabrics/prints.
When I was gathering projects in mid June in anticipation of my annual participation in the UFO Challenge and looking in a cabinet which contains mostly kits and some UFOs, I came across the Ole Glory Flag Quilt project box which contained a few pieced blocks, foundation paper patterns, fabric yardage, cut patches ready to sew onto the foundation paper with a layout and some notes. I decided to add this project to this list since I thought of it while I was working on my Wensleydale Quilt which also had foundation pieced blocks with a similar diamond pattern.
I started sewing the blocks in July while I was at the GP House which turned out to be good timing since this ended up to be one of my August UFO projects.  I did not have a printed pattern for the quilt but I remembered how it looked, so I thought. There were three different types of foundation blocks for the flag quilt; a diamond shape with four points, a square with two points and a rectangle with points. After looking at the few diamond blocks which were already sewn, I realized before I started sewing the blocks that color placement of the fabric was important for each foundation piece so that the reds and blues points alternated around the Moda Georgetown flag print. I also decided that I was not going to make an almost 72” square quilt but instead make a wall hanging measuring 36”x45”. Once I decided on the new size, I had to determined how many of each block type  needed the red patch to be on the upper right or upper left.
After I finished all the foundation pieced blocks, I thought I should find the actual pattern for the Flag Quilt. I had mentioned in a July post that this was a Sandy Gervais Flag Quilt project but could not find the pattern online nor in my pattern library. After thinking about it, I finally remembered that this was a pattern by Jodi Barrows and was in her Blocks by the Square book published in 1999. This block was designed to be used with her Square in a Square ruler which I instead designed the foundation pieces using Electric Quilt’s Sew Precise software so the blocks could be more accurately sewn.
It turned out to be a good thing I found this pattern because I realized my original layout was wrong with using too many of the flag prints and I needed a plain rectangle block for the center row. I looked through my bins of Sandy Gervais fabrics and couldn’t find the right fabric so I then looked through my Navy Blue bin of older and traditional fabrics and found the Sandy Gervais I Pledge Allegiance print there and it was perfect. BTW, when I first thought this quilt was a Sandy Gervais pattern, I was going to name this quilt, I Pledge Allegiance #2 which I will show you why later in this post.
When I was digging around the Navy Blue stash, I found another Sandy Gervais print for the outer border. The light fabrics for the inner border and plain blocks along the sides were found in my older stash of light prints which I also found a lot of oldies but goodies. The flimsy was finished last week and I couldn’t decide how I was going to quilt it because I didn’t want any machine quilting on the flag print. I was thinking that I wouldn’t be able to finish it by the end of August.
While at the GP House this past weekend and looking at a pic of the flimsy, I saw how I wanted to do the machine quilting. I did vertical straight line quilting spaced 1/2” apart on the center row and then horizontal line quilting spaced 1/2” apart on the  rows which did not have a flag print which resulted in the plain blocks with the I Pledge Allegiance print to have grid quilting. I also quilted in the ditch on the outer star points and inner border.
Here are some close-up shots of the quilt backing which is yardage of a Joined At The Hip print, the machine quilting which I used a CT Essential Thread in Caramel and a shot of the blue border print which I also used for the binding, so you can see it had red dots which may not be noticeable in the other photos. I want to mention that some of the photos of this quilt are too yellow/gold and the photo in the lower right corner is the most accurate.
Also worth mentioning again is that the Ole Glory Flag quilt uses fabric I pulled over twenty years ago from my stash and I do remember that I included a light print which had trains (you can see on the top diamond block) in recognition of the Chinese immigrants who help build the Transcontinental Railroad.
Here is why the Ole Glory Flag Quilt was originally going to be named I Pledge Allegiance #2 is because the above quilt is a Sandy Gervais I Pledge Allegiance pattern which I finished over twenty years ago. This quilt is 64” wide and 38” tall and includes the entire Pledge and stars I hand embroidered. I think this quilt may have been one of the reasons why I didn’t finish the Ole Glory Flag Quilt since once I finished this, I may not have wanted to work on another flag project for at least another twenty years. Just kidding, since then I have done quite a few more quilts in red, white and blue and several flag quilts which I may have alluded in previous posts was because it was the color and or theme of my Family Room. I realized while I was working on Ole Glory and wondering if I’ve made too many flag and patriotic quilts, I had a “Duh” moment—I reminded myself I was born on Flag Day and may have not mention this in my posts for several reasons. Like the fabric I buy with Roses because it has my name on it, I can say the same for Flag prints and patterns. 
One last pic of the Master Quilt Holder holding Ole Glory from behind a tree which is a great way to photograph a small quilt without him having to stoop. I thought this was going to be a quiet Post but it turned out I had a lot to say/explain about this over twenty-year old UFO and that a lot of memory muscle, searching for pattern facts and rediscovering old fabrics went into the making. Now when I start a new project, I take a lots of pics on my iPhone so I have a record of when I started, a pattern pic and the fabrics used but I also should include some written info since I never know if one of my current projects is going to be a future UFO finished by the darling Granddaughter who is becoming quite a Quilt lover.