

I'm being a little old school here by referring to these two finishes as Kaffe Fassett and not KFC but I didn't want you to think this Post has something to do with me eating two buckets of fried chicken. Despite there being less than a week left in June, I decided I would end this month with these two lovelies. The bottom right String Quilt was a new project started at the end of April and the one on the upper left corner was a flimsy made last Christmas Day. Both of these are what I call Patchwork Throws since they are backed with plush but one of them had batting in the middle which technically would be considered a quilt. The crazy thing about these two is that they were finished during the past few days right in the middle of a heat wave. Thankfully, I sew in the lower level (basement) and it’s quite cool down there.

Kate/The Last Homely House had posted a YouTube video of her making a String Quilt and when I first saw it I thought I’ve already made several during the past few years so “No.” But after I was organizing the scraps leftover from my Kaffe Fassett Dazzling Diamond Quilt, I changed my mind. I did pull other strips from the KF scrap stash and did cut more strips from KFC fabrics purchased recently. I made my string blocks differently than Kate by sewing them or QAYG onto scrap batting rectangles measuring 6.5”x9.5”. I sewed 84 rectangles in two diagonal directions to make 21 diamond blocks measuring approximately 18” x 12”. This was a great way to use up scrap batting plus using half-wound bobbins which I have quite a few. This was a traveling project which I could work on during our few and far between stays at the GP house as well as at home.
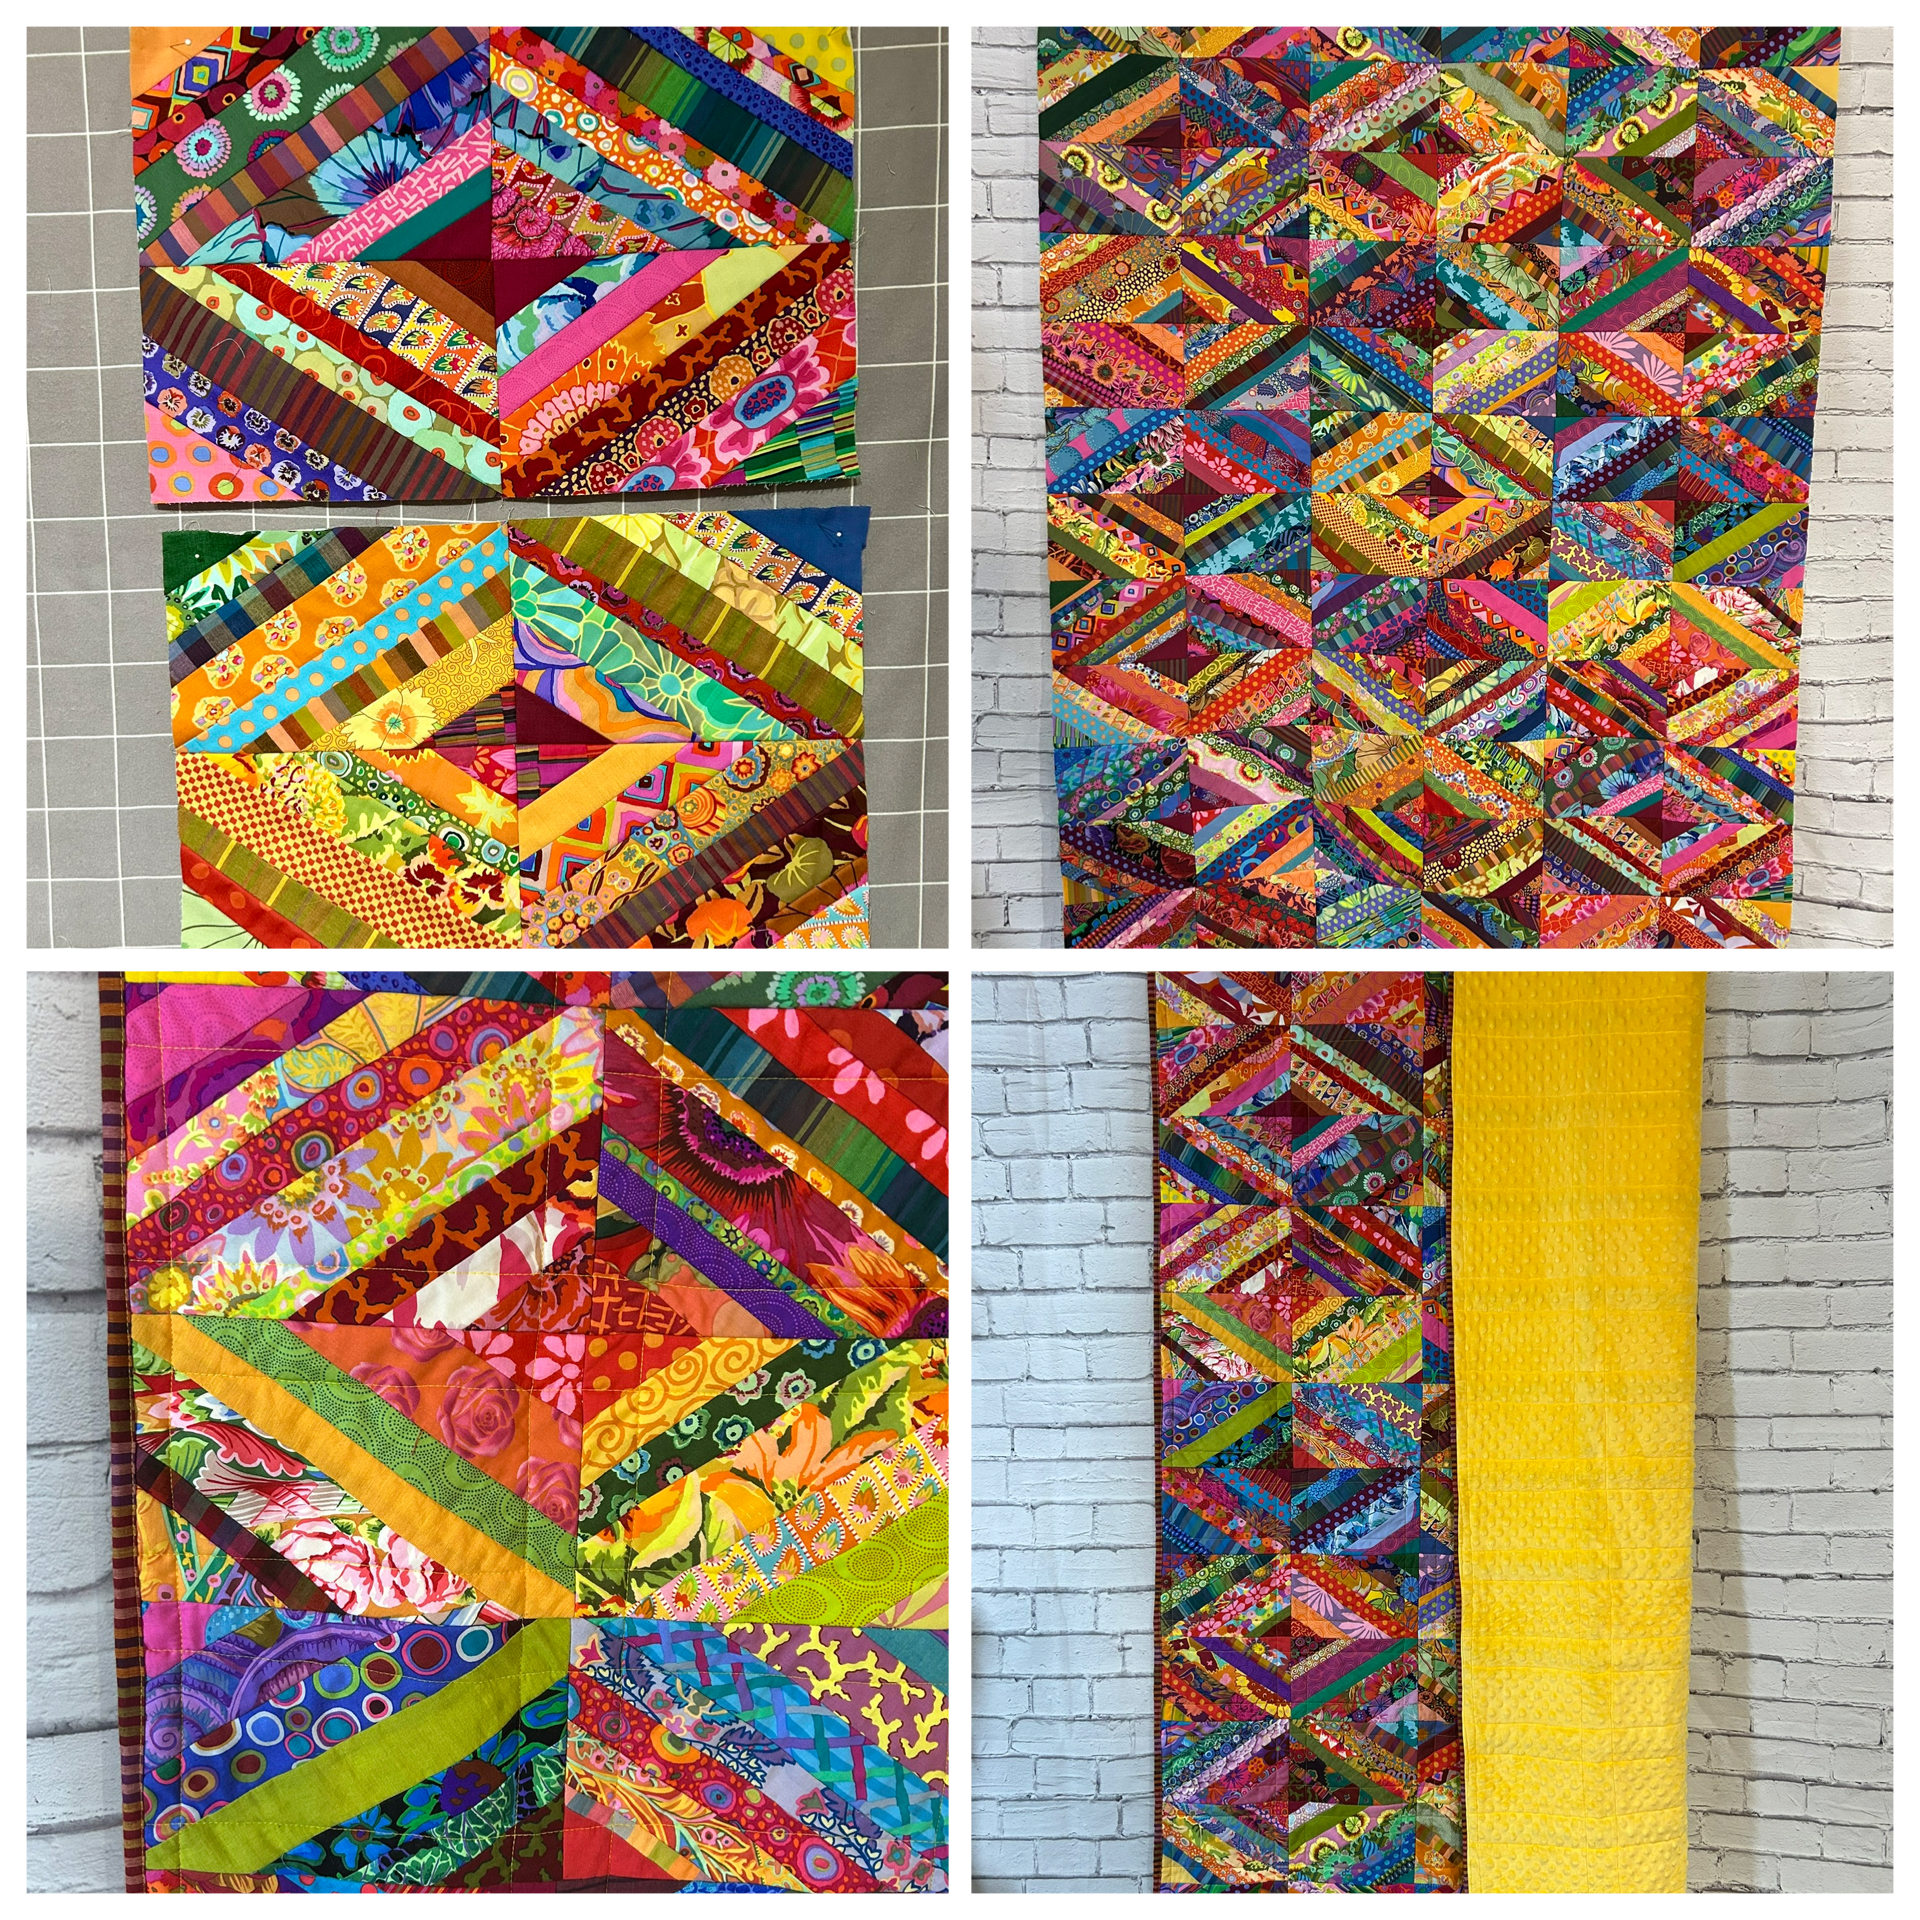
I decided my diamond block layout would be horizontal, much like my Wensleydale Quit. When sewing each block together, I considered color and fabric distribution. Once all of the diamond blocks were sewn and ready for layout, I separated them into two piles, one warm and one cool for color to make sure one fabric or color were not concentrated in one area. I didn’t want to sew a pieced backing with my KF stash and since the width was only 54”, I thought the cheddar butter yellow Minky in my stash would be perfect. I still was able to do light straight line quilting along the block edges because of the QAYG method and, yes, the combination of batting and Minky makes for heavier quilt which I’m sure would be extra snuggly during the Winter. I used a yellow polyester thread for machine quilting and the binding is the red KFC caterpillar stripe.
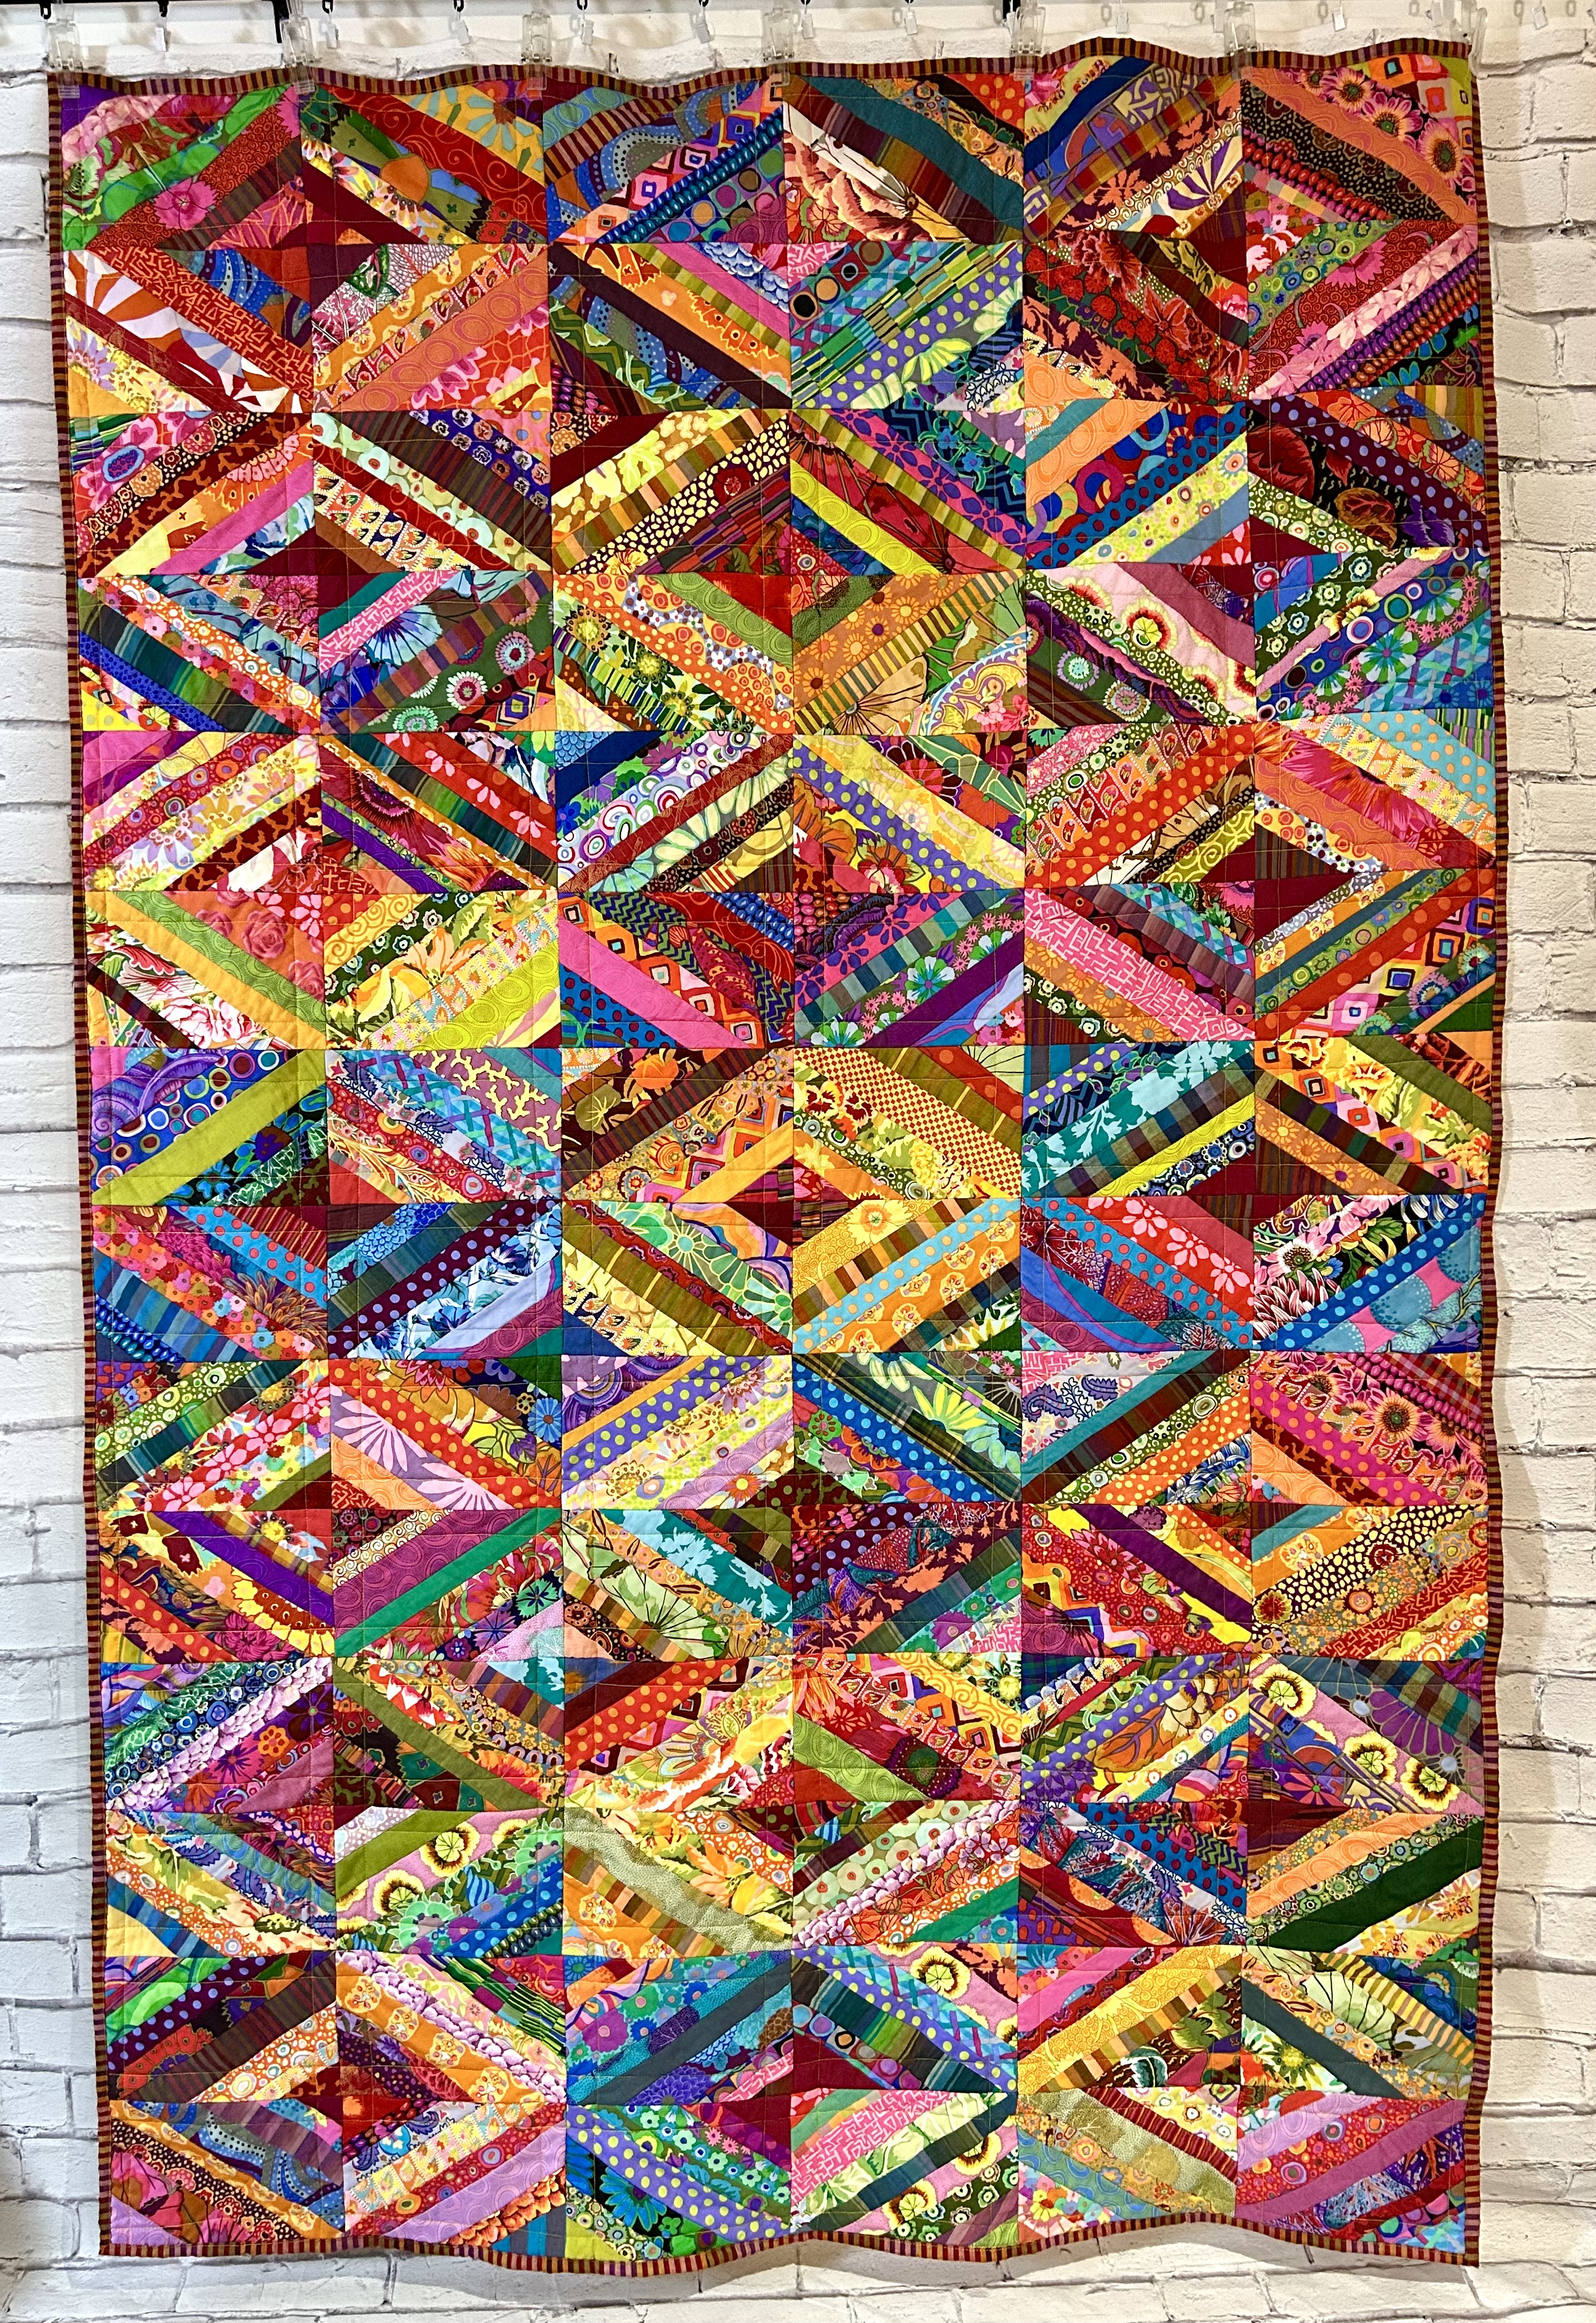
The KFC String Quilt measures 54” x 84” (approximately.) I should mention that I still have a lot of strips and scraps left as well as scrap batting. Oh well, that’s the circle of Scraps.

I briefly mentioned the making of the KFC Fat Quarter Flip Flimsy made on Christmas Day in this Post. The pattern is a variation I made of Fat Quarter Shop Fat Eighth Flip Pattern which is a free pattern available on their website and is perfect for the large scale prints.

I received the February 2024 Kaffe Fassett Collective Fat Quarter Bundle on Christmas Eve and the next day the flimsy was a finish. Of all of the KF projects made since last Fall when I discovered Kate/The Last Homely House, this is the first time I used exclusively KFC fabrics which are recent releases. The other projects I used stash and some were collected over twenty years ago. I did have a brief hiatus when I did not purchase any new KF fabrics so I was unaware of it now being called KFC fabrics. I am slowing building up a nice stash of KFC fabrics now. My favorite steel gray Zig Zag double plush was used, no batting, and simple straight line machine quilt 1” away from the block edges using a gray polyester thread which is truly a Patchwork throw. Brandon Mabley’s black/white stripe fabric was used for the binding so it may not be official KFC. My KFC Fat Quarter Flip Patchwork Throw measures 56” x 76” (approximately).

These two definitely were not made for a Summer Day but lovely to look. I am in no hurry to wrap myself up and snuggle in them; I can wait at least six months for cold Winter days. I now have made five KF/KFC projects so far this year and may need a hiatus from the KFC stash. Should I refer to my other fabrics now as De-Kaffe? Big laughs here….
The Master Quilt Holder had his second Kyphoplasty surgery for his spine yesterday and is recovering quite nicely so we will be visiting the GP house this weekend. This means I need to clean up the studio, return comments and organize my next projects. I really would like to take a break from sewing but the KFC and De-Kaffe fabrics are calling my name.
Linking up with Kathleen McMusing/TGIFF


