Monday, December 19, 2016

Final Quilt Finish for 2016, I think.....


I made the quilt top earlier this year and recently realized that this would make a nice Christmas gift for a certain someone so I spent this past weekend quilting and binding it.  Since we are experiencing sub-zero weather lately, only a crazy quilter, like me, would go outside to take  a photo of this quilt since I didn't like the way the inside photo turned out.

The top was made from a Pinterest Club kit which was several years old and was purchased from Country Threads.  I added some fabrics to make this quilt which measures 40"x56", a nice size for a lap warmer. To make this quilt soft and snuggly and really warm, I put fleece in the middle, in lieu of batting, and used gray Minky for the back.  I have found from working with Minky and fleece in the past, you don't have to quilt it much since both are synthetic material.

I only quilted the top and fleece together and then added the Minky to the back by tacking all three layers at the block corners.  The Minky is secured further once the binding was sewn on.  When I quilted the top and fleece together, I used Missouri Star Quilt Co. polyester thread with a 90/14 Jersey Knit needle and it turned out beautifully.  Since I started using a Janome Walking foot on my Juki 2010Q, I have been beyond happy with my machine quilting.  As you can see on the photos below, there were no dreaded pinches or puckers where the quilting intersected which happened a lot when I used the Juki Walking Foot.


Lately, I've been basting my quilts with quilters straight pins (they're almost 2" long).  I really like the ease of using straight pins but unfortunately don't like the inevitable pricks and pokes on my fingers, arms and stomach so maneuvering the quilt is done very slow and very carefully.  I think the next best invention would be a combination straight pin and safety pin.  Using Pinmoors would be an answer but unfortunately are way too expensive--$35/100.  I did find an alternative to these which is buying a roll of 20 ft. polyfoam caulk saver for $3.00 which will give you  approximately 240 1" pieces.  I found this idea from the Closet Crafter; here is the link:  Closet Crafter .


When I first made them and used them, I found they were quite staticky and stuck to my fingers and flew around the floor.  So, I ended wrapping each one with 1" blue painters tape which helped.  I do used them but sometimes find it annoying that I first have to pin the quilt first and then go back and add these.  Plus, some of them do fall off during quilting so you still end up getting poked, but for the price I pay for these, it's worth it.  But when I feel like quilting dangerously, I just use straight pins, especially for small quilts.

 So for the remainder of this week I'm going to focus on getting ready for the holidays and when there is a lull, I'l work on my Women of the Bible Blocks which I started at the beginning of the year.  As of yesterday,  I made 33 out of the 40 blocks so there may be a good chance I can finish the remaining seven blocks by the end of the year.  But then I do have other tops laying around that I would love to machine quilt.  I do need to order a roll of batting and am waiting until next month to buy it.  I didn't tell my hubby this because I didn't want it to be my Christmas present.

I hope everyone enjoys their holiday and Santa brings you something special.

Cheers!

Tuesday, December 13, 2016

Hanging It Up: The Quest for the Perfect Hanger


Ever since I started pinning my quilts on Pinterest around four years ago and posting them on Facebook over a year ago, I've been trying to find interesting ways to photograph my quilts.  I love seeing the photos of quilts hung in beautiful outdoor locations on other Quilters' blogs.  Unfortunately, my house sits on a typical suburban lot with no interesting tree branches or fences to hang my quilts on nor do I have a beautiful garden. Plus, I really don't want the neighbors seeing what I'm doing since none of them are quilters, I don't want to have to explain myself.  So the majority of my quilts have been photographed, using my hand-me-down iPhone 4 given to me by my son when he upgraded to a new one, on my small front porch on the bench or hanging from either the screen room door  or outside patio door.  The bench is a nice place to photograph my quilts but sometimes to get the full effect of the quilt, you need to hang it up.


My quilts were first hung on clear plastic skirt hangers and then I graduated to using white skirt hangers purchased from Wal-Mart but I still wanted a more polished look.  This was a sorry attempt to hang my quilt on an angle and it almost fell off the top hanger.


Always on a lookout for the right hangers, I thought I found my answer when I was looking through my Material Obsessions book by Kathy Doughty and noticed that when she photographed her quilts outside, she used these metals clips with S hooks and the search was on.  The closest that I could get to this was purchasing metal beach towel clips and 3" S hooks.


I  really liked how it photographed but the problem was that sometimes the S hook would fall off of the clips when I was just about to hang it which is annoying when you're standing on your tippy toes.  BTW, this quilt was hung on my garage door which is now a new location for a quilt photo shoot and you should have heard when one of my neighbors was driving by and hitting the car brakes to see what I was doing.


So, again I went searching and finally found what I have been looking for:  Hanging Boot Clips with Swivel Hooks, all one piece, so no falling hooks.  I found these on Amazon where I also found the metal beach towel clips and don't know why I didn't see these boot hooks before when I was searching earlier. Here is the link for these clips.  Hanging Boot Clip with Swivel Hook


Now with the winter weather finally here with a blast, it looks like I'll be taking photos inside the house.  The screen room is too cold so I was noticing how nice the morning light is in the living room.  I started thinking about buying a photo shoot backdrop rack to hang the quilts but at a price of over $200 for a good one or making one with PVC pipes for $10 but with no adjustments for changing width or height, this thought went quickly on the wayside. I did take the above quilt photo on the hanging rack in my studio but since it's in the basement, the lighting isn't so great.  I could get a photo lamp or I could finally take the time to learn how to edit photos on PicMonkey or maybe I should get an iPhone 7 since I heard the camera is really great.  A new search is on!

Wednesday, December 7, 2016

Trying To Be Good During The Holidays


The most very good thing I've done during this holiday season was to finish the final four baby quilts for the Blanket Ministry at my Church which means I met my commitment of making twelve baby quilts each year.  It's always a good feeling to make these and an accomplishment when they're done.

I thought I would share my favorite patterns which uses just six fat quarters for the top; one for a baby quilt and the other for a lap quilt.  What I like about making these quilts is that you can use six fat quarters from the same collection or mix them from several collections.  For the baby quilt, I tend to pick bright colors based on the one or two focus prints I pick for the quilt and for the lap size quilt, it's a great way to use the large focus prints that you can't bear to cut up.

Baby Quilt


The size I make for the Blanket Ministry is 36" square which is the bottom quilt. I cut, from each of the six fat quarters, four 3.5" strips (3.5" x 20") and arrange them into two sets of three strips to make rail fence blocks.  Once the strips are cut and sewn, I cut 9-1/2" blocks, two blocks from each strip set, a total of 16 blocks, eight of each color set.  I like to arrange all of the blocks horizontally in a four by four layout,  so in order for the seams to nest, I iron one set of strips with the seams going up and the other set with the seams going down.  The top quilt is also made from six fat quarters but I cut five 3.5" strips which will make twenty blocks  for a quilt measuring 36" x 45".

Lap Quilt


I call these lap quilts, Happy Lappy Quilts and is based on the Six and One Half Dozen quilt pattern by Hydee Ann Sews, a tutorial can be found here:  Hydee Ann Sews.  I just love this pattern because it's a great way to use up the large scale prints some of which has been sitting in my stash for a long time.  Again, it is a great way to mix up fabrics from different collection.  It's a nice size for keeping the lap warm, 40"x 54" (approx.) and I like to take one when I go to the movies because my theater has the reclining seats and I'm getting to the age where I'm always cold.  These quilts come together quickly and make great gifts.

As mentioned in my title, I am trying to be good, meaning staying on task which is hard to do especially when all the quilt goodies I purchased on Black Friday are starting to arrive, new magazines purchased  and need to be read because I'm always looking for new ideas, plus I just discovered Kraft-Tex.  I still need to finish decorating the house, buy Christmas gifts (online of course), send Christmas cards (not online), clean my studio, etc.  It's gotten to the point I actually had to make a list and so far only one item has been crossed off.  Thankfully my husband and son are doing the bulk of the decorating.  Meanwhile, cleaning up my studio is going on day four, today's distraction is the new dies and discovering PicMonkey which meant I had to put a photomark on all of my quilt photos and making a photo collage.

Hopefully my plan on finishing everything by this weekend will happen because after all I still have a quilt top which needs to be quilted by Christmas--which isn't on my list.

Tuesday, November 29, 2016

A Sew-Along Finish--Split Square Quilt


I finished my Holiday Split Square Quilt this past weekend which is a wonderful sense of accomplishment for me which I will explain more later in this post.


Mary Etherington and Connie Tesene's latest book "Sew Charming" was just released and there are so many wonderful quilts that I want to make, mainly because I have fabric in my stash which will work well with all of the quilts, the quilt sizes are doable, the smallest is 15"x18" and the largest is 48"x60" which are great sizes for the wall, table and gift giving and most inspirational of all, many of the quilts are quilted with straight lines, my absolute favorite look and I can now do since the Janome walking foot is working well on my Juki.  Also, another added bonus is that I can die-cut or use my shape-cut rulers for many of the pieces, finger risk is minimal.

Mary Etherington is hosting a Christmas sew along for one of the quilts in the book, Split Square, http://country-threads-chicken-scratch.com/uncategorized/the-christmas-sew-along/ which measures 24"x28".  The idea for Sew Charming is you can use this book in two ways- either a charm square book or as a scrap fabric book which is right up my alley since I can do both.  My Holiday Split Square Quilt uses leftover Sandy Gervais jelly rolls strips from my Holly Bar Quilt and yardage of two teal fabrics.  And, of course, I did a horizontal straight quilting just like Mary's quilt.  My quilt was finished right before the launch of the sew along because I received my book several weeks before and I knew this was the quilt that was going to be made.  My impetus was getting this quilt done was that I have several quilts which need to be finished this week and because I realized while I was making the top, it would be perfect to hang on my hallway door near where the Holly Jar Quilt will be draped over the banister.  I love finishing quilts when there is an immediate need for them which leads me to explain why I participate in Sew Alongs, Block of the Months, Mystery Quilts, etc.

Sew Alongs are fun and you can participate by yourself but for some reason you always like a friend to do one with you, sort of like a partner in crime feeling.  They're also great when they fall into one of these categories:
  1. you can use the fabric that you already have in your stash which is my favorite reason;
  2. it's an excuse to buy new fabric which isn't a bad reason because sometimes you need to add to the stash
  3. it's something that you can really use 
  4. it teaches you new skill sets or is outside your comfort zone.  Unfortunately, when sew alongs fall under this category, my completion rate is almost non existent or I deviate from the pattern in order to get it done.
The best sew alongs for me are the UFO Challenge.  Over the past few years I have participated in several of them and I was able to finally finish at least 20 of them, some of them well over five years old.  Unfortunately, my Fat Quarter Shop 2007-2008 Piece & Plenty Mystery Quilt never made it on one of my lists.  This is my oldest UFO and I only need to finish three blocks; but these blocks really stretched my skill set and patience, an example being one of the blocks I finished had a background with over 60 patches and most of it was going to be covered by an appliqué sand pail.  I'm not a big fan of appliqué nor blocks with lots of tiny patches.  My friend, Carol, who I convinced to do this quilt with me, affectionately refer to this project as the Quilt from Hell and I still feel guilty about suggesting this as something we could do together and fear what payback could be.  I've taken the box containing this project out trying to come up with a way to finish the quilt without making the final three blocks but something keeps telling me I need to do the remaining blocks, so the box still sits on my shelf.  I've already decided another quilt along that I did with my Facebook friend Dee this year, Women of the Bible quilt, is going to be on my UFO list.  I told Dee, it's only 40 blocks, we do one block each week and we should be done by October, it's a piece of cake and the quilt is so pretty.  For this sew along I purchased new fabric (Good Neighbors) and as of this date, I've only made 30 blocks.  My only excuse for not finishing it is that some of the blocks involved rotary cutting odd sizes which used to be out of my comfort zone so I put this project aside for quilts which allow me to use my die-cutter.  Also the quilt finishes to king size and I really don't need a new quilt for my bed yet.  Again, payback may be coming from Dee (it didn't help that I won our World Series bet).


Some of the sew alongs that I participated in were the ones that Mary Etherington hosted during and after Country Threads days.  I did the last Block of the Month where I quickly learned that I didn't like 1" HST but I did like that I could use my stash of civil war prints.  Also, the quilt was made per the pattern, except for maybe a few mislaid blocks, and it is quilted and laying on the quilt rack.


Last year's sew along, was Mary wanting to do Jen Kingwell's pattern Gypsy Wife and talk about a quilt that made me want to scream, this would be the poster quilt.  For those familiar with the pattern, you can see I did not make it according to the pattern because I just could not do the finishing strips and chose to finish it in a sampler style.  As soon as I was finished with this top, I quickly sent the pattern book to Dee which may be another payback in the future.  At least my quilt is finished and the mere mention of Gypsy Wife makes my eyes cross.  Payback for Mary is to continually send her fabric and patterns and extolling the wonders of a die cutting machine.


Another quilt I made was based on a quilt Mary was making several years ago which she called her slab quilt and I wanted to make one because I have this decade old bundle of red and black fabrics which were perfect for this quilt and I also could use my die-cutter.  I realized that I never posted a photo of the completed quilt which I straight line quilted before I bought my Juki.  Although it's not an official sew along quilt, I call this a Monkey See, Monkey Do quilt which I do a lot, especially with the Ernie quilts.


Last but not least, another sew along quilt I did this year was Pat Sloan's Secret Garden Quilt which consisted of twelve 15" blocks.  I made mine with only nine blocks because I wanted a new wallhanging for the family room and if I made it with all twelve blocks, it would be too big for the wall space above my couch.  This made me realize that I don't have a good track record with sew along quilts which I don't know why I should feel defeated with this aspect of my creative life.  I was planning on sending this quilt to my LAQ but realized after see of the quilts in Sew Charming, I think I could straight line quilt it myself, especially since the Juki and I are working so well together.

In planning my 2017 quilt activities, I was not going to participate in any sew alongs which has fallen to the wayside since I've committed myself to doing two now; one is the Red Pepper Quilt that Connie Tesene has graciously provided me with the pattern and one in which Carol has finally wreak payback on me for the Quilt from Hell experience, we're doing Lucy Carson KINGWELL's Smitten quilt, https://www.amitie.com.au/shop/c/p/Smitten-by-Lucy-Carson-Kingwell-for-Jen-Kingwell-Designs-x4700618.htm, pattern and paper pieces have been ordered.  This is definitely a Yikes and a Category 4 sew along, I don't mind doing the paper piecing but it's the putting it together that is going to be a challenge, I wonder how long once I'm making this quilt, will I be figuring alternative ways to finishing it.  Also, there is Dee's payback that's out there and hopefully won't be coming too soon.

Just can't say So Long to Sew Alongs, can we, because friends don't let friends quilt alone.

Wednesday, November 23, 2016

Catching the Rug Making Bug


I finished making this rug last night and I think I can safely say I won't be making anymore rugs for the rest of the year.  I decided to make another rug after I found a bag of 2" strips that I had die-cut in anticipation of a rug along and got tired of the bag sitting on a chair in my studio, okay, my dogs wanted the bag off their sitting chair.  I thought this would be something I could do while watching the Cubs during the World Series and on Game 1, I set up the rug loom and after ten minutes I realized that there was no way I could weave while watching the game or any other game so I put this away until last week after the Championship was well secured.

Thanks to Mary Etherington, Country Threads, I caught the rug making bug at the start of this year when Mary started a rug along in January which I was anxious to do since my rug loom was made over 10 years ago by my hubby but never put to use because I was hung up on how the strips were connected.


Thankfully, I found my answer in Mary's book, DVD and YouTube videos.  (Mary's book & DVD is still available to purchase by sending a $20 check to Mary Etherington, 2345 Palm Ave., Garner, IA 50438.) Once my Quilt Goddaughter, Lauren help me put the twining on the loom I was ready to go.


I absolutely love making rugs,  It's a great way to use up the old stash of fabrics, especially the homespuns bought on clearance, which I once calculated uses at least ten yards of fabric.  Since I have a die cutter, 2" strips can be cut in no time. Weaving is very relaxing and something that can be done while watching TV and for me it's very portable, I can weave anywhere in the house but, unfortunately, Sophie is very put out by my rug weaving since she thinks my hands would be put to better use by holding and loving her.


Here's the first rug made from my yardage of pink and purple plaid homespun along with other bright homespuns.  It's such a great feeling to finally make something from fabric that's been sitting in the stash for a useful purpose.  A nice thing about rug making is that once the last strip is woven, you are finish once it's taken off the loom and the loose ends are tied up.  This rugs did sit in front of the patio door in my family room not quite matching the colors of maroon and navy and the dogs love laying on it; Sophie not as much.


Soon after, I made another one in Denver Bronco colors before they won the Super Bowl using my stash of blue, orange and red homespuns but regular cotton was used for the twining--a great way to use up that stash.

Rugmaking is not quick, especially the 24"x36" size.  It takes approx. 40 hours to make one and when I make a rug it takes over the dining room with all the supplies and equipment I use, i.e., rug loom, fabric strips laying on the table, stool, easel, etc.  So once I'm done, everything is put away, threads pick up off the floor and the dining room is once again ready for the once-a-year company.


I wanted to make rugs in other sizes so I found a store online, Our Old Country Store in Dell, AR, Our Old Country Store, where I purchased two frames, one mug rug size and one table runner size.  They're very reasonably priced and well made according to hubby who was thankful that he didn't have to make them, but delivery charges are somewhat expensive.  I'm really eyeing the bigger frames, especially the adjustable size one.


Here is the table runner which measures approx. 18"X26" and lays on the family room ottoman.


The mug rugs measure 6-1/2" x 8-1/2" and I made over a dozen of these in homespun, batiks and cotton.  For these, the strips were die-cut 1.5" and can be made pretty quick, less than 2 hours, and especially portable for making while on vacation. I've made these for around the kitchen and around the house and also gifted several of them.

So now, rug making days are over until next year and my latest rug is laying happily in the family room, fitting very nicely with the decor. The pink rug is now laying in the dog crate which almost is the right size, just a little bit too wide.  F.Y.I., Sophie never is in the dog crate.

Monday, November 14, 2016

This Is How I Cut

When I first started quilting twenty years ago, my biggest obstacle, fear, trepidation, etc. was having to use a rotary cutter.  Between that and lighting matches, which I don't do, I want to protect my beloved fingers.  I'll even admit that I'm not good at changing blades, I rather use a brand new one, I tend to buy them when they are a good price, or purchase individual blades and not bulk packages because I don't want to deal with separating them which really is hard to do.

Luckily, soon after I started quilting, June Tailor came out with the Shape Cut Rulers and I would not have made as many quilts as I have without this ruler.  I promptly referred to it as my best friend.  The first ruler cut up to 12" and had slots in 1/2" increments and now there are several other rulers, most notably the Shape Cut Plus which went up to 18" and had slots in increments of 1/2" but a guide to cut 1/4" which when this became available at first to Quilt Shops only, quickly became my new best friend.  I have at least six different versions of these rulers, even the grand mommy of them all, the Shape Cut Pro which cuts in increments of 2.5"which came out when jelly rolls, charm squares and layer cakes were becoming popular. (F.Y.I., Since my cutting mat is white, I put blue painter's tape on the bottom so I see the numbers better).


Other rulers and aids used to overcome my discomfort with the rotary cutter were these two speciality rulers, Guidelines for Cutting Ruler which are those cuts other than whole, 1/4" and 1/2" (believe me I am so annoyed when cuts are in 1/8", 3/8" and anything in 1/16", i.e., Gypsy Wife, and avoid making quilts using those measurements) and the Simple 7/8" Ruler for half square triangle which is useful when you only need to make a few of them, otherwise I am a big fan of triangle paper.  I do have other rulers, regular and specialty, too numerous to mention but I'm thinking as I write this post, I may now understand why men buy tools.


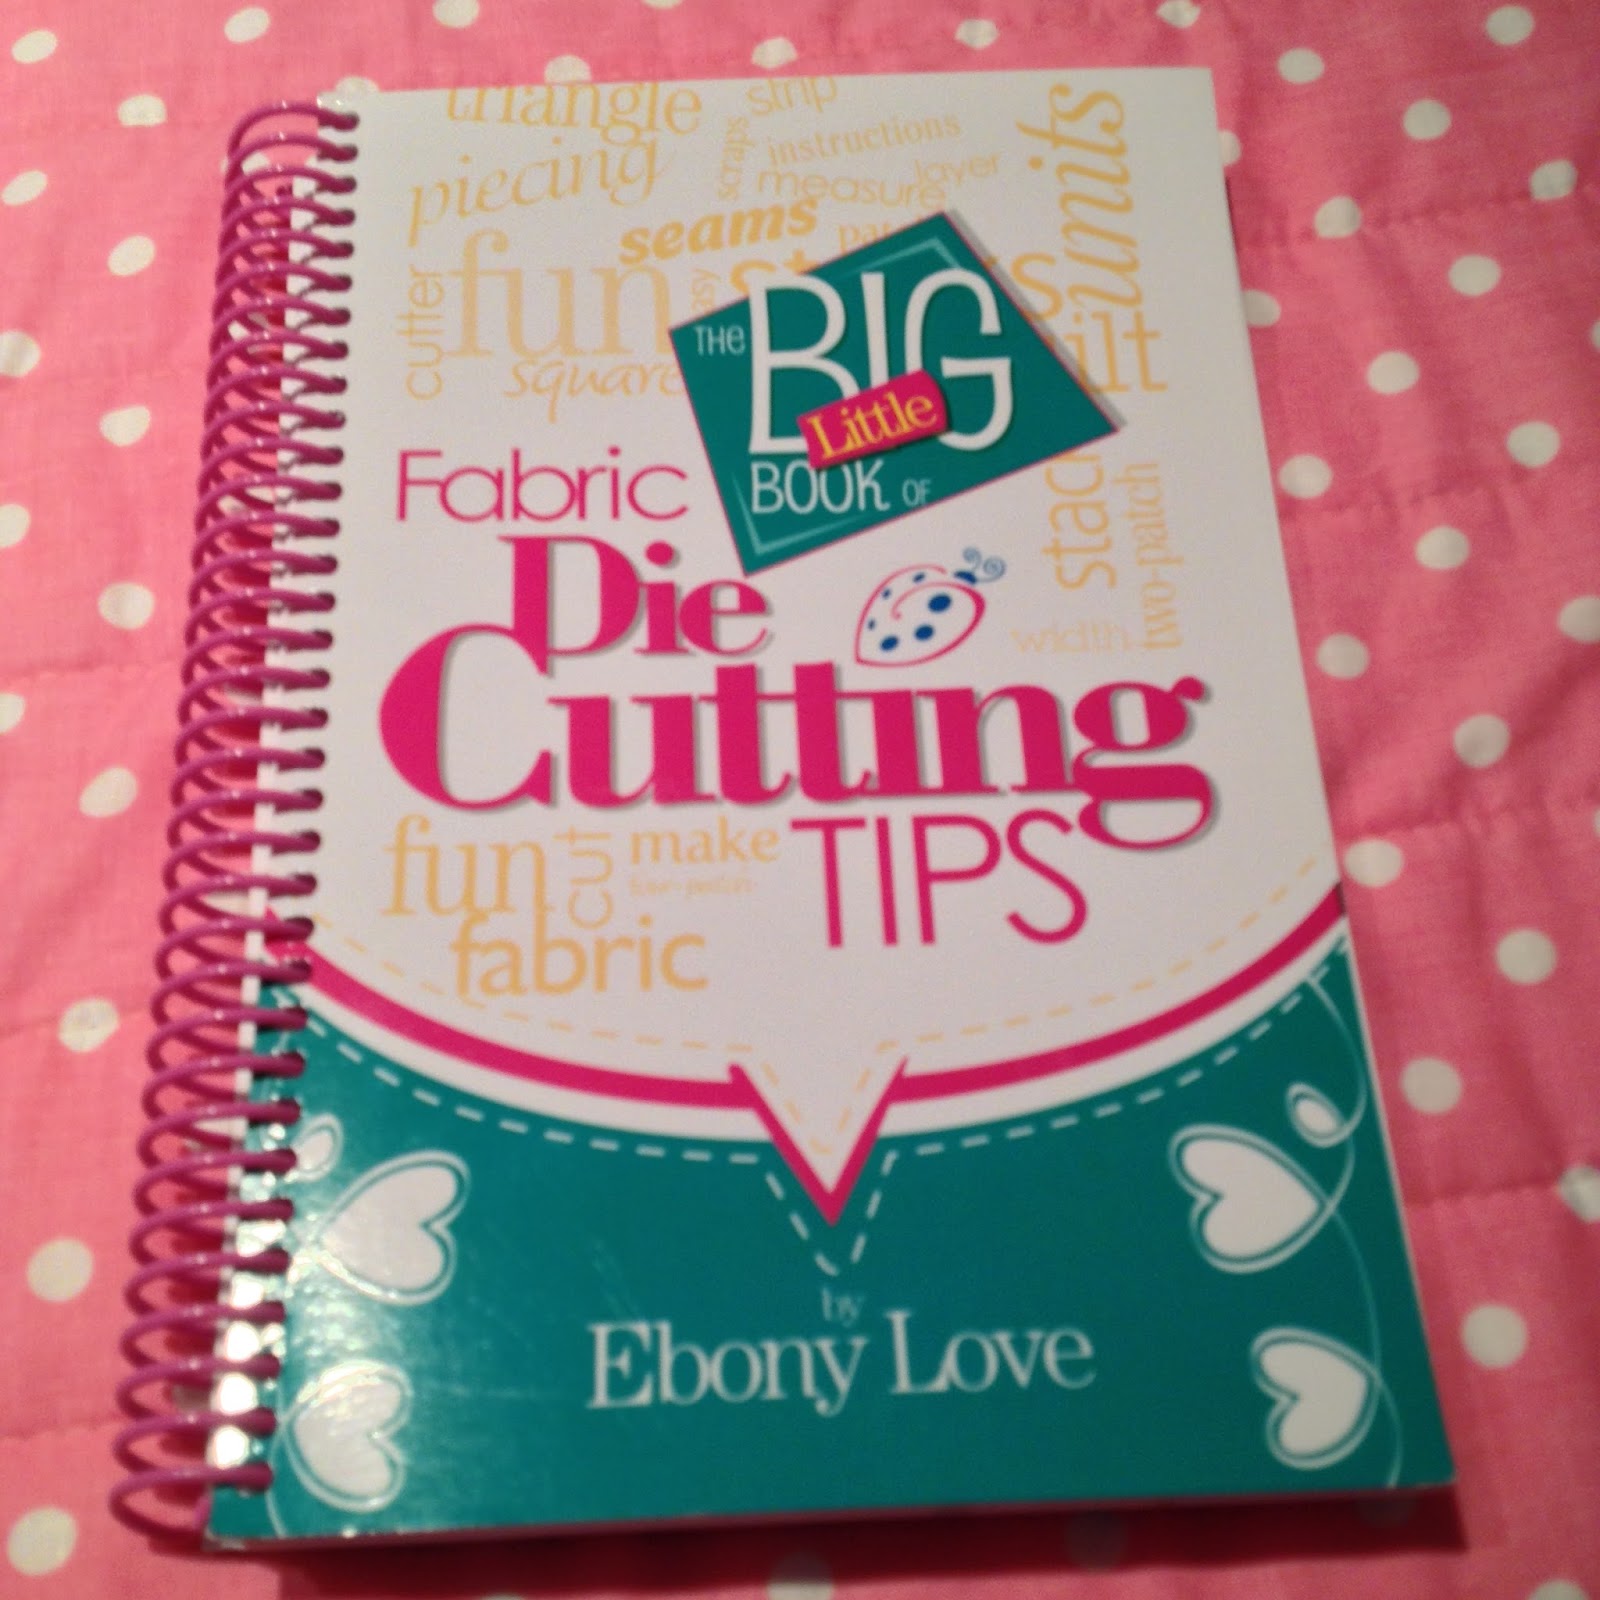
Almost three years ago, I started thinking about die-cutting machines even though at that time I thought I was the last holdout with my reasoning being they were too expensive, waste too much fabric, etc.  After purchasing and really reading Ebony Love's The Big Little Book of Fabric Die Cutting Tips and studying YouTube videos, hemming and hawing for a year,  I finally decided to buy one in November, 2014 because I was becoming very unhappy with my fabric cuts, the bow in the center of the strips, inaccurate cuts, etc. which I attribute to my shape cut rulers and myself getting up in age.  In less than two years, I now have three die cutters and almost one hundred dies and thought I give a little guide and thought to the machines I have.  Please remember these are only my opinions and I do not consider myself an expert but rather an enthusiast.  If you want to learn how to operate a die-cutter, be sure to check out the manufacturers home page online or YouTube.


The first die-cutter I purchased was the Sizzix Big Shop Pro and the big selling reason was because I could use both Sizzix and Accuquilt dies (you do need to purchase a special adapter plate). It is a big machine which has two different sizes of trays, regular and extra long which is need for the strip dies.  It weighs 45lbs and  the recommendation is to find a permanent spot for it since moving it around is cumbersome.  I have this machine, affectionately called, Princess Die-Cutter, on a metal cart and when I do use it I carry it over to my big basting table which is less than a yard away.  It's not too heavy when you remove the tray.  After I had Princess Die-Cutter for around a year, I was thinking that the Sizzix Fabi-Cutter would be nice to use for the smaller Sizzix dies and bought one when Amazon offered me an incredible deal.  Originally, they sold for $119 and Amazon's price was $89 and I kept putting it and taking it out of my cart for several months and they finally offered to sell it for $63 and I couldn't resist.  I think this unit was being eliminated so they were trying to get rid of their stock.  Even though both of my Sizzix die-cutters are less than two years old, they are the old models since the newer ones are now white.  And finally, I have the Accuquilt Baby Go which I received for Christmas last year, the reasoning being again, it nice for the smaller Accuquilt dies that I have.  I love it because of its portability.  Here's a photo of the three helpers and just another FYI, my studio is in the basement and it gets cold down there so that that's why there's plastic on the window.


My thoughts on the two manufacturers, Sizzix and Accuquilt, is if I could do it all over again, I would have purchased the Accuquilt Studio Cutter 2 which both Sizzix and Accuquilt dies can be used.  At that time, I didn't want to spend the extra $200 and I thought this die-cutter was made for high volume users like quilt shops.

Accuquilt die cutters are made specifically for quilters and I find their dies cut the fabric much cleaner than the Sizzix dies.  More often than not, after making a die cut with the Sizzix, there is always threads attached that need to be removed in order to separate the strips/pieces.  Sizzix has been making die cutters longer but they weren't specifically for quilters but also for scrap bookers.

Accuquilt dies are more expensive than Sizzix and you can find Sizzix dies on sale at great prices from Sizzix. com, especially during Black Friday which from my experience is the time to stock up.  Amazon is another place where you can find great prices.  A word of caution, when Sizzix dies are on sale, especially really low prices, base on previous experiences; they could be reduced because something is wrong with the die, as with the 4"x 8" rectangle die which was not accurate, the die could be mislabeled, (which is another source of confusion, because you have to make sure the die measurement is for cut size and not finished size), or the die is being retooled.  During the past year, three of my dies were defective and happily I had no problems with getting replacements quickly.

I do think using a die-cutter is better for you ergonomically and for accurate cuts but whether it is a time saver is a toss up for me.  There may be a perception that you put the fabric on the die-cutter run it through and Voila' you have 100 pieces.  It doesn't work quite that way.  Without getting too technical, it's best that the fabric is pre-cut to match the size of the die space and for some that may seem redundant.  Pre-cutting your fabric and strategically placing it on the die also reduces fabric waste.  Also, there's the time I spent on the leftovers, little and not so little strips which I put in a box and later sorted out to see which strips/patches can be used for quilts, rugs, fabric twine, etc.  I'll save anything that is 1/2" or bigger.

Besides the expense of the dies, cutting pads needs to be purchased for both machines and are pricey, especially the ones for Sizzix.  I purchase them from either Amazon or directly from Sizzix or Accuquilt when there is a sale or free shipping is offered.

One of the nice things about having my die-cutters, I can cut my own jelly rolls, charm squares and layer cakes and not have to deal with those pinked edges since I have a 2.5" strip die, 5" square die and 10" square die amongst my many dies.  When I first bought dies, I based it on the size of blocks I mostly made which were 8" and 12" so I looked for dies in 2" and 4" increments.  Accuquilt has a nice system of selling their dies in size bundles but it is pricey.  Also, another source of patterns is the books and magazines for pre-cuts.  My most used die I would say is my 2.5" strip die which stays on Princess Die-Cutter and I have die-cut many strips for binding and strip quilts.  Another thing, once you sew a HST that was die-cut, you'll never go back to your old method, I love that they are die-cut without dog ears.  I keep a die inventory list so I can refer to it when I see a pattern or before I purchase a new die.  For reasons I can't explain, I purchased two of the same die, several times, and have learned my lesson not to buy until I check my list.  If you buy directly from Sizzix or Accuquilt, dies are not returnable unless they are defective.

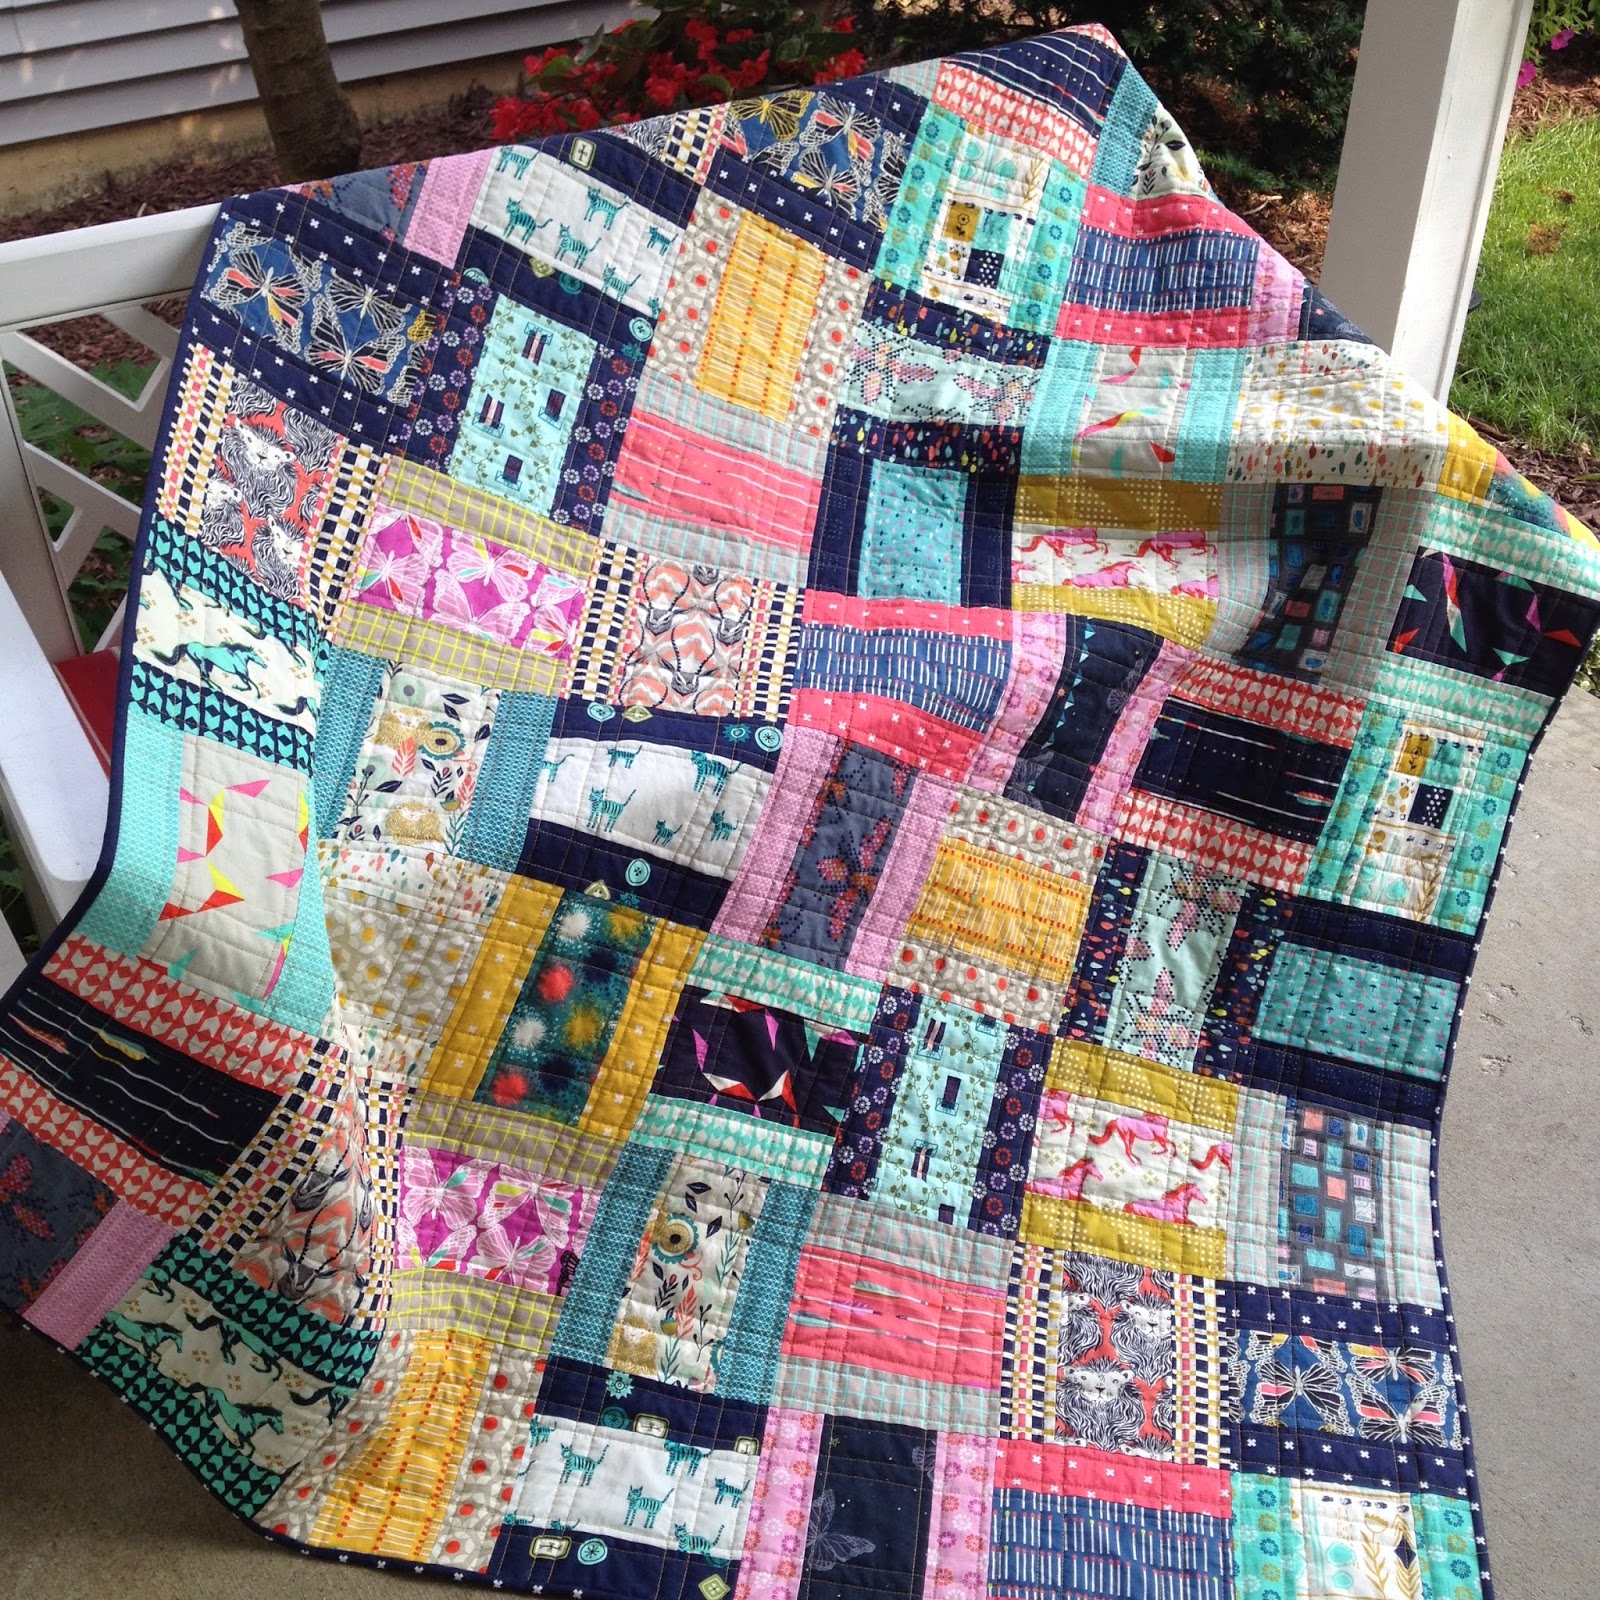
Most of the quilts I make now are those that I can use my die-cutter.  Sometimes I will change a pattern so I can use my die-cutter.  Here are some of my quilts which the die cutter was used:

Dies used: 4"x8" rectangle & 2.5" strip die
Dies used" 3"x 6" trapezoid and 3" HST 
Accuquilt 3'x6" Half Rectangle Die
Accuquilt Hexagon and Equilateral Triangle Dies
I have more quilts that can be seen on my Pinterest Boards: RMM Quilts and Quilts To Die-Cut for.

I know that I've put my die cutters to good use and can justify the expense.  There are still some committed (notice I didn't say die-hard) rotary cutters like Mary and Connie who I demonstrated my Accuquilt Go this past weekend.  I wish I took a photo of them watching me with total skepticism and disbelief, based on previous experience with their die-cutter,  after seeing how nice the die-cuts came out.  I don't have to change my rotary blade as often and my triangle paper supply is just sitting there.  I once said that if I became Queen of the Quilting World, I would abolish any pattern using 1" HST but they are safe now because I have a 1" HST die.

Saturday, November 12, 2016

Week Days with Ernie & Friends


I'm back from Garner, IA after just spending over a little over 24 hours with Mary & Connie and Gang for a little bit of sewing, a lot of talking, laughing, eating, fabric exchanging and getting over- stimulated with new ideas and projects.  You can see our activities on Mary's blog here:  Country Threads Chicken Scratch.

 I thought I do a quick post of the photos I took that aren't on Mary's blog.

Here I am with my quilt muse, Ernie Joe Mauer, the inspiration for the Ernie Quilts.  Boy, is he one big, heavy dude!  And yes, he blessed the Ernie II quilt, although I had to bribe him. The visit would not have been complete without feeding Emma and Charlene.


We took a quick visit/tour of Connie's studio.  Both Connie and Mary have studios to die for, a separate space from their house.  Connie lives in the city proper and her studio is above the garage. (BTW, I am not the best photographer when I'm excited, so I apologize for the lighting, shadows, etc., plus I really need a new iPhone.)


This is the stairway leading up to Connie's studio and photos of some of her creations she has in her wonderful space.  I wish I took more photos since her walls were filled like a gallery.


I'm sorry that I didn't take photos of her actual studio because by that time I was over-stimulated with all of the visual yummies and projects she had going.  You have to believe me when I say her space was wonderful; there was even a full bathroom!

Here's the group project which Connie has put together for us: Red Pepper Quilts Pickle Dish Variation Quilt.  On a side note, Mary and I decided that Connie couldn't propose one until she completes one of the projects we did as a group, i.e., Gypsy Wife, rug, etc. but somehow she managed to slip a few in like the Wildflowers.  I was open to doing this because I know I can die-cut the pieces and it is a great pattern for the modern fabrics.


And look at the portfolio/envelope she is making with Kraft-tex, something I never knew about and have to check this out because next to fabric, I like paper and boxes.  I have some little orphan blocks that would work with this idea.  And Kraft-tex comes in different colors too.


In between all of this, we ate out at Matt's and the Pizza Ranch, stayed at the Garner Inn which was very nice, did a quick visit at Farm Chicks Quilts,  I really needed to stay longer. But when you have dogs and a son who could only dog sit for only a day,  Bill and I had to go home.  BTW, while I was sewing, Bill did a bike ride on the Trolley Trail in Clear Lake, drove by the Surf Ballroom which unfortunately was closed, had a guitar sing along with Becky and visited with Rick.

I have to admit I almost changed my mind about coming to visit with what happened this week but decided to Sew Forth.  Even though I have my differences with Connie and Mary, most notably, I like to die-cut and they don't, Connie likes appliqué, paper-piecing and small pieces while I like the big patches and Mary and I do crazy while Connie is the sane one, I am glad for this time we had together.  Sometimes you have to disconnect from the big world and connect with your small circle where differences aren't as bad as they seem. WE bring good things to life.  I know when I resume working on the Marcia Derse Alphabet panel and fabrics, my original thought of just using her fabrics have changed to Mary's & Connie's rule of never using just one designer's fabric but using others to make it your own.

 If I ever run away from home, you know where I will be.  Here's to good sewing friends to make life happy and bright!