Friday, May 26, 2023

Sushi Shuffle

In between two projects which were “must-dos”, I managed to squeeze in making Sushi Shuffle a “shouldn’t be doing” which some would say is a “dream” but for me turned into a scream because that’s what Quilt Karma does sometimes, especially to my aging Asian mind. I was tempted to name my latest quilt Screaming Sushi but thought Sushi Shuffle would give a better image.
Anyhoot, while I putting away my fabric purchases made from last month’s Maine vacation, I purchased yardage of the black/gray/white Stof print (lower left corner). I knew I could use it  as backing for a quilt I would someday make with the other Stof prints which are stored  in my box of Teal fabrics. For such a small box, this has been a start of many quilts made as I mentioned in this Post. And wouldn’t you know just opening this box inspired me again to make the Sushi Quilt so I stopped working on my secret project.
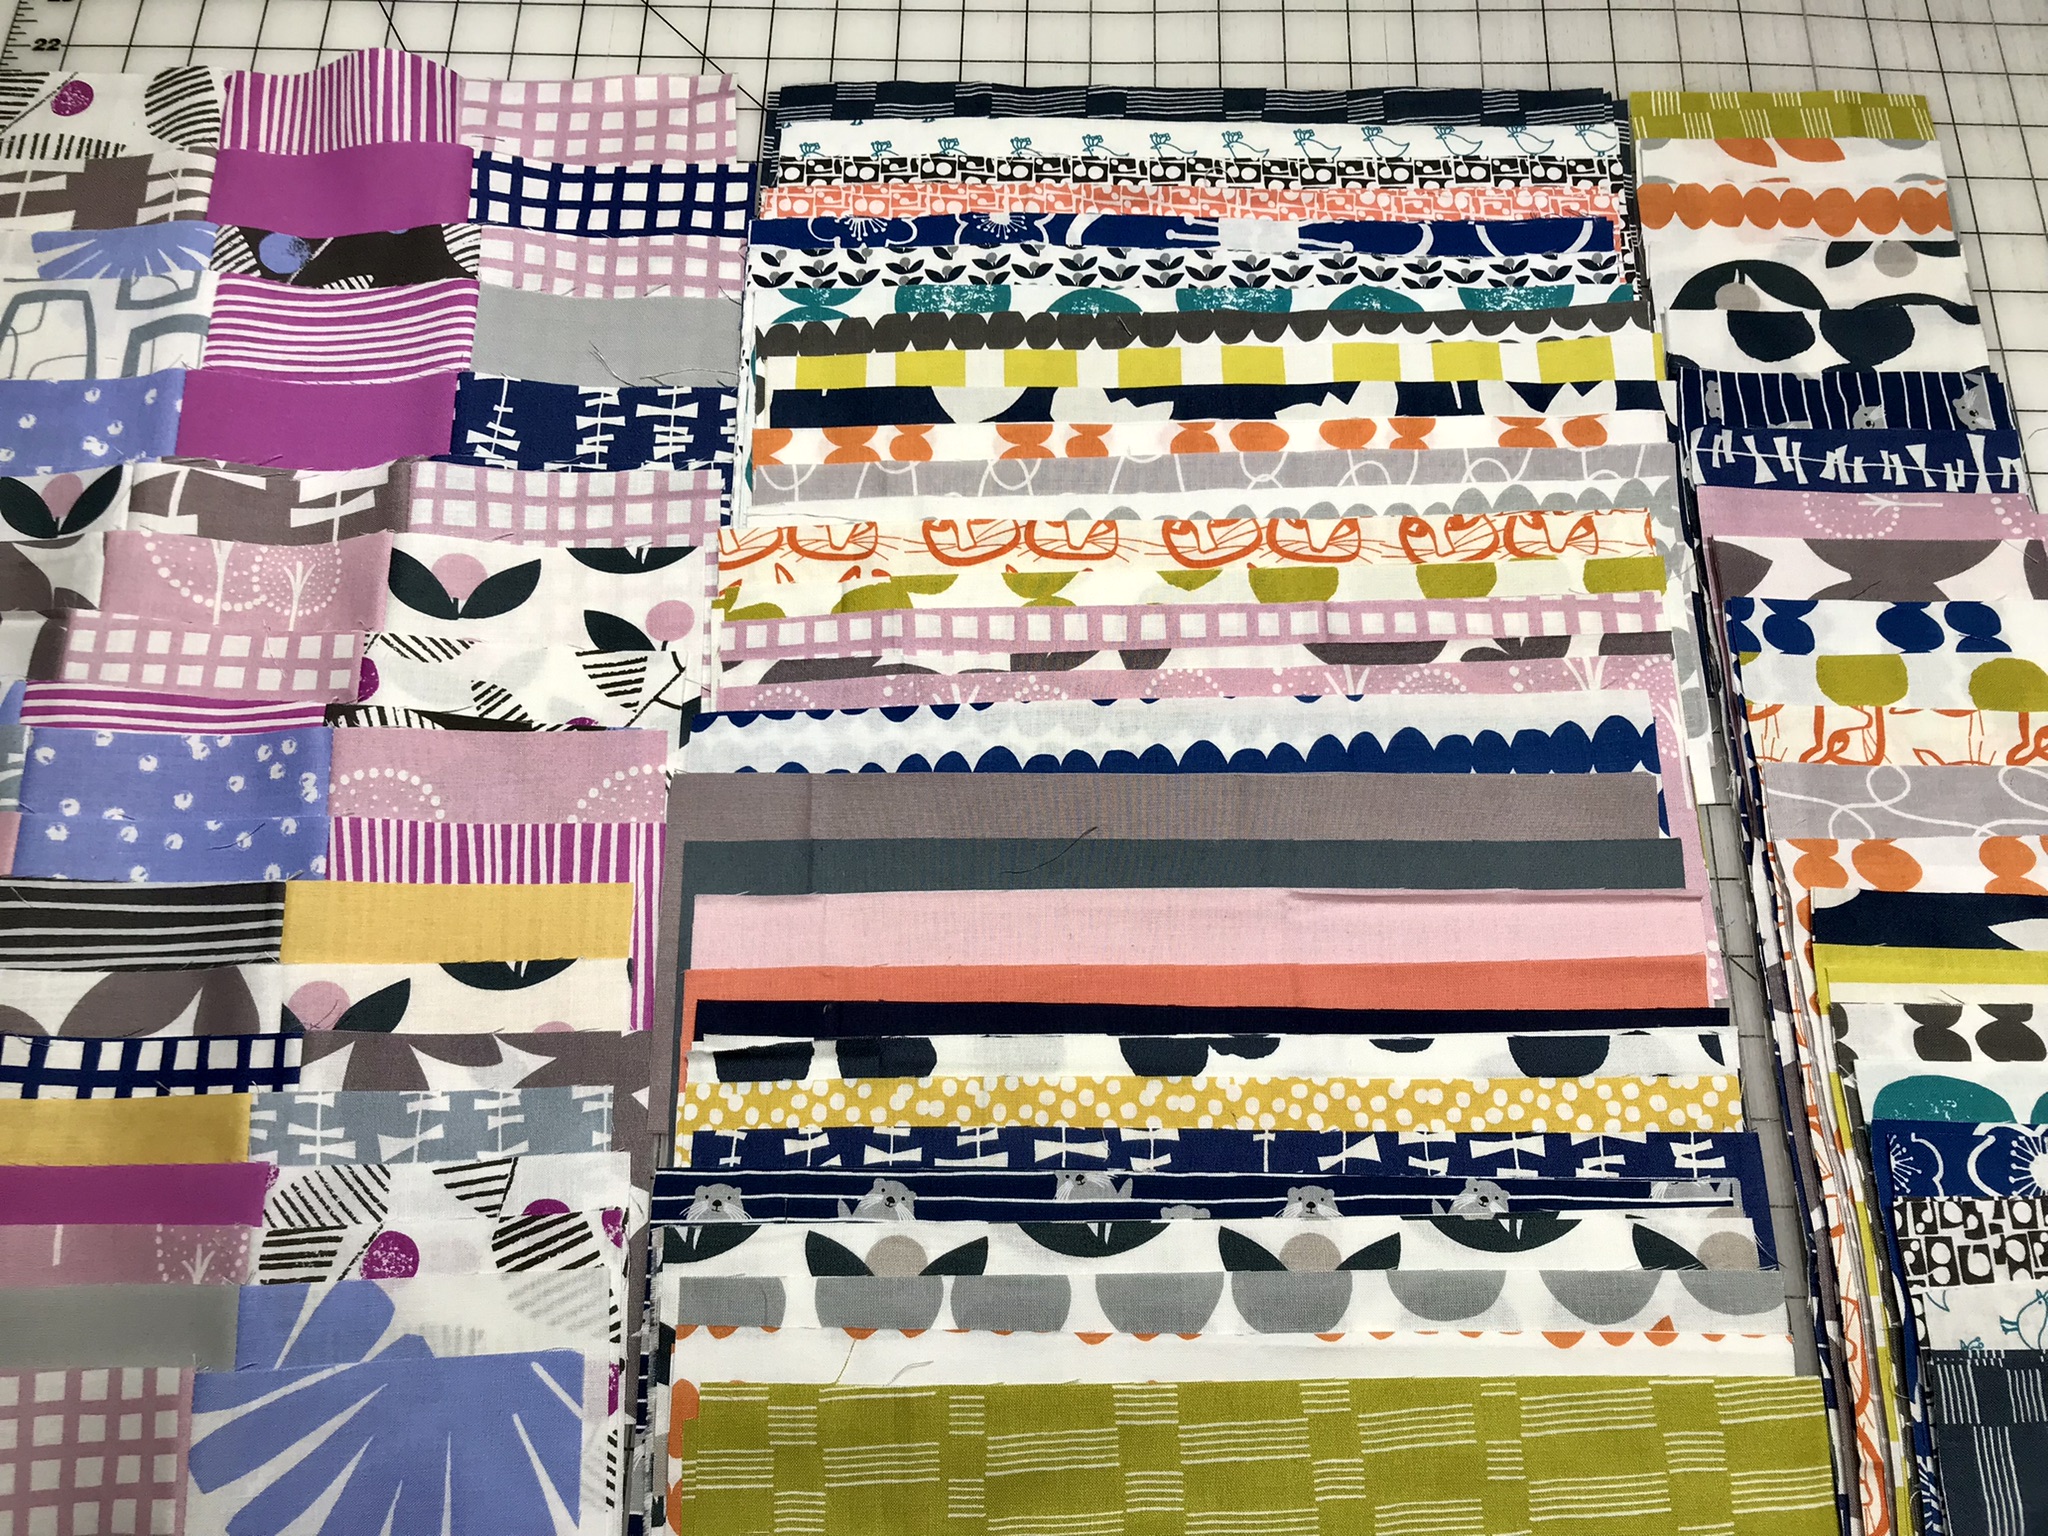
No surprise that I wanted to make another Staggered Strips and Brick quilt with my initial fabric pull. Except for the black prints, the other prints were stored with the Teal stash. I knew someday I would make a quilt using the two fish prints on the left which were the color inspiration for the quilt. I did end up pulling some more gray and taupe prints because you can never have too much fabric when making a Staggered Strip quilt.
I decided that the Sushi Shuffle quilt would have (4) panels measuring 8”x72” each of staggered strips and three panels of 4”x8” blocks each also measuring 8”x72” since I wanted to feature the Stof prints purchased almost five years to the day from The Fabric Nook in Granby, CO which are the green and black and the gray and black print. I had to find some other prints which would complement the Stof  prints and was lucky to find the black/taupe which is by Basic Grey and from the Basic collection. Even luckier was finding the wonderful Stof print I didn’t remember purchasing, on the right and it wasn’t with the Teal box but with low volume prints. The orange Fish print is a Moda print which was stored in the Teal box. Have you notice my use of “the Teal Box”? I normally would refer this as my Teal Stash, but after making Sushi Shuffle, I’m thinking it’s like Pandora Box, not evil, but it does unleash sometimes untimely inspirations.
I really thought the Sushi Shuffle was going to be an easy and quick make and was I wrong as soon as this crossed my mind. I had to include a photo showing the seven panels so you understand how this quilt went from a dream” to a “scream”. First of all, I thought I was being smart by remembering that the strip panels needed to be on the sides of the block panels because I don’t like the way it looks when the blocks are on the outside. I also was going to add strip panels on the top and bottom but remembered that I don’t do this when the strip panels are vertical.  When making lap size quilts, I like at least an 80” length since we are a tall family and  now would have to settle for a 72” length since I already cut them this length before remembering I should have cut them 80”. But what really started the screaming was when I was sewing the two panels, what should have been the final seam, one with #1-#4 with #5-#7 and it did not line up. It seems that whenever I make a vertical Staggered Strip quilt there is always a problem with the panels lining up evenly and salty language is always used.  This time there was a 1” difference and I had to take the two panels apart. I thought maybe the solution was to also take apart panels #4-#7 and resew them back together.
I was so happy after ripping out two long seams that the panels lined up (left photo) but there was a problem. I don’t know how I did this but panels #4 and #6 were switched and finally corrected it after ripping more seams apart like three-four times, I lost count (right photo). I will say that this was not the original layout since panel #1 and #7  somehow got switched in all of the shuffling. If you’re wondering how I came up with the name Sushi Shuffle, I did want a name that tied in with the fish prints but really settled on Sushi because I was saying the four-letter “S” word a lot, especially after realizing I had to rip seams out again and again. Sushi is a nice alternative word for a swear word to use especially around the darling Granddaughter. And Shuffle was what I did and I do like alliteration when naming my quilts. I did mention before Screaming Sushi was in the running but also Senile Strips because I had to be with the many times I sewed the panels together wrong.
I did end up sewing panels on the top and bottom and wonders of miracles I sewed them in the correct spot. I really did want this top to be 80” long and since the panels were already made I decided to add them. I do like the way this looks. After the flimsy was  made, I did set it aside for the secret project that needed to be finished.
It’s no secret now that I am participating in the book launch blog hop for Kelly Young’s, My Quilt Infatuation, latest book “Perfectly Pieced Quilt Backs which will be released on June 21st. My quilt made for this book launch is a Finally Finished and I am very excited to share it along with the other quilters who are participating in this book launch. This is another great book by Kelly and has converted this once pieced-back resister.
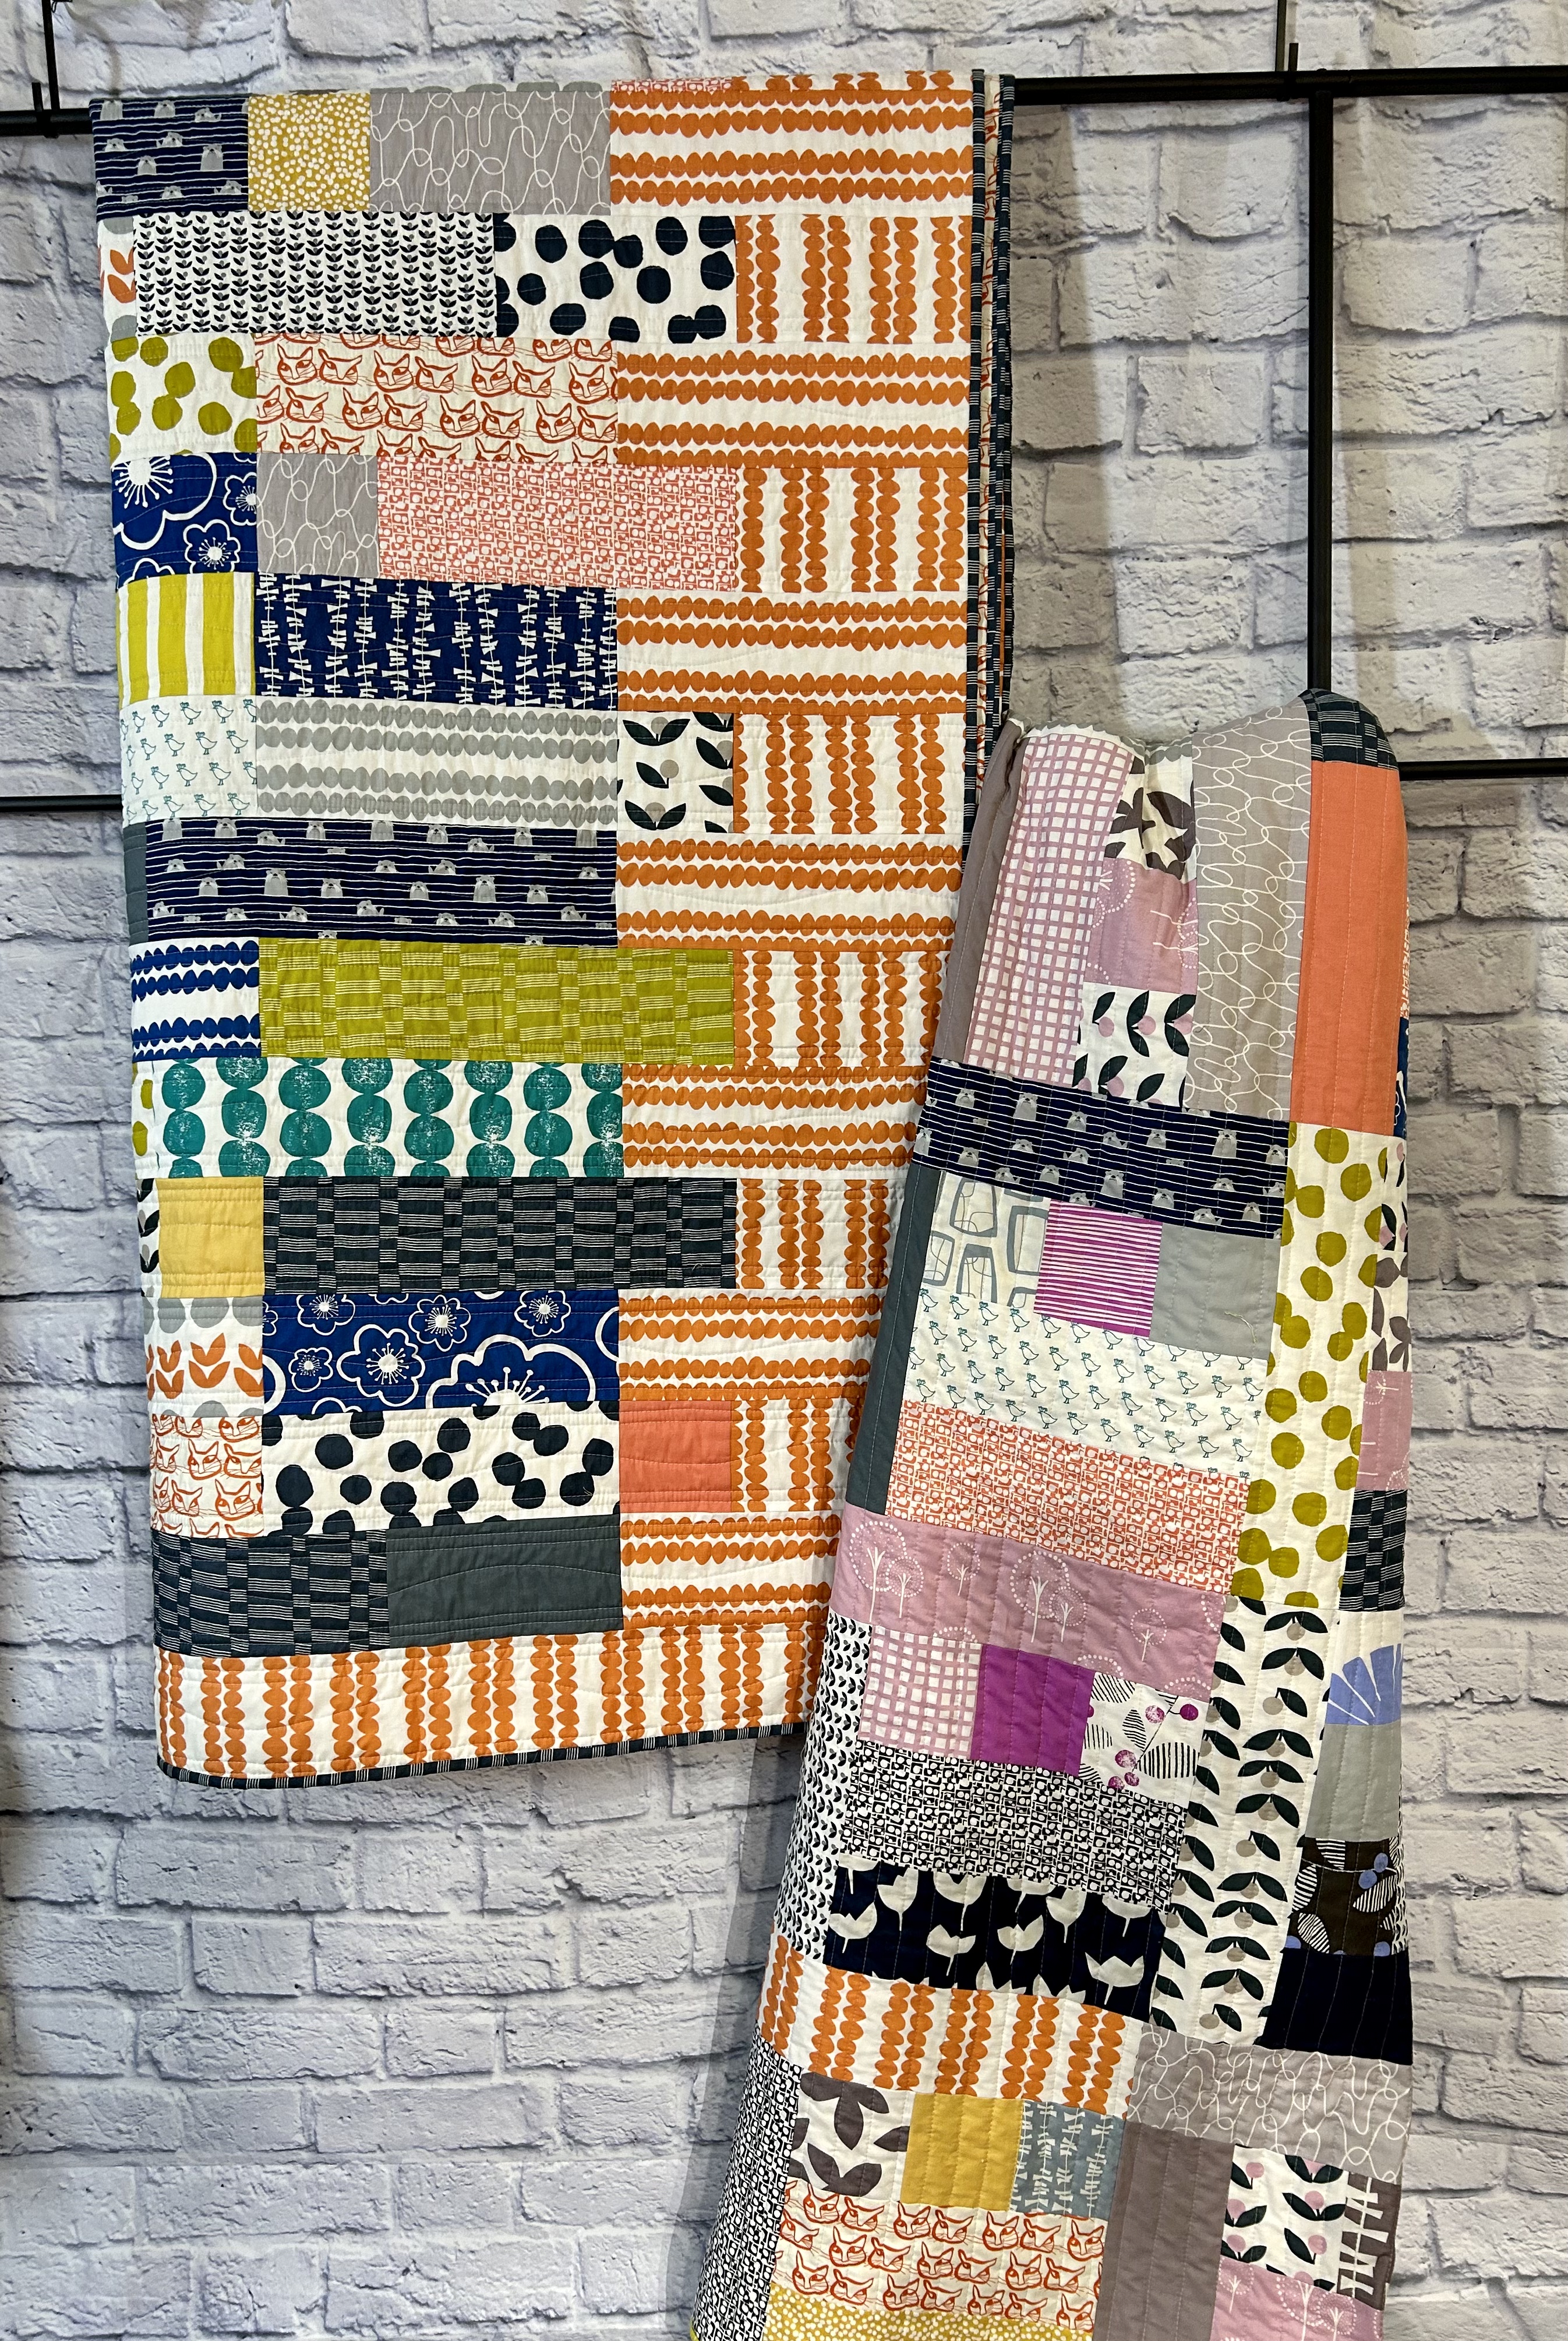
And to show how inspiring the book is, instead of backing Sushi Shuffle with just the black and gray Stof fabric which was my original intention when I bought the fabric, I did a pieced backing using the leftover strip panels and fabric chunks. The way I see it, I needed to use up the scraps, as encouraged in “Perfectly Pieced Quilt Backs” and not put them away in the Teal Box because I don’t need another future project. I plan on staying away from this box for awhile. It feels good to spend just a little more time and thought into my quilt backings and making it a nicer Finally Finished.
Here’s are close-up pics of the machine quilting with straight and wavy lines using CT Essential Thread in Stone The binding done by machine was with the Basic Grey black and taupe print. Sushi Shuffle measures 56” x 80” (approx.)
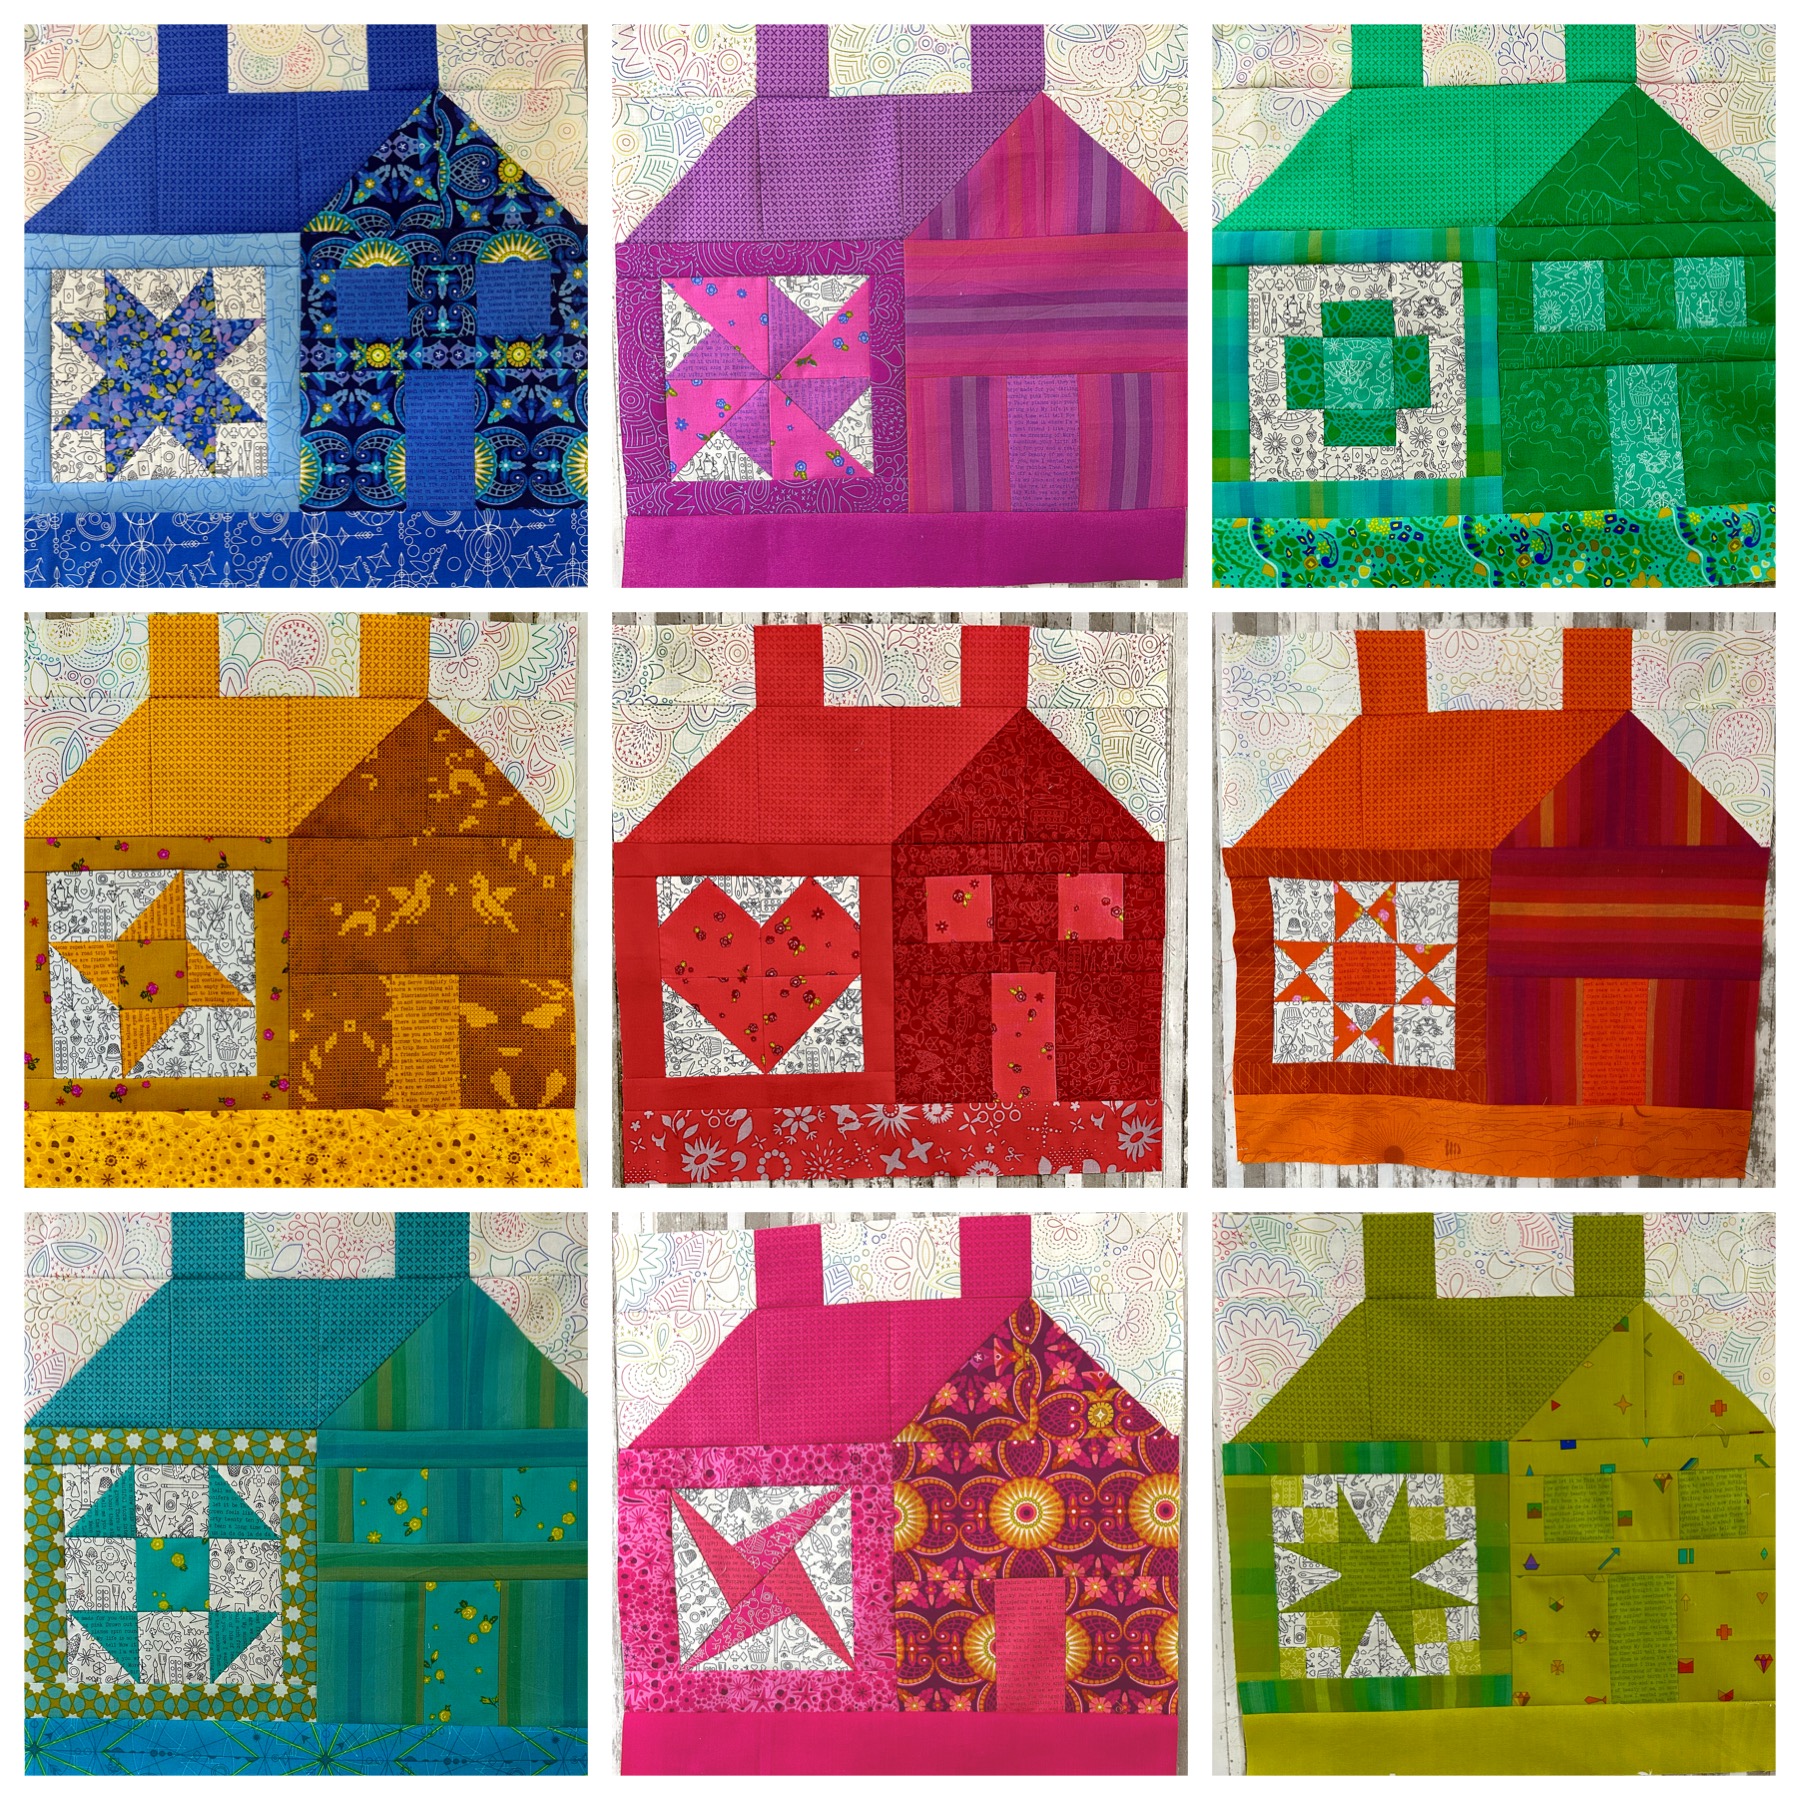
I always like to close my posts with a “glamour” shot of the quilt and thought Sushi Shuffle would look nice in front of a Sushi restaurant. Unfortunately, there isn’t one close by so this one is made possible by PicMonkey. The colors in this quilt does go with the restaurant, doesn’t it? Knowing the reason why I’m using Sushi, I didn’t think it would be pretty if I used a photo of Outhouses, right?  Now that my May Misbehaving may be over, it’s time to put together my flimsy for my other mmmust-do, the Rainbow Neighborhood QAL parade scheduled for the end of June. We’ll be leaving soon for a vacation in the mountains and I’ll be visiting The Fabric Nook to see if they have more Stof fabrics to add to the Teal Box.

Wishing everyone a Safe and Happy Memorial Day Holiday.

Linking up with:My Quilt Infatuation/NTT

Sunday, April 30, 2023

April Amazement

Despite being away from home for a total of fifteen days in April due to a Maine vacation and going to the GP House several times,  I was not expecting to have a Finally Finished this month. This past week when we were done with our travels, I worked on a somewhat secret project for one of my favorite Quilt Designer’s new book launch for early June. I thought if I was going to properly participate, I needed to first sew a top using one of my favorite patterns designed by her. I finished the flimsy this past Friday afternoon, several hours before dinner and thought I could possibly have a flimsy finish for April’s Country Thread Dirty Dozen UFO Challenge. I was thinking that I was going to skip doing a project this month but when you soon realized that there was still time, the Peaceful Kingdom Cabin Fever quilt was a big finish last night and amazing for several reasons.
I’ve been saving this group of fabrics for several years now and been waiting for a pattern which would showcase the Rae Ritchie by Dear Stella print on the left. I don’t know the name of this print and since it’s more than several years old and thinking I may have purchased it for a baby quilt for the darling granddaughter who is now six years old, I’m calling it Peaceful Kingdom since the orange tiger and deers are co-existing rather peacefully in the pretty landscape. Rae Ritchie prints are always interesting and the colors in this print are fun. Before deciding on a pattern, I’ve been accumulating prints from recent purchases and from stash. I was quite pleased when I finally put these group of fabrics together on the right which are Cotton+Steel, two Bonnie Christine prints (the mint green circles and yellow alphabet), the rose pink dots from Clothworks and the blue dotted line is from Blend’s The Adventurers. When I make a quilt with less than ten different fabrics, I think the colors need to snap together or match perfectly which means sometimes the fabrics need to be from one fabric line but with this quilt using different fabric lines made it fun and happy.
I’ve been buying/collecting Villa Rosa Design quilt pattern cards since 2011 when they first came out and now have almost thirty pattern cards which includes the ones from Pineapple Studio. I always like buying these  cards (not an affiliate link) since they can be inspiring for quick and easy makes plus you can’t beat the price. I can honestly say though, I have never made a quilt using one of these pattern cards until now.  When I decided to finally make something with my Peaceful Kingdom fabric grouping, I knew I could use one of the pattern cards and the Cabin Fever pattern by Running Doe was perfect. Thankfully I purchased this card back in January when two of my Bee Sistas ( Wendy and Kathleen) participated in a Villa Rosa Design QAL and seventeen of these cards arrived at my house. (With this many new cards, I better have found a pattern, don’t you think? What can I say- $2 each, free shipping plus an app to tell you which pattern cards you own-I just have to remember Rose Cards means Villa Rosa Design pattern list and not my list-confusing, right?)
Anyhoot, Peaceful Cabin Fever (I have to be careful typing Peaceful since I sometimes mix-it up by typing Pieceful as in Wendy’s Blog)  although it was Pieceful with the cutting and sewing of the flimsy completed way under two hours.
Imagine my surprise when I thought Saturday was the first day of May but instead the last day in April which meant I could have a Finally Finished for the month. Horizontal wavy line machine quilting was with Aurifil #2123 (a very pale yellow color), two inches apart which made it fast and easy. The blue Cotton+Steel print was used for the binding and thought I would have to hand sew it since Juki Junebug is semi-retired now. But, with finally purchasing the Even Feed Foot for Jinny Janome, I was able to sew the binding down and it turned out great. Do I dare say, Jinny performed better than Junebug for machine binding?  I’m just glad I can finally machine sew binding down once again. Peaceful Kingdom measures 39”x47”. It’s amazing that the Peaceful Kingdom Cabin Fever Quilt was made slightly over 24 hours, right? And yes, I hummed “Can You Feel the Love Tonight” song from The Lion King even though there was tiger and no lion.
I had two yards of the Rae Ritchie print which I used for the backing although I was tempted to save the leftovers for another Running Doe pattern which I did not purchase although I thought I had the Baby Goose pattern. It would have been perfect also for this print but glad I used it for this quilt instead since this makes it a two sided quilt. I just love this print so much and really should be used for a backing because it’s so pretty and interesting. I had purchased this fabric online and was not disappointed with it once it arrived and started the quest to make something with it. After I had cut the piece needed for the front, it was two inches short for the backing so I sewed two strips of a mint green print on the top and bottom and it’s not too noticeable.  I used  a Pellon Cotton/Poly batting which makes for a puffier than usual quilt, just perfect for a new baby tummy time playmat. I think the Cabin Fever pattern would be great for making tummy time playmat quilts, especially using bright colors and patterns to stimulate the baby. Also, if you need a quick quilt to make for a baby shower, this pattern would be just right.
I thought I give a sneak peek of the flimsy for the upcoming book launch. Could I name it Wild Kingdom? I seem to have a theme this month. I should be home more during May which means I will work on finally finishing my Rainbow Neighborhood Quilt, this secret Quilt plus the May quilt for the Dirty Dozen Challenge. It would be another amazing month if I finish all three since June will be another traveling month.
I thought I would end this Post with a snapshot collage of my Strips Ahoy Quilt, meeting up with Kathleen McMusing and my amazing fabric and one pattern (not a Villa Rosa Design Pattern) purchases all done while in Maine which truly was a wonderful vacation.

Linking up with My Quilt Infatuation/NTT

Monday, April 10, 2023

Glass Houses/Rainbow Neighbourhood QAL/My Blocks Are Finished

The Rainbow Neighbourhood QAL hosted by Sandra of mmm quilts was kicked off last week and just like my usual and previous mode of participating as someone who does not QAL well, I am ahead of schedule by having all nine blocks finished but for good reasons. The thought of not having a finished quilt by the June 30th Parade was not acceptable for me since this would be the first time since participating in the past six QALs that I would only have a flimsy finish. Plus, after making the First Block and like Sandra said, these houses are addicting to sew, especially with my Alison Glass stash and the guidelines/suggestions she made by as how you  can make the houses your own, it was hard for me to make only one house a week, especially with the two vacation planned during the QAL. You can read Sandra’s Rainbow Neighbourhood post Here.

I had already made the first block before reading Sandra’s Rainbow Neighbourhood QAL Kick-Off post and was really excited/inspired with  the many good suggestions she made with how the houses could be made. I swear she read my mind or now can forecast Rebel QAL behavior because I already planned on doing some of them by:
  • Choosing to make only Type 1 and Type 2 houses since they were the simpler of the designs since I didn’t want to cut up too much of the wonderful Alison Glass fabrics. It was fun putting the fabrics together from the yardage, charm squares and scraps from my Ernie Express Quilt #2. My Accuquilt Die-Cutter (no affiliation) was used to cut the squares, rectangles and HST which was made possible with normal measurements meaning there was not eighths or sixteenths. When working with the large scale prints, I did spend some time fussy cutting which is usually not my favorite thing but I do like the results. I have to admit I sure did use my seam ripper a lot, my error or lack of skills and not the pattern.
  • I changed four of the quilt blocks to more simpler blocks. (I really wanted a Heart block for the House in the center.) My earlier problem with the first quilt block not being an accurate 8-1/2” was remedied when I switched from using Jinny Janome to my Juki HZL F600 which has a scant 1/4” foot. 
  • I cut and sewed one block at a time just to stay organized but as you can see below, I work in mmmayhem mode. Another good reason for doing these blocks all at once is that this mess can be cleaned up by putting away the fabrics, die, equipment, etc. I do have some bits and chunks which will make lovely crumb blocks one day.
I can’t decide if  I have a favorite Glass House because I love them all. There’s not one that I’m unhappy  with and am glad they all play well with each other as a Rainbow Neighbourhood should. It feels so good to have these blocks finished before leaving on vacation later this week. I have another project that I’ve already started which needs to be finished by June so I’ll be busy upon my return from vacation.

I can’t say enough how fun these house blocks were to make. I’m thinking of making some more to hang on the door in holiday or seasonal fabrics.  If you haven’t already join the Rainbow Neighbourhood QAL, it’s not too late and it will be easy to get caught up. The pattern (not an affiliate link) can be purchased Here.

Piece/Peace!

Saturday, April 1, 2023

Rainbow Neighbourhood QAL


It’s time to say “Je ne sais QAL” because Sandra, mmmquilts announced her 2023 QAL, Rainbow Neighborhood and, once again, as I have for the past six years, will be participating which is now a rite of Spring and to celebrate her late father, the Famous Canadian, birthday. I had purchased her pattern last December and mentioned to her then that I thought this should be a QAL. As soon as I downloaded the pattern, I printed it which I hardly ever do and it’s been sitting on the studio desk since and knew I could start it once I decided on the fabrics. Imagine my surprise and happiness when Sandra first mentioned the QAL back on March 25th that the Rainbow Neighborhood was the pattern. I was at the GP House which meant the pattern and my stash was at home so I could only think or “mmmull” over my usual reasons for participating. Do I like the pattern, Big Yes, especially since I had the pattern and realized the blocks are 16” and the quilt blocks are 8” and not 4” as I thought they were; can I use fabric from my stash, I’m pretty sure I do but have to wait until I’m at home which won’t be for several days; and since I’m doing the throw size, the schedule for completion is doable since a block a week is sewn until the end of May and then have the month of June to assemble the top for the parade on June 30th. We have two vacations planned during the QAL so the chances of having a finished quilt may be slim but at least you only need a top in order to be eligible to win one of the many great prizes Sandra has lined up. But the main reason for making Rainbow Neighborhood will be explained later at the end of the post.
On the drive home, I decided the fabric I was going to use was my stash of Alison Glass which was the perfect choice since I’ve accumulated stash especially from buying a nice selection of yardage and scraps online from a blogger who was having a destash sale. Once I was finally in my studio I was able to choose the nine colors for my Rainbow Neighborhood along with the background, sashing, border and cornerstones.
I am so happy that I can use my Alison Glass fabrics for Rainbow Neighborhood and I’m having a little tongue in cheek moment by naming my quilt Glass Houses. I have some charm squares for most of the colors and will be using them for the 8” quilt blocks along with the black and white print. The multi-color light print will be used for the sky for each house. I should mention that the yellow green solid is not an Alison Glass print and will be used for the cornerstones. If I do any deviation from the pattern, it will be the sashing and border due to only having one yard of the multi-color black print which I want to use as the border but I don’t like pieced borders which I would have to do since I need at least 60”.

The official start of the Rainbow Neighborhood QAL is April 3rd and I’ve already started after checking with Sandra to see if there was a sequence as to which house to make and there’s not, really. My first block is already done and the cutting and sewing was easy but I need to be better with the quilt blocks measuring 8.5”. I do love that the house blocks are 16” finished, my sewing is much more accurate with large patches. I did press all of the seams open, except for the rows but in the future, will only do it for the 8” quilt blocks. My chimneys did not line up with the roof lines as well as I would have liked so pressing these two rows so the seams will nest might be better. My plan is to make three more blocks before we leave on vacation on the 12th so I will be on schedule once we return.

We did spend half of March at the GP House which the darling Granddaughter did a wonderful job babysitting us and we also celebrated her sixth birthday. Once we were home from our last visit and before I started working on the Rainbow Neighborhood QAL, I did finish my March top for the CountryThreads Dirty Dozen UFO Challenge. My plan is to make this a Patchwork Blankie by backing it with a pink plush which has been hanging around the studio. I wasn’t sure if I wanted to use Jinny Janome since I haven’t sewn plush with her yet and Juki Junebug is stored away in the dining room or the formal sewing room now. BTW, the problems which I had with Juki Junebug could not be fixed by the last shop and they wanted to ship it to shop in Alabama who said they could fix the thread cutter plus the foot pedal problem. I decided I could live with these problems rather than spend any more money. There would be certain quilts, such as this patchwork blankie, that Juki Junebug could still do. It’s just a matter of setting her up on the dining room table which I may be now in a mood to do.

As mentioned earlier in this Post that I had a really good reason for wanting to make Glass Houses, aka, Rainbow Neighborhood is because I thought it would be the perfect wall hanging to go with my Petal Pop quilt which was finished last year. The plan then was that this quilt would be for the darling Granddaughter and now with the perfect wall hanging to go with it, this will be her new bedroom ensemble. After all, she’s now the big “6” and it’s time for a change. 

Friday, March 10, 2023

Strips Ahoy, a Nice Nautical Not Naughty Finish


Back in the early part of February, I finally had the chance to work on a new project and was going to play with Janet Clare’s A Field Study fabric line but soon jumped ship when I saw the stash of blue fabrics from her Hearty Good Wishes and More Hearty Good Wishes fabric lines in the stash. My plan was to make another version of my Staggered Strips and Squares pattern but this time instead of using 4.5” Squares I would make 12”x16” blocks to go with the 2.5” strips.

I decided that I didn’t have enough different fabrics from just the Hearty Good Wishes fabrics, so I added fabrics from Janet Clare’s Nocturne and Aubade, some Japanese/Asian prints and a Jennifer Sampou Dot print as well as fabric from Moda’s Indigo line which is over ten years old.
The above are quilts/projects, Skyfall (left) made in Fall, 2021 and the Indigo Tiles Quilt and Everything Bag made in 2017. My Strips Ahoy quilt is now part of the trio of quilts made with Janet Clare’s fabrics in blues and gray and I never get tired of seeing these think these colors together.
The 12”x16” blocks were made from the Hearty Good Wishes and More Hearty Good Wishes charm packs along with yardage of a blue and a tan print. I wanted the Tan Prints only to be used for the blocks and I think this accents nicely against the blue and gray strips. The strip panel was made from over 100 2.5” strips cut in varying lengths and were sewn in four rounds ‘ala jelly roll race to make an eight row panel measuring 16-1/2” high. I also included in this mix a strip panel leftover from the Skyfall quilt.
My initial plan was to randomly place the blocks among the strips but decided on a controlled layout of two different row settings; one with a 36”(f) strip panel framed with a 12”x16”(f) block and the other with three 12”(f) strip panels alternated with two the two blocks. This measured 60” x 80”. I finished the flimsy by the third week of February and could have quilted it then and glad I didn’t. Lessons learned from the Celestial Moonrise Quilt and the Tell Tale Blues Quilt were forgotten and then remembered after looking at this photo when I was at the GP house later and that is I do not like the way blocks look when they are on the edge. 
 
Thankfully I had enough leftover strip panel to take apart to add two rows on the sides and the top and bottom. I think it looks so much better when the blocks “float” next to the strips. Some of the previous Staggered Strips quilts mentioned in this post, the strips were set vertically instead of horizontally but for the Strips Ahoy quilt the strips were set horizontally because I didn’t want the whale and fish prints to be swimming upstream but it looks okay on the side borders.
The backing is a map print that I have been saving for when I ever did make something with the Janet Clare blue fabrics. I only had four yards of it and had to add a gray clamshell print on the sides. I already made the backing with the smaller measurements and thankfully I only had to add a strip on the bottom to accommodate the larger size.
Machine quilting in Aurifil #2610 Blue/Gray thread was done with my usual but favorite straight with meandering lines horizontally but I also added the lines vertically to the side borders to create a grid pattern. The binding is the stripe print from the Hearty Good Wishes line and sad to say I’ve used the last of the yardage. Strips Ahoy measures 68” x 88”. I also like to mention that with all of the changes made, not once did I use any salty language which I have been known to do on previous quilt with a blue or Sea theme.
Strips Ahoy was finished a week ago and I delayed posting about it because I wanted to include some outside photos but the weather has not been co-operating. The first photo we tried to take outside, I realized that it was a tad too wide for the Master Quilt Holder. The plan was to take it to the GP House where the darling Granddaughter will be babysitting us for the next thirteen days and again had to wait several days until the rain stopped. Also, next door is where the Rookie Quilt Holder resides.
The Rookie Quilt Holder assisted the Master Quilt Holder to finally get a nice full-size shot of Strips Ahoy.
I do like this shot also since the house and sky matches the colors of this quilt. Would you believe after these photos were taken and we were inside, the Sun made an appearance.
We will be traveling to the East Coast mainly Maine and Niagara Falls and will be taking this quilt with us since I think I need some photos of Strips Ahoy by the Ocean and Falls. We will be meeting up hopefully with my Bee Sista, Kathleen McMusing, and I’m sure she will know some places to take photos. I’m also pretty sure she won’t be able to hold up the quilt though (a little inside joke here). I do have the perfect bag to carry Strips Ahoy in.

Linking  up with: My Quilt Infatuation/NTT


Thursday, February 9, 2023

Lotta TaDa—The Last Two Quilts Finally Finished

I thought this was a good title for my post about my Lotta Jansdotter quilts. Last August, I observed a”Ya Gotta Lotta” month with the making and finishing of the Lucky Jerry Lotta Quilt plus two flimsies using my stash of Lotta Jansdotter fabric. I’m participating in the 2022/23 Country Threads Dirty Dozen UFO Challenge and have a choice of finishing a project that’s either a UFO or the designated color/pattern of the month. I’ve also included additional choices like a project with a designated fabric designer, scraps or a flimsy waiting to be quilted which is my preferred choice. 
Lotta Jansdotter was my August designer and although my plan was to quilt my Mori Girls flimsy, I was distracted by my Studio Squirrels who were chanting “Ya Gotta Lotta” inside my head so the Lucky Jerry was a start and finish way before mid August. After that, I did finally quilt Mori Girls and then proceeded to make four more flimsies, two of which from the still not depleted Lotta Jansdotter stash. 

Here are details of these two quilts:
The Lotta Love Bundle Buster quilt is a modified version of Quilting Jet Girl’s Bundle Buster pattern (not an affiliate link but one of my favorite patterns for strips).

When the Lucky Jerry Lotta Quilt was being planned and the decision made to eliminate the orange, blue, purple, fuchsia, pinks and lilac fabrics, I still wanted to make a quilt with these fabrics and the Bundle Buster pattern was perfect. This is the fifth time I have made a quilt with this pattern and it’s really easy to modify the size of the strips and blocks.
Here’s a pic of some of the blocks in the quilt and you can see the different colors playing well with each other.
Lotta Love is the third quilt I quilted with Jinny Janome and unfortunately I had some problems with what I call dragging but was soon remedied. Since I wanted to quilt straight vertical lines 1” apart, I used a quilt guide on the walking foot which put some pressure on the quilt sandwich and I should have set my pressure at zero instead of 1.5 which is my usual setting. Lesson learned for the future. I used Aurifil thread in Silver.
The backing was the blue bead stripe which I had in my stash for way over five years and the binding was my favorite stripe in Citronickle. Lotta Love Bundle Buster measures 64” x 80”.
Orangentina, so named way before Argentina won the Soccer World Cup, but I will admit singing the Evita song while this quilt was being made. Since I still had some squares and strips left over from Lotta Love,I decided to make a quilt like my previous Slinky quilts. I used the orange bead stripe as the setting strips on the side but alternated the direction to give it more interest and I like the look. I finished the flimsy before the Lotta Love flimsy which was my reason for quilting it first.
Here’s a close-up  of the quilting; I quilted wavey and straight lines with Aurifil thread in silver with no problems. I have to mention that there is a print that is not Lotta Jansdotter and its the blue stripe print with the gray Seals. I thought it went well especially since I thought the Cat print needed company.
And speaking of the Cat print, I was very proud of myself for using it as part of the backing. Good Quilt Friend, Carol, gifted me with three yards of this fabric, even after I threw her under the bus with Mary Etherington who started the Ernie quilts which were named after her orange Farm Tiger/Cat. Carol has an unique gift of interpreting quilt patterns and I happened to point it out to Mary. When I was given the fabric, I did plan on using it for a backing and may have been a little hesitant at first but decided it went well with the orange stripe. Do you see that organic shadow on the left photo? I hope it’s not bad woo-woo from Carol because I could not figure out what was causing this shadow to appear. The binding is the other navy stripe in the Lotta Jansdotter collection. Orangentina measures 60”x84”.
Here’s a photo of the three quilts together, the Lotsa Lotta Lovelies. These quilts have me thinking of Summer especially with the cold, wet weather we’re having today which is why all the photos were taken indoors. I can see these three quilts laying on porch cots during the Summer but in reality these will be my Summer quilts for the living room. I have to say it’s hard for me to pick which one is my favorite and also that I still have lotsa Lotta fabric left, especially scraps. It was hard to finally put these fabrics away but I really want to work on some new projects.

Linking up with: My Quilt Infatuation/NTT