Wednesday, September 30, 2020

Sweet September SewJo

Despite making four trips to the Grandparent House and only spending fourteen days at home, I have five Finally Finished which makes this a very busy and productive month for me.  Apparently when only having a limited schedule for quilting, I can be pretty focused.  The first Finally Finished for September was my Shine Quilt which I posted on September 8th.  My next four quilts were for the Jelly Snowflake QAL, a Dreami, Country Threads Dirty Dozen QAL and a surprise finish; here are the photos with a brief description of each.

Emily, The Darling Dogwood, and I decided since we already did two of the same QALs this year without us knowing that neither one of us was sewing together, we would do a third one together and we decided upon Fat Quarter Shop’s Jelly Snowflake QAL.  You can see Emily’s beautiful interpretation Here.  I have mentioned in previous posts that I consider myself a QAL Escape Artist and Emily seem to have followed in my sew steps, in that, we did the first two blocks as per the pattern and then veered off with our own  finishes. The Jelly Snowflake pattern was beautiful and made great use of jelly roll strips but I wanted to showcase more of the fat quarters of the Stacey Hsu North Pole fabric which I received several years ago in one of the Fat Quarter Shop’s Christmas Sampler Box. That’s all I’m going to say about the Jelly Snowflake pattern and named my quilt Frosty Flake because of the snowmen on some of the prints and because it is my favorite breakfast cereal.  After the top was completed, I immediately knew how I wanted to quilt it with the straight-line diagonal quadrants with red thread.  Frosty Flakes measures 48” square and it’s going to be nice to have a new Christmas quilt to hang up this year.  BTW, I thought that instead of calling myself a QAL Escape Artist, I would give myself a new name or descriptor: Sewing Rose-gue, it seems to better explain how I quilt.


While searching for the red binding for my Frosty Flake Quilt in my red stash, I came across the Watermelon fabric with the matching large red gingham print and immediately knew I had to make something for the darling Granddaughter.  Since I’ve been spending so much time with her, I’ve become quite fond of the CoComelon videos which are fun and addicting to watch. Even when we’re not at the GP House, Hubby and I are humming and singing many of the tunes.  A simple patchwork blankie was made with some fun green prints from the stash and another red print.  I had the perfect shade of a coral pink Minky yardage in the stash and a quilt was made before the next GP visit.  This Blankie measures 40”x56”, which is a nice size for snuggling for one person but I would have made it bigger if I had more of the watermelon and red gingham print.
The month of September also meant a new UFO finish of our #11 for Country Thread’s Dirty Dozen which was my Flea Market Square. The top was made over seven years ago and it seems that during this time, I made a lot of square quilts and some of them I have committed to finishing for this QAL.  I didn’t keep any notes on the making of this quilt and I was able to ascertain that a charm pack of Moda’s Three Sisters Flea Market II was used along with some yardage.  At first I didn’t remember even what fabric line was used but was able to guess after looking at one of the charm squares which had a Paris map and was able to connect it to one of the Flea Market lines.  I was happy that I found the quilt top with the backing and binding safely tucked away together.  
I’ve mentioned in previous posts how I was inspired by Mary Etherington of Country Threads to do straight line quilting on traditional quilts so I thought since I was finishing this quilt as part of her QAL, it would look appropriate for Flea Market Square.  I quilted it with a very pale pink Mettler thread to keep the quilting  quiet and simple. I usually don’t back my quilts with fabric from the same line, partly because of cost and not wanting to waste it especially for a wall hanging, but I must have purchased the plaid when it was on sale because I had three yards of it.  I do love pairing plaids with florals.  Now that this quilt is a Finally Finished, I have a place to hang it on my bedroom wall since I’ve been meaning to replace the current artwork which has been hanging around for over twenty years.  Sad I won’t see the backing, but I’ll know it’s there.

Since I had a day left before the end of September when I wanted to post, I thought I would squeeze out one more Finally Finish with the Big Blinky Bill Blankie. I made the top earlier this year and is one of the flimsy made during my Flimsy Frenzy February.  The top was inspired by my Slinky and Pinky Quilts which is a simple pattern using squares and rectangles.  When I wrote the posts for these quilts, I mentioned I was inspired to make more and keeping the “inky” in the names.  Good Quilt Mentor Sue of PatchworknPlay offer up Blinky Bill which is an Australian Children Book Koala character.  Since I didn’t have any Koala fabrics I thought the next best thing would be to use my stash of Aboriginal prints which have been sitting far too long in the stash with solid squares of Shot Cotton, Peppered Cotton and Aged Muslin.  I thought this top could be a quick Finally Finished if I made a Patchwork Throw by only backing it with my favorite gray Chenille Plush.  It measures 52” x 82” which would make it a throw according to my rules, but since I love alliteration in my quilt names I’m calling it a blankie, thus the name Big Blinky Bill Blankie.  Since Hubby’s name is Bill, this will be his, especially since with the other patchwork throws I made with the plush for the backing, I’m always telling him how wonderful they are for snuggling and napping.  Now he will have his own to find out how true this is.
I still managed to find time to start others projects and keeping up with my 2020 Color Challenge blocks.  I’m calling this a month now and maybe rest for the remaining few hours left.  But no, I still have 1.5 days left before we leave for the GP House again and the studio here is still where I’m the most productive; probably because I don’t have a sweet distraction beckoning me to play with her.

Tuesday, September 8, 2020

Septe”MMM”ber Shine

It’s been awhile we’ve been home for at least a one week stretch and one of the projects I needed to finally finish was my Shine Quilt designed by Sandra (mmm quilts).  The flimsy was finished in early August but in between the numerous visits we made to the Grandparent’s House since then, this was the first time I had a decent block of time to tackle the quilting.  To tell you the truth, if you’ve seen Sandra’s Shine Quilt and admired the exquisite quilting she did on her quilt, you would understand my hesitancy in quilting straight lines which is the only type of machine quilting I do besides wavy lines and thinking that it would look too bland.  Surprisingly, I love how the straight lines looks and doesn’t the sunlight dappling through the tree branches onto the quilt make it “Shine”?
To give you a little back story on how the quilt got to be made, Sandra asked me a few months back if I would like to be a pattern tester for her Shine pattern which you may wonder why she would ask me since I”m a little rebel or tend to “misbehave” when I joined her QALs which have been, according to my calculations, five.  I’ve always did something a little different with either the background or construction and did not always follow her pattern but the finished quilt always looked the way Sandra designed it.  I promised Sandra that I would be a good pattern tester and would follow her instructions completely.  I chose to make my Shine quilt with Carrie Bloomston’s Wish fabric line with Ruby Star Society Spark fabric for the background.  I chose this for the background since I thought the Silver Gray fabric would help the letters and stars stand out and also I wanted a background fabric with a little detail to make up for the inevitable lackluster quilting.
This is the first time I had the opportunity to be a Pattern Tester and I took this task very seriously.  I read the cutting directions very carefully to make sure it was accurate.  I did order an extra half yard of the background just to make sure I had enough in case I made an error cutting or in this case my iron acted up and splashed rusty water while I was ironing it and ruined a quarter yard.  Thankfully I still had enough.
It didn’t take me to long to break my promise to make the quilt according to her instructions.  Sandra let me deviate from her Flying Geese method since I like to make them using my die-cutter and that was the only time I “misbehaved”. 
I wished I could had a video of me sitting by the sewing machine, concentrating on following the instruction with my finger running over each line to make sure the patches were sewn together correctly and then lifting my head up and staring into space when I realized then that I wasn’t a Pattern Tester but Sandra gave me a pattern test to see if I could really focus and follow her instructions. This happened when the patches were almost all sewn together into blocks. Talk about getting schooled for my “bad” QAL behavior.  At least the “test” was easy and also very fun to sew, I’m not saying this for extra credit.
I think I passed and learned some patience in sewing the top together.  I’m never one for pinning rows together but for this quilt I did to make sure they lined up.  Funny fact about the making of the top was I was really tempted to only finish the left half of the quilt since I thought that the Shine panel would make a nice banner especially for a classroom but my determination to be a good “Pattern Tester” prevailed. Also, I like to mentioned that this is the first time I ever pieced letters and really enjoyed making them.  I even told Sandra she has to come up with the rest of the alphabet.

Once the straight line quilting of 5/8” apart started, it was a breeze, no pinches or puckers.  It was really nice using Aurifil thread for both the piecing and quilting.  I really thought the straight lines would be boring but I think it gives the quilt a nice graphic look.
While I was machine quilting, I was listening to “The Gown: A Novel of the Royal Wedding” by Jennifer Robson which was recommended by Wendy of Pieceful Thoughts.  It’s a story about the embroiderers who worked on the wedding dress which inspired me to embroidered some of the stars around the flame with yellow floss. 

The backing was yardage of a gray dotted fabric I had in my stash which I love when that happens.  I originally wanted to bind the quilt with the same solid yellow fabric as the small stars but decided the gray and white geometric print would accent the colors of the quilt better; the yellow would have been overwhelming.
Shine was a Finally Finish this past weekend and of course rain was in the forecast so I didn’t think I would be able to post until later this week. Surprisingly the sun was shining on Labor Day and we had the opportunity to go to a friend’s house which has acreage to gather acorns for my squirrels.  I brought along Shine so I could take photos of it amongst the trees and, of course, with Honest John, the twelve-foot road sign on the property.  They look good together don’t they?

Here is the Link to the Shine Pattern which is available to purchase from Sandra’s Etsy Shop.  This is not an affiliate link and just wanted you to know where you can purchase this fun pattern. I still am tempted to make just the Shine panel which would make a nice door quilt or a banner for a future classroom.

It’ll be a few more days before we leave for the Grandparent House and my Shine Quilt will be living there now in the darling Granddaughter’s bedroom.  I’ve already made her another Patchwork Blankie which I will share on my next Post along with other projects done during the rest of September.  It seems like Summer is leaving us too soon. Hope everyone stays healthy and happy.

Tuesday, August 25, 2020

Best Finally Finished:Pipertown

I’m participating in Country Threads Dirty Dozen Challenge which started in July and I have committed to finishing twelve UFO’s, one for each month, for the next twelve months.  I’ve done a few QALs and BOM with Country Threads in the past and always have stayed on task.   So far, I am now two for two with my big finish this month of a top which I made in 2000, twenty years ago.  I used to keep a spreadsheet of my quilting activity back in the early days so I checked it to see when this top was finished and much to my surprise as to how long ago it was but I also forgotten who my inspiration was for this quilt top which has been hanging around in my studio for too long. I mistakenly had referred to this top as my Pluto Dash quilt; Pluto being our dearly departed Blue Tick Coonhound but when I looked at my spreadsheet, this quilt was named after Piper, a Black Lab whose owner I worked for some years at her quilt shop.  Whenever I worked at the quilt shop, Piper was my charge and I seemed to be the only one he would listen to which I attributed to me being the one who gave him good cookies.  I need to remind Carol, my Quilt Peep of this important fact from our quilt shop days who is also tasked with verifying that Amy Butler once gave me a quilt pattern. 

When the conversation print of the dog came to the shop, I knew I wanted to make a quilt to showcase the print, I loved it so much, I bought all three of the color ways it came in; brown, black and blue (which is the color I would use for Pluto).  This is the  black color way and although it looks more like a hound like my Pluto, the black was going to be for Piper, who was named after a plane but to me his name reminded me of Scottish Bagpipers.  

I can’t remember the inspiration for the pattern but I remember designing it on EQ which is simply 8” Churn Dash done in two different colors, one with red HST and black HST with 8” HST in the dog print and black and 8” plain black blocks arranged in a barn raising layout. This quilt measures approximately 60” by 75”.

Here’s a close up view of the seven prints used in this quilt, many of them old friends like the black eyelash print by Jinny Breyer, which is one print I wished I still have some more. I chose the red plaid print in keeping with the tartan sounding name of Pipertown.
When the top was finished I knew back then that I wanted diagonal straight lines going around the center of the quilt which wasn’t common back then for a longarm quilter to do and I didn’t want a pantograph.  Also back then, I knew I couldn’t machine quilt it myself, it took twenty years for me to get up the courage to quilt it the way I wanted.  There were a few times I wanted to quilt just straight vertical lines just to get the quilt finished, but I’m glad I stuck with my initial plan.
At first I had a problem with pin basting on the diagonal until my 3” wide ruler came to the rescue in keeping the pins straight and 4” apart.
And keeping me up the night before I started the machine quilting was thinking how I was going to mark the quilting lines but the guide on my quilt foot was the answer to keeping my lines 1” apart.  I used a black Aurifil thread for the quilting and liked the way it turned out.  
I started the machine quilting at the corner ends which is where I usually start when I straight line quilt and was worried that once I started quilting towards the center it would be a puffy mess but glad it turned out just a little puffy with no tucks or pinches.
Another worry I had about this quilt, was if I would be able to find more of the red plaid for the binding and was lucky to find that when I was setting up my binding drawer I had put some of it away thinking that this quilt would eventually be finished.  Big Whew here. The backing is another Jinny Beyer print which I must have purchased at least ten yards of it since I used some of it for another quilt.  I’m pretty sure I must have bought it on sale.
One of the reasons why I chose this quilt to be one of my “Dirty Dozen” was that it would go with the other red and black quilts at the Grandparent House where it is now residing.  Right now it’s covering one of the chairs in the living room but don’t know if it’s going to stay there since I have a dog, Sophie, who likes to scratch and snuggle on the quilts and a granddaughter who likes to throw quilts off the chairs.  I’m not looking forward to the day I have to wash this quilt and pray the reds won’t bleed onto the light dog print by using a gazillion color catchers. Hopefully the quilt won’t get ruined and if it does, I have more of the dog print and it won’t take me twenty years to finish it. I have the machine quilting experience under my belt now.  All the worries which came with the finally finish of Pipertown ended with a big sigh of big happy relief and happy dancing for me.
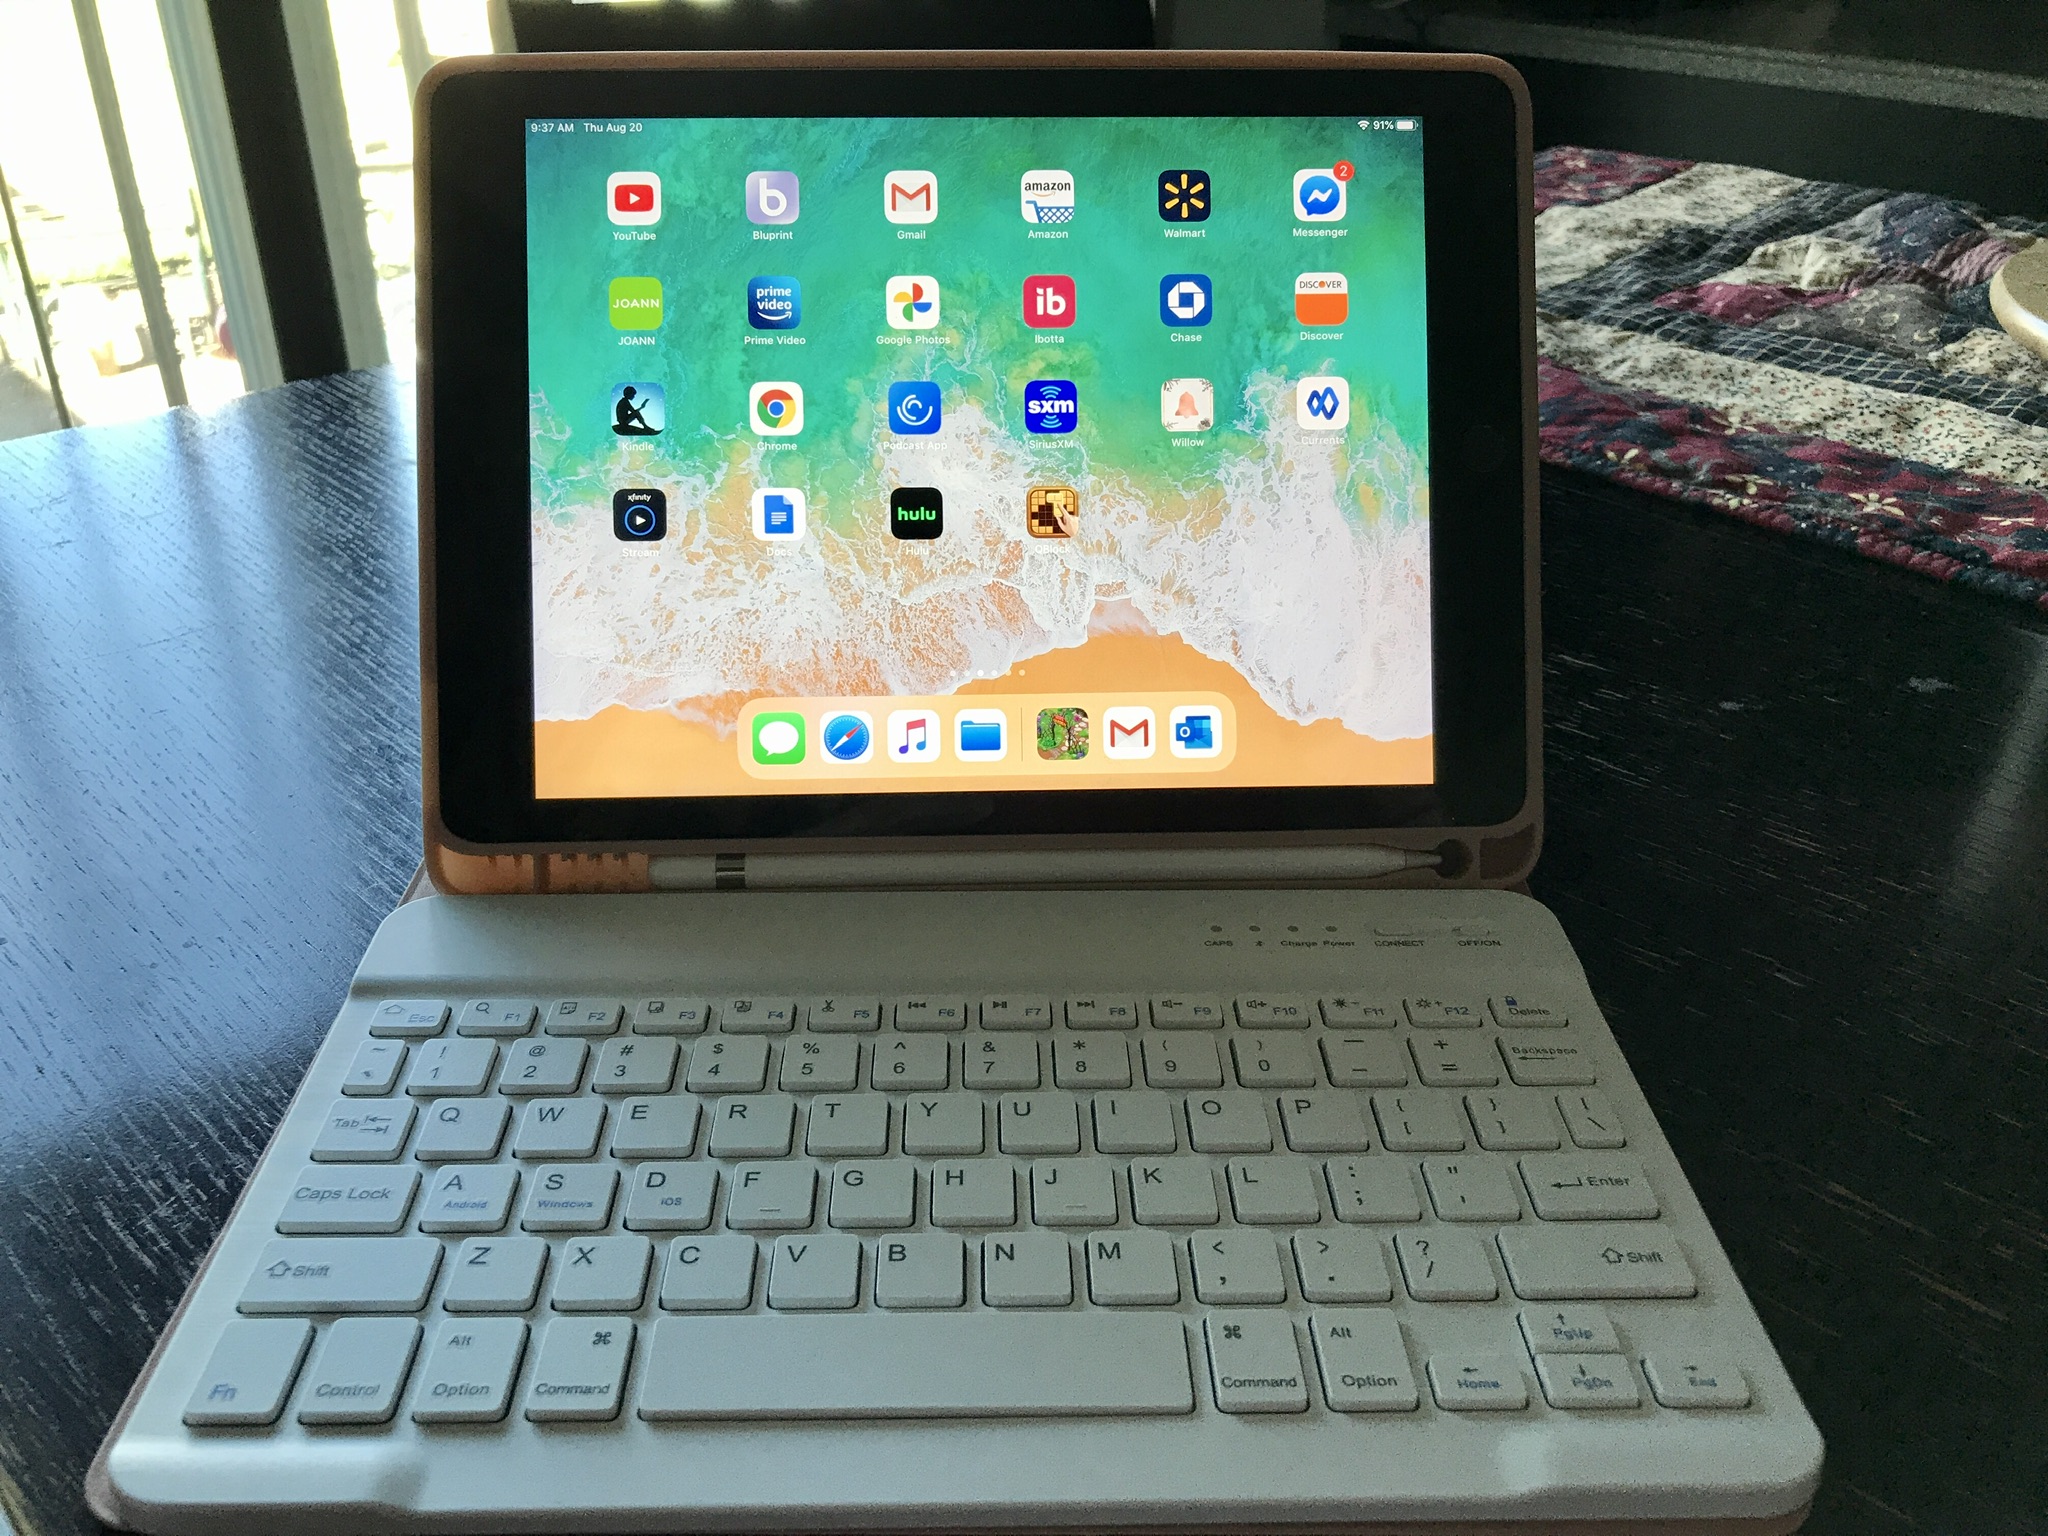
I now have made typing peace with the new Blogger Interface with my very recent purchase of a keyboard for my iPad.  Why I didn’t think of this before is a mystery, even more why no one suggested it before, Kathleen—this is a game changer.  Since my last post, I now know how to add links which there are none in this post and labels; almost back to the good old Blogger days.  I’m also pretty proud that I realized all by myself that I didn’t have to switch the iPad from the keyboard case to my usual pink case which is the one my granddaughter knows for her video watching, the keyboard is portable and isn’t attached to the keyboard case. Hopefully this new Blogger Interface is going to stay awhile because I don’t how much more adaptability or flexibility I have left in me.

Friday, August 14, 2020

July/August Blog Break

It’s been six weeks since my last post and I decided to give the new Blogger interface another go, despite reading other bloggers’ comments about problems they’re experiencing and also seeing how elongated photos are appearing on their blog. For the past few days I’ve been trying to decide whether or not to leave  Blogger and join Wordpress which comes at a cost I’m not sure would be worth it. This afternoon I had some luck with editing my 2020 Quilts and Project page and was comfortable with using the editing tools once I knew how to access them. So, here I go with posting what I’ve been sewing/finishing in between the three visits to the Grandparents’ House, mostly photos with brief descriptions.  And if my photos are experiencing the same problems with elongation, I might be posting photos of myself since my Twiggy Days have been long gone.

I’m participating in Country Threads 2020 Dirty Dozen QAL which started in July and I committed to finishing twelve UFOs. Coincidentally, the number pulled was for a Country Thread’s Pinterest Kit for a table runner purchased before the shop closed over five years ago. The runner is now a Finally Finish and sitting prettily on the dining room table at the GP house.

Sandra, mmm Quilts asked me if I would test her latest pattern “Shine” which I was happy to oblige since it was an opportunity for me to use my recently acquired Carrie Bloomston Wish fabrics. The flimsy was finished several weeks ago and the pattern is available from Sandra’s Etsy shop “SandraJaneQuilts”. Once my Shine quilt is a Finally Finished, I’ll write more about this quilt and my adventures of being a “pattern tester”.

Emily, The Darling Dogwood, and I decided our third QAL together would be Fat Quarter Shop’s Jelly Snowflake and both of us decided independently of each other that our quilt would be a little different. My modified version doesn’t look like a snowflake but there are snowmen in some of the prints so I named this quilt Frosty Flake, so apropos since it is my favorite cereal.


Two baby quilt tops were made for Jack’s Basket.

Granny Squares blocks were sewn for an QAL between Sistas and waiting for sashing and border.

My August block for the 2020 Color Challenge is sewn and the color this month was Pink for Flamingos.


Last of all are two feedsack fabric projects which I was able to work on while at the GP House. Surprisingly, the darling granddaughter showed no interest in my sewing machine, supplies, fabric-it’s a good thing we have a lot of good toys and videos to distract her, along with snacks.

I gave myself a little pep talk these during my blog hiatus to spend more time in my studio and try to commit to a number of hours each day to my “craft”. I should mention that I haven’t done a very good job in recording my activities in my planner and not tracking my fabric log but pretty sure it’s negative, maybe barely. Also it was a little tedious typing my post on my iPad, just don’t like my index finger doing all the talking and also the uncertainty with the new Blogger interface. I’m glad to be able to post before we leave for another visit to the GP house. Here’s to better Blogger Days and to figuring out how to insert links and labels.

P.S. before I published this post, I learned that I inadvertently typed this as a Page and not a Post and thankfully nothing was lost. My index finger could not handle the retyping.

Saturday, July 4, 2020

Celebrating the 4th With My Fourth Finally Finished Quilt

Our trip to the Grandparent House was delayed so we ended up spending the 4th at our house which meant I could finish my Mackinac Island Rows quilt which was the first RWB (Red White and Blue) quilt I started this year but was set aside for the other three RWB quilts I just posted. After all, it was time to finally have a quilt made from the Minnick & Simpson Prairie Paisley Fat Quarter Bundle purchased in 2008. 

I started this quilt back in March when I came across two Charm Packs of Minnick  & Simpson's Mackinac Island which may have been part of a Fat Quarter Shop Sew Sampler Box. I thought that I would either make a Jelly Charm Chase or Staggered Strips and Squares Quilt but thought the layout needed to be more controlled since I didn't have a large variety of strips from my Prairie Paisley Fat Quarter Bundle.  I added to this mix, two fat quarters of large floral prints and a homespun plaid once a pattern was decided.
I decided to make another variation of a Strips, Squares and Brick Quilt and drew a layout on my trusted graph paper.  You wouldn't think by looking at this quilt, a lot of planning on the color sequences of the rail blocks, squares and bricks went into this quilt.  I was lucky that I only had a certain number of rail blocks in certain combinations and there were enough of each to have a balanced layout.
Over the course of several months, the rail blocks rows and the brick strip were sewn.  They were assembled into five panels; three of which consisting of one brick strip of seven 4.5" x 8.5" rectangles  framed by a rail block row of seven 6.5”x8.5" rail blocks and two panels consisting of three rows of fourteen 4.5" squares each from the charm squares which were trimmed. This quilt measures 56" x 72".
You can see by this photo the two different layouts of the rail blocks, one with light blue,  red and light strips and the other with red, light, and dark blue strips and they were laid in a certain way to contrast with the brick strips and the charm square panels.  This is a nice and easy pattern and I have plans to make this again with other fabric collections from the past which I somehow bought a charm pack and yardage.  I also decided if I ever buy charm packs, I should buy at least two.
The machine quilting went well with the combination of straight and wavey lines in red thread.  Backing was the ticking stripe from the Prairie Paisley line.  I considered doing a wide 1" binding in the red stripe but decided the usual size would accent the blocks better.

Two little tidbits about the Minnick & Simpson and the Prairie Paisley bundles as I was preparing to write this post.  When I was figuring out how the Prairie Paisley fabric was purchased, I remembered how much I loved the fabric so I purchased both a fat quarter bundle and yardage. I knew the bundle was no longer intact when I started the Mackinac Island Rows quilt since some fabric was used and was wondering what I could have made with it.  Well, duh, it was the Snowball Quilt (top) and I only posted about it just five days ago.  It was a chuckle and head shake moment.  As to why it took me so long to finally make a quilt, it could be sort of a grudge against Minnick & Simpson for the 12" block they designed for Fat Quarter Shop's Moda Designer BOM in 2007/2008.  This is the BOM, my Quilt Peep Carol and I refer to lovingly as the Block of the Month from Hell and the Minnick & Simpson block is the one we always mention when we talk about it.  Would you believe there were 91 patches of half triangles, squares and one plain rectangle sewn together for the background and another 10 for the appliqué for the darling pail and flag which I fused and raw edged sewn by hand-a total of 101 patches. Sometimes I wondered if the Moda Designers were trying to outdo each other to see how many patches could be in their block. I never finished the quilt, (there are three blocks left and I can't remember where I put them) partly because it was full/queen size, definitely made to hang on the wall and fortunately for me there wasn't a wall in my house to accommodate it.  I thought of making two smaller quilts, one with the appliquéd blocks and the other with the pieced blocks.  They really are sweet blocks and maybe one day I will post them.
Here's another photo of the quilt.  At first, after the top was made, I thought I could wait until later to quilt it but the next morning I looked at the photo of the top and decided I needed to quilt  it now since I thought it would be nice to have it finally finished by the 4th. Plus, I once again have an SOS ("Seasonally On Spot") quilt-coined by Nancy of Grace and Peace Quilts. It just wouldn't be appealing to post this quilt in the Fall.  I will say my RWB mood has now left the studio.

Also, a confession, I reverted back the the Legacy Blogger for this post since I had a number of links I wanted to use and right now I have not figured out how to do this on the new Blogger Interface.  I can't wait for Sandra's, mmm quilts, in-depth tutorial.

I hope everyone had an enjoyable 4th of July.  It's now evening and the neighborhood is filled with fireworks.  I know one dog, Sophie, is not happy right now as well as some of the other neighborhood dogs.

Wednesday, July 1, 2020

In the Mood for Red, White and Blue


‘‘Tis the month for sewing red, white and blue quilts which means I have three Finally Finished, two of them longtime UFOs and one quilt a start and finish within nine days which would have been done sooner if not for a five day visit to the Grandparent House. I already have a nice collection red, white and blue (RBW) quilts and it’s been awhile since I’ve made one, with the exception of some small wallhangings, but these three just “happened” to get made. 

This is the first RBW quilt finally finished and if it weren’t for Mary Etherington, Country Threads posting the one she was currently working on, there was a strong possibility this would have remained a top. It’s been over five years since this was made and was a QAL which Mary hosted. I changed the dimensions of the blocks to 6” finished so I could die cut them and used fabrics from my Minnick & Simpson stash. Seeing Mary’s current quilt gave me the impetus to finally quilt it. It’s the first time I’ve ever sprayed basted and really liked it and thought it would be a game changer but as I later discovered it works best right now for small quilts. This quilt measures 28” square and already hanging on the hallway door.

This is the second RBW quilt which I finally finished as a result of the first quilt because I made the two at the same time and it just wouldn’t be right for it to remain an UFO. The pattern is Dandy designed by Pat Sloan and she also hosted a QAL. I thought this was a great pattern for the Zippity Doo Dah fabrics designed by Sandy Gervais which I had a layer cake and yardage. This has to be one if the few quilts I've made which only used four fabrics. After I made this top, I wasn’t sure how to quilt it so that’s why it was an UFO for so long.  I decided to quilt it with curvy horizontal lines and again I spray basted it and this time I don’t think I liked it as much with the numerous pinches and puckers. This quilt measures 34” x 46” and will be a seasonal table topper for the dining room table.  (I’ve been thinking a lot of Pat lately because right after I finished my Dandy quilt, I learned that while going for a walk, she tripped over uneven pavement and broke both of her wrists and had surgery today. I’m a big fan of Pat’s patterns and fabrics and wish her a speedy recovery and hope she heals well.)

While hunting for the binding for the Dandy quilt and coming upon the Zippity Doo Dah layer cake, I knew I wanted to use it for an Algorithm Quilt, a pattern designed by Gundrun Erla, GE design, which is a fun pattern to make and a nice change of pace from the strip and square quilts I’m fond of making. Would you believe, we're at the end of June and this is the first quilt the Master Quilt Holder has held up outside? 


The pattern did not include borders and measures approximately 49"x64". Normally I do not add borders but thought since I still had yardage of the floral print I would add borders so the quilt measures 57"x70 which is a nice size to cover more than a lap.

Since I added borders, I was tempted to quilt straight through the borders but decided that I would start the straight and curvy line quilting inside the top and bottom and spent the time burying the knots.  I was going to use a natural color thread and glad I decided at the last minute to use instead Red. For the borders, I also did a combination of straight and curvy lines also.

For both the Algorithm and Dandy quilt, I was able to back it with a 2001 print designed by Jill Kemp/Bear Paw Design.  It's a patriotic print with text saying "Remember Me' which I'm glad I did because it's definitely been waiting to be used.  Since I didn't like the red print I had left from the Zippity Do Dah stash, I decided to use a ticking stripe of red and natural which went well with the other prints.

If you read my last post about my Centred Quilt, which I mentioned that I was unhappy with the new Blogger interface and some may have interpreted that I wasn't going to post anymore since I wrote that this post would be the last post I would do in the old or Legacy Blogger interface which I dearly love. Well surprise, surprise, I'm writing this post in the new Blogger interface since I decided to put on my big Blogger pants and post with the flow.  My mentor Sue of PatchworknPlay and tormmmentor Sandra of mmm quilts have been helpful.  I discovered one of the problems I was having is that my MAC Pro Laptop is ten years old and cannot support the new Blogger interface so the toolbar was not appearing.  It worked on my iPad but there was no way I was going to type with one finger.  My hubby suggested that I try typing it on my PC and it works but I had problems with uploading photos directly from OneDrive.  Another problem is inserting links so I apologize for not including them in this post.  Hopefully, Sandra, who promised a little tutorial for the new Blogger interface can offer some insight.

Wishing everyone a Safe, Happy and Healthy Fourth!