Showing posts with label 2.5” strips. Show all posts

Friday, September 9, 2022

Kitty Corn Mix-A Halloween Quilt For You Know Who

Since the beginning of September when the Country Threads Dirty Dozen Challenge project number and color was announced, I’ve been busy working and finishing the two projects I designated. My first project, the Kitty Corn Mix, was made possible with Mary Etherington’s choice of the color Orange to be September’s color. Normally the color is drawn but she thought with Fall approaching that the participants wanted to work on projects with pumpkins. I was more than happy to switch to my Orange projects from the Neutral projects which was my #11, the number Mary did pull, because I did want to finally make something with the Kitty Corn fabric purchased last year. Also, this would be a quilt for my favorite recipient, the darling Granddaughter.
With the jelly roll and one yard-cuts of two focus prints and the black and white gingham, I came up with a version of the Ernie Quilt. I did make a slight change later to not making the kitty blocks with the black and white gingham because I didn’t have enough fabric plus the kitty print is just that cute.
The blocks are 8.5”x12.5” and there is a mix of five different types; two were just plain cuts of the two focus prints, one was a four patch block with the two focus prints which was made because there wasn’t enough of either focus prints and two type of rail (Ernie) blocks made either with two prints or somewhat scrappy since again I was out of jelly roll strips.
I spent some time arranging or tweaking the blocks in a controlled layout; the rail blocks with black were in the center, the rail blocks with teal green were next to the black blocks and the blocks with the light green are on the outside. The plain blocks with the kitty print are in the center and the blocks with the black focus prints are on the outside. There were some blocks made with the plum prints and I decided not to include them in the quilt. After the above pic was taken, I did make one more “tweak” and then I was ready to sew.
Machine quilting in a light Apricot Essential Thread with my go-to straight and wavey lines went well. The binding was the black and white gingham print and I’ll say it again, I just love binding my quilts with a gingham print. Also, I was lucky to find the gray and white dot print in the backing vault. The Kitty Corn Mix Quilt measures 56” x 84” which is a nice size for both the darling Granddaughter and I to snuggle under. It’s nice to already have a quilt finished in time for Halloween and I will be taking it to the GP House this weekend.
I really have to stop making my quilts so long as it’s getting hard for the Master Quilt Holder. Fortunately, he was able to hold it up by standing one the front porch and letting Kitty Corn Mix hang down. I’ll be posting soon another quilt finish for the UFO Challenge and this one we needed the ladder. Stay tune!

Linking up with: My Quilt Infatuation/NTT

Thursday, August 18, 2022

Mori Girls Quilt

My Mori Girl Quilt is my official finish for the August CT Dirty Dozen UFO Challenge. I was confused at the beginning of August when I forgot I compiled my list a little differently from Mary Etherington who is pulling from two lists, one for a number and one for a color. I combined her two lists by using her color list which she numbered as my list. This month she pulled #12 and Yellow and my #12 is any UFO/project which were stripe or contained stripe fabrics. My Mori Girl quilt was a flimsy made in December of 2020 and this finally finish has hit a sweet spot with me. No surprise that the Mori Girl print reminds me of the darling Granddaughter, the one time baby who has morphed into a little girl.
I had purchased a remnant piece of Mori Girl along with a gray ticking stripe from Bernie/Needle and Foot and knew I would have no problem finding fabric from my stash to go with it. My palette for this quilt was black/white, gray, gold and coral pink. I love the black and white print with the red dots used for the QST which was perfect for the Mori Girl print with its crosshatched lines. 
And speaking of the QST, my plans originally was to use four-patch blocks but when I was drawing out the layout on my trusty graph paper and rather than marking the squares with a plus sign, I used an “x” and decided that this was a better block since it mimics the hair bows and butterflies in the Mori Girl print. I should also mention that this is a Dashwood print, the fabric line was Mori Girls and this print was called Paper Girls but I like the sound of Mori Girl better. This is a version of a Strip and Brick Quilt which I love making since it involves two of my favorite sizes; 2.5” strips and 4.5” x 8.5” rectangles. After the prints were paired, I made 4.5” x 8.5” rail blocks. Each row contains (5) rail blocks with (1) QST and (1) 4.5” patch, either a rail block or focus print.
Sewing the flimsie was quick and has been finished since late December, 2020. It languished since I was debating on whether to quilt it with a combination of diagonal quilting on the top portion with straight line on the bottom. I was still undecided as I was preparing Mori Girl for machine quilting and finally went with straight line quilting 1” part with diagonal quilting lines on the QST
Here’s a pic showing the cute Mori Girls, the sometimes straight quilting lines with light gray Aurifil thread and the fabrics. The binding is the black print used in the QSTs and the backing is a Waverly print. Mori Girls measure 48” x 60” which is a nice size lap quilt for which I intended, but have decided since I love this quilt so much it needs to hang in my studio. I think my Smitten Quilt which has been hanging in my studio for several years now deserves a much need rest.
One outside pic is a must. The Master Quilt Holder obliged me with a little stoop and clarified this by saying this is what I mean when I call him “Stupid”, Uh huh, wink.
In my last post, I mentioned that my plans were to quilt Mori Girls upon my return from the GP House unless the Squirrel distracted me with another one of my August Projects. I made this flimsie with Sherbet Pips fabric BEFORE leaving for the GP house. I thought I would show it since I love making quilts with 2.5” strips. My plans for making this a patchwork throw next has now been changed to another flimsie which needs machine quilting. There’s no surprise here with plans ever changing-the Focus Force is not strong in me. At least I can say I could be finish with this month’s Dirty Dozen UFO Challenge.

Linking up with: My Quilt Infatuation/NTT

Wednesday, August 10, 2022

The Lucky Jerry Lotta Quilt

August started a new month for Country Threads Dirty Dozen UFO Challenge. After I finally finished one of the flimsies from the July Challenge, I was ready to start quilting the August flimsie this past weekend when I was distracted by my bundle of Lotta Jansdotter fabric which I had chosen as the designer for this month. I could hear the Studio Squirrel chanting “Ya Gotta Lotta” so I did.
These are the original fabrics I pulled maybe last year when I had planned to make another Strips, Squares and Brick Quilt,  similar to my Mackinaw Island Row Quilt which is a pattern I designed to use up charm squares and yardage of the same fabric collection which I seem to have accumulated, intentional or unintentional. I had several charm packs of the Follie prints and yardage of other Lotta Jansdotter’s lines such as Glimma, Mormor, Lucky, Lilla Prata and Homemade. These are fabrics from the 2010’s and I haven’t purchased any of her recent collections. The gray fabric on the left is a Figo print which I purchased on sale to use for the backing. I decided after looking at this bundle and then looking what was still in my stash that I wanted to use different fabrics for the bricks and strips and didn’t want to use all of the colors which were in the charm packs. After eliminating the orange, brown, blue, purple, fuchsia, beige and lilac fabrics, my palette for the Lucky Jerry Lotta Quilt is Black, Gray, Citronickle (yellow/green, not Lime), Golden Yellow and Teal. I find these colors to be a pleasing combination despite not having a focal print to tie these colors together in this quilt.
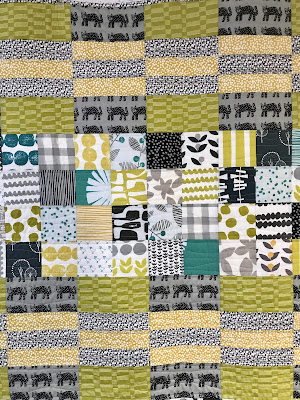
This pattern is what I called a stir fry; much time, almost the whole day was spent on die-cutting the strips, squares and bricks and then laying out the patches on the design board. Rather than sewing in rows, the quilt is constructed with 8”x16”(f) blocks which I found was easier to sew together rather than separate patches. The block on the top is (8) 4.5” squares in a two by four layout and the blocks on the bottom are the 4.5” x 8.5” bricks sewn with 6.5” x 8.5” strip sets. The bricks in this quilt are the Lucky Jerry Cat print, the inspiration for the name of this quilt, which paired so well with the Citronickle line print. Once the blocks were sewn, assembling the flimsy was quick just like a stir fry recipe. 
I should mention that I was first drawn to Lotta Jansdotter prints because of her use of Citronickle a name for the yellow/green which Wendy of Pieceful Thoughts and I came up with — a tomato/tomahto moment of our blog friendship. I also changed the strip sets to be the black/white and golden yellow prints from the Lucky and Lilla Prata lines which contrasted nicely with the bricks. Aren’t the teal prints a nice pop against the Citronickle prints? While I was laying the blocks onto my design wall I was saying to myself that this looked so Scandi/IKEA  that I realized another change to my plans needed to be made.
The backing for this quilt went from the gray Figo print to making this a patchwork throw by backing it with my favorite plush chenille to my Aha! moment that my long treasured and last yardage of the IKEA Nummer print which I’ve been saving for just the right quilt was to be used. You can see I quilted with a combination of straight and wavey lines. I think the Lotta Jansdotter and the Nummer print are a perfect and a great combination which was meant to be.

I used the black/white Lilla Prata print for the binding which at first I didn’t think would look right but now glad that I did. A light gray Aurifil thread was used for the machine quilting which went well with all of the colors. I thought I would include a closeup of the blocks and quilting. The Lucky Jerry Lotta Quilt measures 56”x74”, approx.
One last photo of the Lucky Jerry Lotta Quilt taken outside with the assistance of the Apprentice Quilt Holder. I can’t complain about his right hand showing because that’s his injured hand which is nicely healing and it’s good physical therapy for him to be holding up quilts, right? The Master Quilt Holder was resting after a long band practice so I didn’t want to bother him. We’ve been experiencing some rain this week so it was nice to take a photo outside.
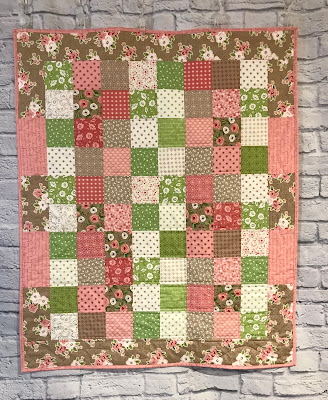
Since I’ve been writing about squares and bricks in this post, I thought I should share the finally finished quilt of a flimsie from July’s UFO Challenge which is now ready to give to baby girl whose mother is sometimes a carer for the darling Granddaughter. This quilt is made from one of the first fabric collections by Lella Boutique and I had both charm packs and yardage of this collection. Once I saw the baby registry in March I knew this fabric would be perfect but sadly I could not find where I put the fabric and too stubborn to pick other fabrics from my stash. Once I started collecting projects for the 2022/23 UFO Challenge at the end of June, I finally found it. I didn’t have enough yardage of the floral print to do a complete border so the side borders were made with alternating bricks of the floral and pink print. I like the way this looked and will have to remember to do this again. The flimsy was finished during the last week of July and I could have finally finished it but was distracted with another quilt. I thought since the mother didn’t know I was giving her a quilt, the quilting could wait. But wouldn’t you know it, last week the  mother asked my son if she could pay me to make her a baby quilt so I knew I had to finish it and it will be a gift. I will be bringing the Baby B quilt when we leave for the GP house this weekend. 

Once we return, I will start quilting what I consider to be my #12 of the Country Threads Dirty Dozen UFO Challenge unless a squirrel brings me one of the other projects. This is what happens when I give myself choices.

Linking up with:My Quilt Infatuation/NTT

Thursday, July 7, 2022

A Happy Stripes Quilt

When I first saw Emily Dennis’ Happy Stripes  pattern, I knew I had to purchase it because it was a great stash buster pattern for 2.5” strips. If you seen my other quilts, you know that I love this combination. The fabric in my Happy Stripes quilt might look familiar since I just finished in April my Carrie Bloomston Unruly Patchwork Throw.
A little bit of happenstance with the making of the Happy Stripes quilt which made me wonder if I really have a Fairy Quilt Godmother in my studio. After I ordered the pattern and I was thinking of using my Carrie Bloomston stash since it was fresh on my mind after making the patchwork throw. I really do love my stash which includes several of her fabric lines which work so well together. I just so happened to see a purple tote bag sitting on the bottom of my project cart and decided to look to see what was inside. It contained approximately 150 2.5” strips cut from my Carrie Bloomston stash maybe last year and had forgotten about it. I just needed to die-cut 25 more strips and HSTs from the Newsprint fabric and I was ready to make this quilt.
Over 60 different prints were used. After grouping the strips in sets of four, there were sixteen different combinations,  After sewing the strip sets which made four rail blocks, the connecting corners were sewn on different sides of the rail blocks so it would look like there were more combinations.
The Flimsy was finished by the end of May and I had to wait until after my busy June was over before I could finally machine quilt the Happy Stripes quilt.
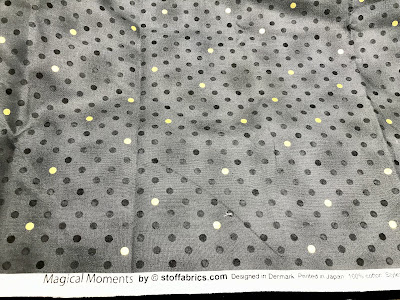
No surprise with the machine quilting with my go-to combination of straight and wavy lines with CT Essential Thread in #20858 Stone. The binding was a Stoffabric gray/black dot print with gold metallic and not from the Carrie Bloomston stash since there wasn’t enough yardage of a solid print which would work and  I thought a scrappy binding would look too busy. Lucky me for just purchasing a yard of this print when I was in Colorado last month.
The Master Quilt Holder had a little trouble holding up this 64”x88” quilt to show some of the backing which is the Pueblo Stripe print from the Carrie Bloomston stash. I purchased beaucoup yardage of this several years ago from Bernie Kringle’s Needle and Foot Shop and I knew one day I would make a quilt to finally  use it.
Here’s another photo of the Happy Stripes quilt. A sad note about the finishing of it; after spending Saturday and Sunday with friends with holiday get togethers,  my plan was to spend the Fourth of July machine quilting. Instead, I spent the morning and early afternoon glued to the television because of the awful shooting at a parade which happened in a town just 27 miles away. This is a beautiful town I am familiar with, visited and even dreamed of living there. I finally made it to my studio late afternoon and quilted with a heavy heart once again. It is days like these which I find comfort in quilting and it’s happening much too often.

Linking up with: My Quilt Infatuation/NTT

Thursday, April 14, 2022

Celestial Moonrise

After finishing my UFO project commitments, studio reorganization, taxes, QALing, a somewhat secret sewing project, etc., I was finally ready in April for easy sewing involving some new fabrics.
Ever since I received my Fat Quarter Sew Sampler box in February which included a junior Jelly Roll of Zen Chic Celestial, I’ve been wanting to make a version of my Staggered Strips and Squares Quilt. It also helped that I already had in my stash another junior Jelly Roll and Fat Quarters of Zen Chic’s Modern Background Even More Background. I still needed to buy additional yardage of the Celestial fabric since I wanted to include more pink and feature the main focus print of the circles and text which ties in most of the colors.
After die-cutting the additional 2.5” strips, I then subcut the approximate 110+ strips into various segments of 5” to wofq depending on the colors. My initial plan was to do a horizontal layout of the strip sets with an 8”(f) square of the focus print but changed it to a vertical layout with an 8”x12”(f) rectangle of the focus print since I love this print so much.
My favorite part of this pattern is first sewing the strips together, then sewing the very long strip together to make two rows and then sewing the two rows together to make a four-row strip set. After this was done, I then subcut twelve 8-1/2”x16-1/2” and three 8-1/2” x 84-1/2” strip sets/panels. This was going to be a quick quilt I thought with a row of the rectangle focus print with an 8-1/2”x16-1/2” strip set alternated with an 8-1/2”x 84-1/2 strip set.
After the flimsy on the left was sewn, the layout looked off balanced with the row of rectangles on the top. I realized I should have started and ended this row with an 8-1/2” square of the strip so I trimmed 8-1/2”off the bottom and then sewed it to the top. But I still was not happy with the way the rectangles looked with the strip sets.
I decided that I wanted the rectangles to “float” more so I added a two row strip set to each side of the flimsy which was an easy fix since I had almost enough left over from the original strip set sewn, I just had to seam rip it apart and then sew some more patches. 
Once I was finally happy with the flimsy, I can say finishing Celestial Moonrise was easy. I had to piece a backing which is something which I do not like to sew but I only had a four-yard piece of the gray Good Neighbor strip. Normally when I use a stripe print for a backing, I like it to run vertically but since I wanted to use this, I was okay with the stripe running horizontally and in order to have enough length, I inserted an 8” strip of the gray Impressions Newsprint which is another print from Connecting Threads (not an affiliate link). Machine quilting went well, and it helped that I was able to use my laser light to keep the lines straight whenever I had to quilt over the rectangles. BTW, when I cut the rectangles, I made sure to cut it so that the circles would be centered on the strip set.
The machine quilting was a combination of straight and curvy lines which is my favorite whenever I make  this pattern. I used the focus print for the binding also which I love how it add an interesting touch to Celestial Moonrise. It almost looks scrappy which I am one who does not like to do scrappy bindings but I might consider it now for the right quilt. This quilt measures 64” x 84”.
I wanted to take a photo of Celestial Moonrise outside and this was the best I could do since today we’re having high winds up to 60+ miles. I really need to stop making such long quilts since the Master Quilt Holder has trouble demonstrating his ability when they’re this long especially since he is experiencing some knee problems now (nothing I did but maybe the darling Granddaughter was involved). As for the Apprentice Quilt Holder, his right arm is in a cast and neither I nor the Granddaughter was involved in this.
Once last photo of Celestial Moonrise and I think the colors of the fabrics look better here. It’s nice to finally make a quilt you’ve been just “itching” to make but you surprisingly stayed on task plus getting to use some new fabric. Now it’s back to the Quilt Mines since I have to start working on my April quilt for the Country Threads Dirty Dozen UFO Challenge.

Wishing you a Happy and Blessed Easter.

Linking up with: My Quilt Infatuation/NTT

Thursday, February 17, 2022

The New Grandma Quilt

Last week while searching for some backing fabric, I came across an UFO of a Valentine quilt which I started in 2014. I thought with Valentines Day fast approaching and the rail blocks made with 2.5” strips from several Sandy Gervais fabric lines which just needed to be QAYG, I would have a quilt to give to the darling Granddaughter. Whatever I was supposed to do could wait.
There were twelve 18”x20” rail blocks already paired with batting rectangles in which two of them were already quilted. The quilting was done with a pale blush pink thread from CT Essential Thread which has been discontinued. Fortunately, I had kept the spool of thread with this project probably knowing that it was no longer available and there was enough left for me to finish the quilting.
QAYGing the remaining ten blocks went fast with just pin basting and straight line quilting along the seam lines; it just took several hours. The top and bottom of the blocks were not quilted but would be once the backing was added. As I was quilting, I remember more about how these blocks came to being and why maybe I never finished this project.
I know that these blocks were started in 2014 after Jera Brandvig’s Quilt As-You-Go Made Modern was released. From looking at the two blocks which were already quilted, I knew I used my Elena 8900 and was unhappy with the way the straight line quilting looked and at that time I was looking to purchase a new sewing machine. I purchased my Juki 2010Q in 2015 but still did not resume working on these blocks and was packed away with another flimsy (seen below) made several years earlier with some of the same Sandy Gervais fabrics.
In March of 2017, I posted about this quilt, named  The Grandma Quilt and I quilted and finished due to the pending arrival of our future grandchild in which we didn’t know the gender. I, being the future first-time grandmother wanted a pink quilt to hold my grandchild in but I ended making another  quilt, The Grandpa Quilt in case we had a grandson who wouldn’t appreciate being photographed with a pink quilt. The Grandma Quilt ended up staying with the darling Granddaughter with the understanding that it would be returned to me after a suitable replacement quilt was made which I then told them I had one in mind. It was the rail block quilt I just finished, almost five years later.
After the blocks were quilted which looked so nice thanks to my Juki 2010, they were trimmed to 18-1/2” square which made a 54”x72” finished quilt. I decided to back the New Grandma Quilt with a pink plush fabric I had in my stash since it was dark enough to hide the QAYG seams even I thought at first it was too pink but it grew on me. I finished the quilt in two days and in time before leaving for the Grandparent house. Before arriving, I let the darling Granddaughter’s parents know of this quilt and that I would like my Grandmother quilt finally returned to me.
And why am I calling this quilt the new Grandma Quilt and not just a Valentines Day Quilt. Well, it turned out the original Grandma Quilt cannot be found or has been misplaced which I am a little peeved; lesson learned, you snooze, you lose. So, the once Valentines Day Quilt is now the new Grandma Quilt and will be staying at the Grandparent House and will be added to the darling Granddaughter’s collection. Do I feel guilty about not letting her take it home, Nope, I plan to snuggle with her and the new Grandma Quilt and tell her a once upon a time story about a Grandma Quilt which came to the hospital on the day she was born.
As disappointed as I am with not getting the Grandma Quilt back, I am glad that the new Grandma quilt is a Finally Finish and now I have one less UFO. It feels like I have a wee little more space in the studio now. I don’t think this would be considered a DrEAMi being that it wasn’t a new project but it was an interruption. I can resume finishing some quilts which I was in the process of doing until I happened upon long-forgotten, but should have been finished sooner, the new Grandma Quilt. I’m planning on finishing my January and February quilts for the Country Threads Dirty Dozen UFO Challenge and hoping I don’t come across another long-forgotten project.

Linking up with: My Quilt Infatutation/NTT